
Pick the chubby or slim silhouette you want
Shape your amigurumi for a cuddly vibe or a sleek look. The silhouette sets the mood, guiding yarn weight, stitch density, and stuffing. Lock this in early to tell the story—huggy chonk or nimble pose. Your choice also shapes how much stuffing you’ll use and the overall pose you picture.
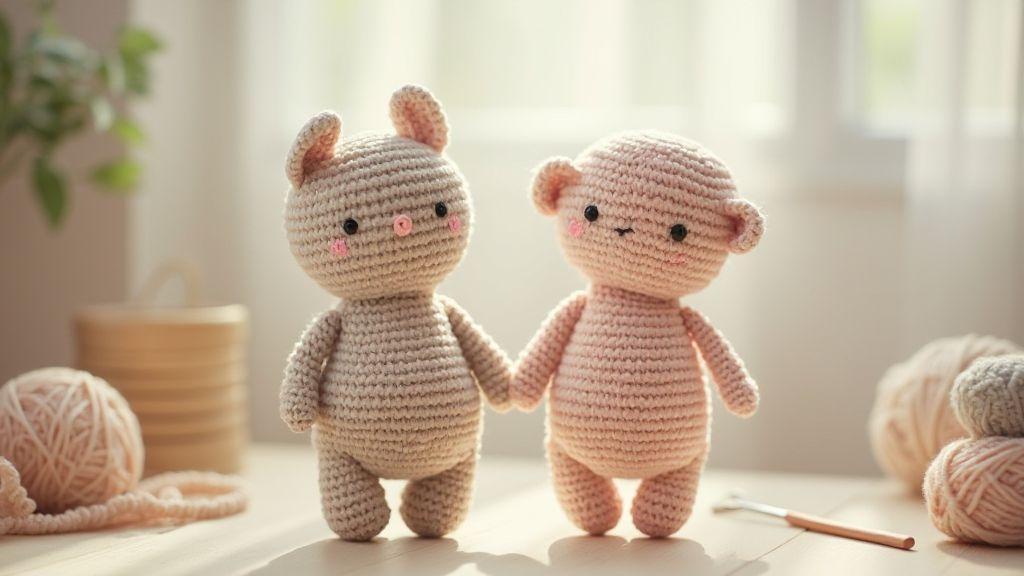
A chubby silhouette feels warm and approachable, softening features for expressions like big round cheeks or tiny button eyes that pop. A slim silhouette reads as nimble and expressive, letting you exaggerate long limbs or a sleek neck. Pattern notes will shift based on your path, especially when counting stitches and shaping. The silhouette also affects how your amigurumi sits, stands, or leans, so decide early for smoother building.
Think of the silhouette as the frame of a painting. A chunky frame suggests playfulness; a slim frame suggests elegance. Once you pick, yarn choice, hook size, and add-ons align differently. You’ll know you’re on the right track when fabric behaves as expected—stitches sit neatly, stuffing stays evenly distributed, and the final shape holds its stance.
Compare chubby amigurumi pattern and slim amigurumi pattern
A chubby pattern uses larger stitches and more stuffing to add roundness, with curves in the belly, cheeks, and limbs and shorter limbs for a soft, friendly read. Shaping often adds body rounds first, then gradual increases for plush volume. This path yields a cozy, tangible feel in hand.
A slim pattern leans on longer limbs and a streamlined torso, using finer yarn or tighter stitches for crisp edges and a tall silhouette. Expect clean joins and precise shaping with lighter stuffing to maintain a sleek profile—great for a poised pose or minimalist vibe.
To choose, picture the character you want on your shelf: extra squish for hugging or a clean, elegant line. Your answer points you toward the right pattern family. You can blend ideas—mostly slim with a tiny, chubby head for contrast—if that suits your character.
Use an amigurumi proportions guide to decide
A good proportions guide helps balance head, body, and limbs. Start with a ratio that suits your goal: chubby cheeks need head-to-body rounding; slim figures benefit from longer limbs and a narrower torso. Use the guide to plan stitch counts and rounds for shaping each part, keeping you on a steady course.
As you follow the guide, note where adjustments matter most. For a cuter vibe, add rounds to head and cheeks before the rest of the body. For a sleeker look, reduce width earlier and keep the torso lean. Consistency matters: once you lock a baseline, you can tweak details without throwing off proportion.
If you’re unsure, start with a simple skeleton: round head, straight neck, basic torso. Then compare limb attachment and stuffing settlement. Small shifts in tension can tilt the silhouette, so use the guide to stay aligned as you test poses.
Silhouette choice checklist
- Decide the mood first: cozy and huggable or sleek and poised.
- Consider how the character will sit or stand and how that affects limb length.
- Check how stuffing will influence curves vs. straight lines.
- Use a proportions guide to keep head-to-body balance consistent.
- Note your pattern’s recommended stitches and adjust if you mix silhouettes.
- Test with a quick mock-up before final inking in the main pattern.
Adjust stitch count for body shape
You’re shaping a project, and the stitch count you choose will directly affect how wide or narrow your figures look. Start with a baseline count you’re comfortable with, then tweak in small increments to see how the silhouette shifts. Remember, even a few stitches can make a big difference.
When you test, work a quick swatch in your chosen stitch and measure the width. If you want a fuller midsection, add stitches; for a leaner look, drop them. Keep the body consistent so pieces join cleanly. You’ll see how each adjustment changes proportions, like tweaking a sketch until lines feel right.
As you fine-tune, take notes. Record stitch counts for each size or body type you design. That way, when you or someone else wants the same result later, you can reproduce it exactly. The process becomes a reliable toolkit for future projects. And remember, the goal isn’t perfect symmetry, but a silhouette that matches your character’s personality.
How you can increase or decrease round counts
To get a bolder, round shape, add rounds around key sections like the belly, hips, or shoulders. You can insert rounds between color changes or after a shaping decrease to rebuild volume. For a slimmer look, reduce rounds gradually so the fabric doesn’t look stiff. Small, deliberate changes keep the flow natural.
Keep track of where you add or subtract rounds. This helps you see how overall height stays steady while width shifts. Try side-by-side tests to compare versions and see which reads as friendlier, rounder, or more sleek.
Balancing rounds with stitch density is important. A tighter stitch can feel heavier; a looser stitch may puff. If you change rounds, tweak tension to maintain the same fabric feel. Your goal is a cohesive look where roundness reads clearly without puffiness or flatness.
Adjust stitch count for body shape to change width
To change width, fine-tune the stitch count around the widest parts. Adding stitches around the torso or hips creates a fuller silhouette; removing them narrows the shape. Do this in small steps to keep transitions smooth.
Test with a quick sample that mirrors the body segment you’re adjusting. Compare the width before and after, then decide if you like the new proportion. Think about how width supports character personality—chunky belly for a cuddly bear or a slim waist for a cheeky elf. Document exact counts to reproduce the look later.
Keep transitions smooth. If you widen the middle, ease changes into adjacent sections to avoid sharp edges. The aim is a natural curve that reads as intentional shaping, not abrupt changes. And, as always, record counts for future use.
Stitch count quick tip
Think in small steps. If you’re unsure, add or remove only 2–4 stitches at a time and reassess.
Master increase decrease techniques
Shaping improves when you mix increases and decreases with intention. Picture the body you want—curves, angles, or a straight silhouette. Each stitch is a decision about volume. Plan ahead to avoid lumpy spots and keep your amigurumi proportional. Treat increases as room to grow and decreases as a trim to tighten space. Count stitches carefully and check your gauge—consistency makes the technique look deliberate.
Label each section in your mind: chest, shoulder, arm, leg. Use increases to add fullness where you want roundness, and decreases to pull in where you want sleeker lines. Rushing leads to erratic shapes, so slow, steady increments help the fabric breathe and keep tension even. Don’t fear frogging a row to fix an uneven curve—the final look is worth it. With time, you’ll distinguish a plush curve from a stiff edge and steer toward your intended feel.
Keep it simple: add where you want volume, subtract where you want slimness. This is a pattern you learn to read with your hands—once you practice, your pieces become cohesive as you maintain even stitch height and yarn tension. Test proportions as you go, not after you finish, to save reshaping later and keep your design true to your idea.
Use increase decrease techniques amigurumi for curves
Your curves pop when you pair increases with decreases. Start with gentle increases to build rounded shoulders or a plump belly, then tuck in with tight decreases to smooth the silhouette. For a more pronounced curve, push increases early and decrease toward the narrowing point. Keep transitions smooth to avoid dips or bulges. Practice on a small swatch before applying to the whole body.
When shaping limbs, mirror increases on one side with decreases on the other to maintain symmetry. Compare to a reference image every few rounds. Adding volume at the top of a limb and tapering down with decreases creates natural curves. The goal is a continuous line, not jagged steps. With patience, you’ll see how these tweaks translate into a softer, friendlier amigurumi inviting a hug.
Choose tighter decreases for a slender look
For a slimmer torso or limbs, use tighter decreases to keep a clean line. Start with a standard decrease, then switch to a tighter version after a couple rounds to maintain control. Stuff lightly to avoid sagging. Use this approach sparingly on wrists, ankles, and the neck—too many tight decreases can create ridges. Balance with gentle increases to keep fabric breathing and achieve a chic, slender vibe.
Pair tighter decreases with mindful stuffing for a crisp finish. Slow, measured changes preserve a sleek silhouette and prevent distortion.
Increase/decrease rule of thumb
Rule of thumb: plan your silhouette first, then map increases and decreases to that plan. Start with a baseline proportion, test with a mock-up, and adjust. For curves, bias increases toward the outer edges and taper with decreases toward the center. For a slender look, tighten decreases and balance with light increases to avoid flatness. Keep tension even and check your work often. This approach builds confidence and aligns the final look with your vision.
Follow stuffing tips for chubby amigurumi
Keep your chubby amigurumi soft and cuddly with the right stuffing. Start light and distribute evenly so the shape stays plump without seams showing. The fabric should remain friendly and squishy. Use polyester fiberfill or safe stuffing that stays fluffy, stopping when the piece holds its shape without immediate compression.
Check consistency across sections. If a lump appears near a limb, tease the stuffing to spread it evenly. For a chubby body, use more in the torso and less in the arms and legs to keep balance. Finish with a gentle press to see if it springs back. If it stays firm, you’ve found a sweet spot where the form feels welcoming and solid.
Picture a plush friend with a rounded tummy and playful bounce. Uniform stuffing across the body helps avoid flat spots and creases that disrupt the toy-like vibe. If your pattern includes facial features or ears, stuff them just enough to hold shape without bulk. The result is a cuddly figure that reads as soft, not bulky or stiff. Enjoy the sense of achievement as your buddy becomes a true, huggable character.
Stuff firmly and evenly to form round shapes
Stuff firmly and evenly to create smooth, round shapes. Begin with a firm core in areas defining the shape, then fill outward evenly. Avoid distorting delicate areas like the face and ears. If seams show, loosen surrounding stuffing and redistribute to keep rounds balanced.
Pause to press the surface and check density for consistency from center to edge. If a flat area appears, add stuffing and smooth. For round arms or legs, pack evenly from the inside to keep the outer shell smooth. After each section, move to the next with the same approach for cohesive silhouette and natural transitions.
Compare with a reference image to fine-tune density and symmetry. The aim is a pleasing, plump silhouette that reads as deliberate shaping rather than random puffiness.
Use light stuffing for slim amigurumi pattern
Slim designs benefit from a lighter touch to maintain graceful lines. Start with small amounts of stuffing and build slowly, checking the silhouette as you go. Distribute evenly along limbs and torso to avoid bulges.
Keep density low near edges and narrow sections, especially around the neck and wrists. A slim amigurumi should read as a continuous line, not a cluster of blobs. If you need more definition, add a tiny bit of stuffing and smooth with your fingers to preserve clean curves. Light stuffing helps maintain the knit fabric’s drape and the character’s delicate look.
As you finish, align the final shape with pattern measurements. If you see a lump, remove stuffing and redistribute. You’ll end with a slim, tidy figure that reads as nimble and intentional.
Stuffing pressure guide
Begin with a gentle press to test density, then increase gradually as you fill. For chubby forms, aim for a firm but yielding feel—resist a little when pressed, but don’t spring back instantly. For slim forms, keep pressure light and even, testing often to maintain clean lines. If a seam flattens, adjust nearby stuffing and redistribute to keep surface smooth. Use fingertips to micro-adjust contours until the shape reads round or sleek as intended.
Shape waist and hips with intent
You can shape the waist and hips on your amigurumi with deliberate choices, not guesswork. Small changes in stitch counts translate to big shifts in curves. Think of shaping like sculpting clay—carve where you want tapering or flare. Your goal is a balanced look with a clearly read waist and naturally rounded hips.
Map the silhouette you want in your mind. Where does the waist tuck in? Where do the hips begin to broaden? Translate this to stitches: tighter waist comes from closer decreases, hip shaping from gradual increases or looser stitching as you move downward. Alternate small shaping steps with brief straight stitching to keep transitions smooth. Maintain a steady rhythm to let the shape emerge.
Keep a garment-like feel in mind. Real waists dip gently, not hard lines. Use yarn tension to your advantage, and don’t fear redoing rows if the curve isn’t right. The right balance makes your amigurumi look alive, not stiff. Your eye will thank you for attention to shaping where it matters most.
Use amigurumi waist and hip shaping to build curves
You’ll create a natural curve by targeting decreases at the waist and then easing into increases toward the hips. Each stitch matters—a single decrease or extra stitch can soften or sharpen the curve. Keep the pace steady so the waist reads distinctly without pinching.
Adjust for a fuller hip by adding stitches in the hip area or increasing more there. If you need a slimmer waist, tighten the middle decreases. Measure as you go to compare waist width to hips. You’re shaping with intention, not luck.
Test against a real silhouette in a photo or mirror. Look for abrupt transitions and tweak as needed. Your goal is a smooth waist-to-hip curve readable from every angle. With practice, you’ll dial in the exact rhythm for consistent curves.
Creating curvy amigurumi silhouette with targeted decreases
Targeted decreases are your main tool for a curvy silhouette. Begin with small, repeated decreases at the waist, then slow the pace as you rise into the hip area to avoid a sharp bend. This creates a natural belly-to-hip transition.
Maintain gentle tension to prevent bunching. If the waist tightens too much, back off one decrease row and resume later. For fuller hips, add a few extra stitches and avoid tightening too quickly. Rotate your work to check proportions from all angles. Your consistency will grow with practice, and soon you’ll place decreases where your curves need them most.
Hip and waist shaping steps
- Start with a waist-decrease phase to carve the midsection.
- Move into a gradual hip-increase phase to widen the lower body.
- Maintain even tension and check proportions often.
- Adjust stitch counts as needed to keep curves smooth.
Use a clear amigurumi proportions guide
You want your amigurumi to feel right in the hand and eye. Start with a simple, repeatable proportions guide so every piece you make follows a consistent rule. Your guide should help you decide quick, smart tweaks instead of guessing every time. When you know the balance you’re aiming for, you’ll sew with confidence and stay true to your design vision. Think of this as your blueprint for every character you create, whether it’s a tiny critter or a mascot.
Your guide should be flexible enough to fit your style. If you like chubby cheeks, let your rules bend to fit that look, but keep the same math behind the scenes. Use fixed ratios as your baseline, then adjust features while keeping overall balance intact. This keeps your work cohesive even as you experiment with different characters. A clear guide saves time and preserves your signature feel across projects.
As you build, write down your chosen ratios somewhere quick to reference. A notebook or sticky note near your sewing area helps. When you return to a new project, you won’t have to reinvent the wheel. Your guide becomes your cheat sheet, helping you compare early shapes, mid-design refinements, and final tweaks with ease.
Set head to body ratios that match your vision
Your head-to-body ratio sets the first impression. For childlike cuteness, use a larger head relative to the body; for sleek maturity, keep the head smaller. Start with a baseline like 1:2 or 1:3, then adjust in small steps. Small changes add up to big differences in how your character reads.
Map the silhouette as you pick ratios. Sketch a quick side view to see how the head sits over the torso. If the head sits heavy on the neck, reduce head size or widen the neck. If the body feels too long, shorten the torso and reposition the head. Aim for a smooth crown-to-chest-to-belly curve with no part fighting for attention.
Keep practical limits in mind. Stuffing can push proportions off, so plan extra space in the head for stuffing while keeping the body lean enough to avoid top-heaviness. Consider a removable dummy for weight testing before committing to stitches. A little experimentation now saves ripping later.
Measure limb and torso length for balance
Limb length should echo the head-to-body vibe. For a chubby look, shorten limbs slightly with rounded joints. For a sleek style, lengthen limbs and keep angles clean. A simple rule: measure the torso, then set limb length as a fraction of that torso height. Maintain several standard options for rotation.
As you measure, assess stance. Stand the amigurumi up and note if it sits naturally or leans. If a limb feels off, compare sides and adjust for symmetry. Balance is about weight distribution and pose read in space, not just equal lengths. A few millimeters can shift personality.
Test with a dry run before sewing. Use lightweight yarn or a string model to simulate limb lengths, catching proportion issues early.
Proportion check before sewing
Before sewing, do a final proportion check. Assemble head, torso, and limbs as you plan to stitch. View from front and side; if proportions feel off, adjust one piece at a time. Small, targeted tweaks keep progress moving.
Use a quick checklist: head-to-body ratio, limb length, torso length, and stance. If unsure, compare to your sketch or reference photo. When confident, sew with intention. This last check saves surprises after stuffing and seaming.
Keep a photo log of proportion checks. Snap pictures at key milestones so you can compare future projects side by side. It’s a simple habit that builds design intuition over time.
Choose or tweak a pattern to match shape
You’ll start by picking a base pattern that already has the silhouette you want, or tweak one to fit your shape goals. For a slim look, choose a pattern with straighter lines and less bulk; for a chubby look, seek rounder busts, wider midsections, and softer curves. Highlight sections shaping the torso, arms, and legs as you read patterns, since these are the places you’ll adjust first. Try a test swatch to see how changes influence scale. The right starting pattern saves hours later and keeps you consistent across poses.
When blending patterns, map where shapes meet—slim torsos with rounded heads, for example. Check gauge and yarn weight to avoid misalignment. Once you’re happy with a mock-up, document exact stitch counts and where you added or removed shaping to reproduce the look later. Your goal is a smooth head-to-toe line, not jagged transitions.
Keep notes on how each change affects overall size. A single extra row can push the balance toward slim or chubby. Measure, compare, adjust becomes your rule. If you drift, pin a temporary stitch or use markers to track shaping. You’ll thank yourself later when scaling for other characters. Right tweaks keep the final piece readable as your intended shape.
Convert a chubby amigurumi pattern to a slim one
When converting, focus on the torso and limbs first. Reduce the midsection circumference with fewer increases and more decreases, or remove extra belly rounds. Replace rounded stitches with straighter ones and shorten front-to-back lengths for a lean line. You can slightly reduce the head size or elongate the neck to balance proportions without stretching the figure. Compare against a reference photo to verify reads.
Next, adjust arms and legs to match the slimmer torso. Narrow upper arms and thighs by skipping increases or using fewer stitches. Lengthen limbs slightly to achieve an elegant look, but keep proportions balanced so arms don’t look too long. If unsure, crochet a quick mini version and compare side by side with the chubby baseline to spot bulky versus thin lines.
Finally, fine-tune with small tweaks that matter. Tension matters: pull a bit tighter in the midsection while keeping limbs comfortable. Switch to a smaller hook or finer yarn for sharper definition. Re-check gauge after each major change to maintain the head-to-toe silhouette. You’ll end with a slimmer, playful character that still reads as cute.
Adjust stitch count for body shape when modifying patterns
Decide where to add or remove stitches to change shape. For a slimmer body, reduce stitches around the waist and midsection, and slightly in the limbs to keep balance. For a chubbier look, add stitches in those zones. Focus changes at the center first, then adjust limbs to maintain proportional silhouette. Mark these changes on your pattern to reproduce them later.
Test with a small version of the adjustment. Crochet a tiny swatch or mini toy to preview proportions. If the torso remains wide, shave more stitches from the midsection or elongate the neck. If limbs seem short, add rounds—but in small increments. Alternate measuring and comparing until the shape feels right. Finally, write exact counts for each section so you can recreate the look reliably.
Tiny adjustments in stitch count translate to big shifts in silhouette, so proceed with care and test often.
Pattern tweak checklist
- Define target shape: slim or chubby, and note torso width, limb proportions, head size.
- Choose a starting pattern or pattern mash that matches your shape goals.
- Document modifications with exact stitch counts and where you changed increases/decreases.
- Check gauge and yarn weight; adjust hook size if needed.
- Test with a small sample or mock-up to preview proportions.
- Compare against a reference image or sketch; refine as needed.
- Re-measure after major tweaks to keep proportions balanced.
- Record final counts for future use and consistency.
Apply amigurumi body shaping techniques in finishing
Finish shaping to add personality. Evaluate the piece from all angles, nudging stitches with a crochet hook as needed until the silhouette reads clearly. The goal is balanced proportions where limbs connect to the torso—soft, not blob-like. Treat finishing as the moment you unlock the character behind the yarn.
Your finishing toolkit should include gentle blocking, stuffing checks, and tweaks after adding features like limbs or ears. Curved lines can read as cute and approachable, while sharp angles can convey energy or sass. Note where you want more curve or straighter edges, and target those zones with small, precise stitches. This is where your design choices become visible in the craft.
Finally, test your amigurumi in a few poses to confirm the shape holds. A light mist during blocking can set curves, then re-check symmetry as it dries. Finishing isn’t a one-and-done step; it’s a mini-test drive to guarantee your character stays charming from every angle.
Use surface stitches to define waist and chest
Surface stitches give you control over where the waist and chest read. Outline a gentle waist with a few subtle surface stitches in a contrasting shade to create a natural narrowing without heavy seam lines. For the chest, a soft arc of surface stitches around the front can suggest volume, especially on plush shapes. Keep density consistent and test the silhouette after every couple of stitches.
If the waist looks too sharp, ease off by widening the curve or reducing surface stitches. If the chest needs more definition, add a gentle arc rather than a straight band. These small adjustments separate a flat amigurumi from a three-dimensional, friendly one.
Experiment with yarn color and fiber for surface lines. A slightly glossy thread can catch light and emphasize a waist curve, while a matte finish reads softer. The goal is to enhance shape without shouting. Aim for a natural, approachable silhouette that invites touch.
Block and shape to smooth contours and posture
Blocking and reshaping help achieve smooth contours and confident posture. After stuffing, pin the piece to a board in the intended shape and lightly mist or press to set curves. Focus on the back, chest, and arm connections so the body reads upright and balanced. If puckers appear at a seam, ease them with a tiny yarn tuck or a gentle pull on surrounding stitches. Posture should be sturdy yet soft, never stiff.
During blocking, test different angles to find the most flattering stance. A slight shoulder tilt or a gentle torso curve can transform the personality. Re-pin and reblock if needed. This methodical shaping makes your character feel real, not toy-like.
Let the piece dry completely before reattaching limbs or facial features. The longer you let it settle, the crisper the final silhouette will be. Careful shaping pays off with clean lines and a dynamic pose.
Final shaping tips
- Keep edits light and steady; small adjustments beat big moves.
- Use soft, flexible stuffing to avoid sharp edges that ruin curves.
- Check symmetry by comparing left and right sides as you go.
- Save notes on what worked for reuse in future projects.
Dress and accessorize to sell the shape
Dress to reinforce the silhouette you designed. Color blocks can emphasize curves or slim lines. Bold stitches push the eye toward fuller areas; smoother stitches guide the eye into a sleeker read. Accessories should echo the shape: oversized scarves for a plump figure, slim belts and tiny hats for a slender frame. Every fabric choice sends a message about size—test a few swaps on a practice doll to see how the eye travels across outfits.
Think about fabric weight and texture as a garment’s voice. Heavier yarns create mass; lighter yarns suggest air and slenderness. For chubby looks, layer plush textures and rounded shapes, then add small rounded pockets or curved hems. For slimmer looks, choose sleek lines: tight leggings, narrow belts, and minimalist hats. Accessories should support the shape, not overpower it. A strong core allows you to push the silhouette with a wide cape or voluminous scarf while keeping a unified shape. Choreograph fabric, stitch, and form so the silhouette reads intentional.
Create a cohesive story with outfits. Let color palettes reinforce the silhouette: warm tones and soft shading for fullness; cool tones and contrast for slimness. Keep accessories consistent with the shape—rounded jewelry for curves, linear pieces for slim figures. If you craft multiple dolls, develop a quick color-and-accessory guide so every character reads the same shape at a glance. Repeatability, not confusion, is the goal, so you always speak the same design language.
Sew garments to highlight creating curvy amigurumi silhouette
When sewing for a curvy silhouette, choose patterns that round the shoulders, chest, and hips. Push texture outward with slightly larger hooks or fatter stitches, finishing seams with soft curves that mimic natural folds. Layer a soft cardigan over a rounded top to exaggerate the torso without losing crochet charm. Add small pockets or curved hems to reinforce fullness. Keep garment edges soft so the silhouette remains the star.
Finish with clothes that sway with movement. A cape or draped shawl adds volume where you want it most while staying crafted. For subtler curves, try a high waist belt creating a gentle hourglass. Practice with swatches to ensure your sewing choices read correctly from different angles.
Use slimmer clothes for a slender crochet doll tutorial
Slim silhouettes benefit from tight, clean lines and minimal bulk. Start with fitted garments that hug the torso, arms, and legs—think a sleek tunic or narrow trousers. Stitching should be tight enough for a crisp edge but not so tight it fights the yarn’s stretch. Minimal seam allowances and straight hems keep lines streamlined. A small hat or slim scarf finishes the look without breaking the slender line. Consistency is key: every piece should feel purposefully narrow, from collar to cuffs.
Textures matter less; smooth surfaces read as leaner. If you want depth, use a subtle rib or column stitch without bulk. Keep embellishments sparse—one slim belt or a linear necklace works better than multiple bulky pieces. Photograph the doll from multiple angles to verify the silhouette holds under light. The aim is a crisp, elongated shape that feels intentional and clean.
Outfit fit checklist
- Choose a silhouette that matches your intended shape: curved or slender.
- Match yarn weight and hook size to your desired bulk or lean line.
- Use color and texture to reinforce the shape, not distract from it.
- Add accessories that echo the silhouette: rounded for curves, linear for slim.
- Keep seams smooth and lines clean to read the design clearly.
How to Design Chubby vs Slim Amigurumi Body Types
How to Design Chubby vs Slim Amigurumi Body Types involves choosing a silhouette first and then following a path of shaping, proportion, and finishing that reads clearly from every angle. This guide-style approach helps you plan head size, torso width, limb length, and stuffing density to achieve a cohesive character. Use this as your quick reference for designing, adapting, or converting patterns toward either a chubby or a slim look.
In short, mastering How to Design Chubby vs Slim Amigurumi Body Types means thinking in frames, proportions, and deliberate texture choices. Start with a silhouette, test with swatches, and document stitch counts to reproduce the exact effect later. The more you practice, the more confident you’ll be at delivering a character that reads as cuddly, chunky, sleek, or statuesque—precisely the look you intend.
Final reminder: How to Design Chubby vs Slim Amigurumi Body Types in practice
Whether you’re aiming for a chubby cuddle-buddy or a sleek, poised figure, the key is intentional shaping, consistent proportions, and mindful finishing. Use the guidance above to plan, test, and document every project. And remember: you can always blend approaches to craft a unique character that embodies the exact silhouette you envision in How to Design Chubby vs Slim Amigurumi Body Types.

Clara Fern — Crochet Artist & Amigurumi Designer
Clara Fern is a crochet artist and amigurumi designer based in Austin, Texas. With 9 years of experience working with yarn and hook, she transformed a lifelong passion for handcraft into a creative mission: making amigurumi accessible, fun, and deeply rewarding for crafters of all levels.
Clara discovered amigurumi during a trip to Japan in 2017, where she fell in love with the art of bringing tiny characters to life through crochet. Back home in Texas, she spent years studying color theory, design principles, and advanced crochet techniques — developing her own signature style that blends kawaii aesthetics with original character design.
Through maclafersa.com, Clara shares everything she has learned — from choosing the right yarn and reading your first pattern, to designing fully original amigurumi characters from scratch. Her writing is known for being clear, detailed, and genuinely helpful, with no steps skipped and no secrets kept.
When she’s not crocheting, Clara enjoys watercolor painting, visiting local yarn shops, and drinking way too much coffee while sketching new character ideas.


