
Explore your creative influences
Your creative journey starts by naming the places that spark your ideas. Look at artists, crafts, and you. You’ll notice patterns in color, line, and shape that make you feel excited. When you study what you love, you learn what you want to carry into your amigurumi. Keep a notebook or a mood board where you collect sketches, scraps, and photos. This is your personal map to pull from when you sit down to stitch. The better you know your influences, the more you can bend them into something that is distinctly yours.
You don’t have to copy anyone. You’re shaping a voice that sounds like you. Try mixing two different vibes—soft, rounded forms from one source with bold, graphic details from another. That contrast is where your character starts to feel real. If you’re unsure, start small: a simple color palette, a familiar texture, a recurring accessory. Each small choice nudges your amigurumi toward your unique vibe, fast.
Let your influences evolve with you. Revisit your favorites after you’ve experimented a while. What feels fresh now might feel flat later, and that’s a good sign. Your tastes shift as you grow, and your work should shift with them. Keeping that pulse—what you love now—helps you stay excited and consistent in your designs.
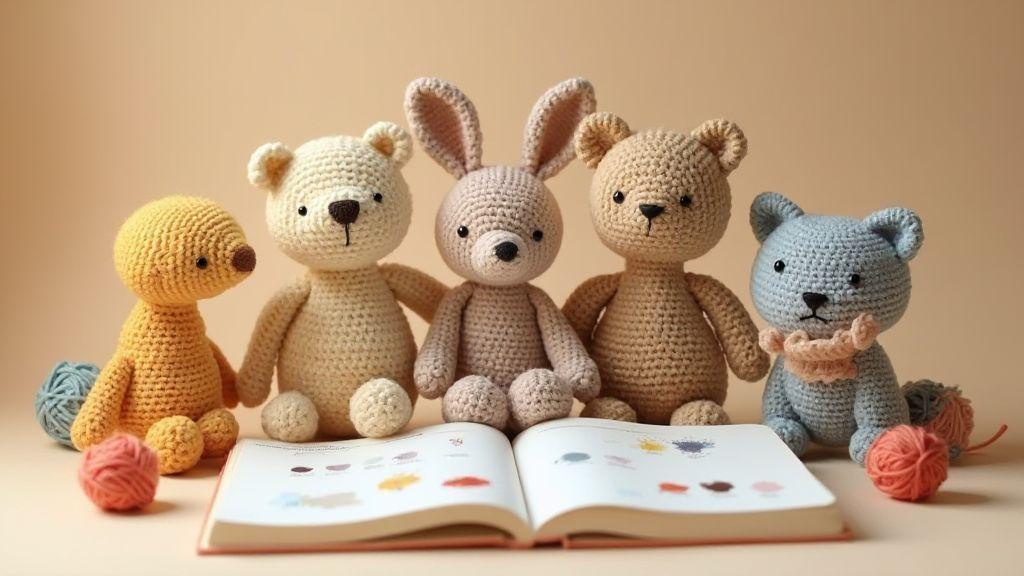
How to Develop a Unique Art Style for Your Amigurumi Characters
You can turn all those influences into a signature look by deciding on a few non-negotiables. Pick a core element you want to be known for—maybe a particular stitch detail, a way you express eyes, or a recurring shape in the body. Then build around it. When your audience can spot that detail in a blink, you’ve started to form your own art style.
Next, practice with purpose. Create a small set of characters that share your chosen signature traits. You’ll learn how each tweak changes the feel of the piece, and you’ll see what works best for your own taste. Don’t chase trends; chase clarity. Your style should feel easy to recognize, even at a glance.
Experiment with texture and color thoughtfully. A single color choice can change the mood of your character, and a texture you love can become a memorable cue. Keep a simple palette and test how different yarns look when you’re finished. Your unique style will emerge as you notice what resonates with you and your audience.
unique amigurumi art style
Your unique amigurumi art style comes from the combination of shape, stitch, and finish you settle on. Decide how rounded or angular your figures will be. Choose a preferred method for eyes—buttons, embroidery, or beads—and how you’ll express emotion. The finish can be smooth, fuzzy, or a little imperfect on purpose. Each choice paints the personality of your characters.
Make a small toolkit that reflects your style. A few specific stitch patterns, a go-to stuffing technique, and a preferred seam method keep your work cohesive. When you present your characters, they feel like a family living in the same world, not a random batch of dolls. Your consistency is your strongest visual language.
Let your style grow with you. You’ll discover new ideas by trying different subjects, but your core look should stay recognizable. Your fans will come back for that familiar charm, and new followers will be drawn to your distinct voice.
Quick research steps
- Gather 5–7 examples that scream your vibe. Note what you love about each, especially color and shape.
- Sketch quick thumbnails to map a few stylistic threads you might fuse.
- List 3 signature details you want in every piece.
- Try making a tiny piece that centers those details to test cohesion.
Define a clear silhouette
When you design amigurumi, your silhouette is your first impression. A clear silhouette helps your characters read instantly, even from afar or when small. Start by choosing a strong overall shape—circle, oval, cube, or a combination. This backbone guides every detail you add and keeps your character recognizable. You’ll feel confident knowing the pose and form read cleanly, which makes your work feel intentional rather than accidental.
Think about the mood you want to convey. A bold, chunky silhouette says playfulness; a slim, tall silhouette reads elegance. Keeping the silhouette distinct also helps you compare options quickly. If you sketch two versions and one clearly stands out, you’ve found your target shape. Your goal is a shape that stays recognizable at tiny scales, so trim unnecessary curves and keep lines purposeful.
Practice helps you refine your silhouette until it feels effortless. Use quick doodles to test weight distribution and balance. If a shape makes your eye jump around or looks unstable, adjust the proportions. You’re aiming for a silhouette that tells your story with fewer lines, not more.
Proportion silhouette for amigurumi
Your next step is to balance head, body, and limbs so the whole figure sits harmoniously. Start with a dominant head or torso as an anchor, then scale other parts around it. Proportions guide how cute or quirky your character feels and affect stability for display or play. If your head is too large, it can tip the silhouette toward top-heavy, while too-small limbs can read unfinished.
Use simple ratio checks. A common starting point is a larger head-to-body ratio for cute characters, then adjust as needed for personality. Keep arms and legs in relation to the torso so the pose reads clearly. If you’re unsure, print a few small shapes and test different sizes quickly. You’ll learn what reads best on your own characters.
Remember, you can shift proportion to emphasize traits. A long neck can imply elegance; chunky limbs can emphasize sturdiness. The silhouette should align with your character’s story, so every length and width serves that purpose.
Simple shape tests with paper
Paper tests are fast, cheap, and revealing. Cut out simple shapes—circles, squares, ovals—and tape them together to virtually draw your amigurumi’s build. This lets you see if the silhouette stays clear when you add arms, ears, or accessories. You’ll spot awkward gaps or visual weight before you crochet a single stitch.
Use a few pose variations to check balance and readability. Try sitting, standing, and a dynamic pose. If a pose hides the silhouette’s clean lines, rethink the arrangement. The goal is a silhouette you can revert to quickly during crochet, not a tangled mess you struggle to interpret.
Keep your tests aligned with your intended character. If you want a playful vibe, lean into chunkier shapes; for a mysterious character, sharpen angles and elongate lines. The paper tests should confirm that your choice communicates your idea at a glance.
Pick a signature color palette
You want your amigurumi projects to feel cohesive, and a signature color palette is your shortcut. Start by picking 2–3 primary hues you love and will keep returning to. Think about the mood you want: soft pastels for friendly characters, bold primaries for energetic ones, or earthy tones for cozy, woodland vibes. Your palette should feel like a brand you’d recognize at a glance, so choose colors that play well together and stay within a vibe you enjoy working with.
Your palette isn’t set in stone, but committing to it helps you avoid color chaos. When you reach for a new yarn, ask: does this color fit my palette or clash with it? If it barely fits, save it for accents or details. Your signature palette should make your projects feel recognizable, even before you add the facial features or tiny accessories that give your amigurumi personality.
Keeping a consistent palette also speeds up your flow. With a clear set of colors, you’ll spend less time debating which shade goes here? and more time stitching. You’ll notice your characters begin to look like they belong to the same family, and that visual thread is instantly appealing to viewers and buyers alike.
amigurumi color palette ideas
Your ideas start with your favorite feelings. For a cozy, friendly vibe, try a soft cream, blush pink, and sage green trio. For a playful look, mix bright turquoise, sunny yellow, and coral. If you want a woodland or rustic feel, olive, mustard, and burnt orange can shine. Don’t be afraid to combine neutrals like oatmeal, taupe, and charcoal with one bright pop color to keep things fresh.
As you collect ideas, save swatches that work well together. You’ll see patterns emerge—some colors naturally pair as siblings, while others act as bold accents. When you stitch, you’ll reach for those dependable combos first, then mix in a surprise color only for tiny details like paws or noses. Your palette should feel like a tiny map you can follow every time.
Remember, your palette is your signature. If you love it, your audience will, too. The right mix of hues makes your amigurumi instantly recognizable, even from a distance or in a small photo.
Test yarns in small swatches
Before you commit to a color for a full project, test it in a tiny swatch. This saves you from buying a whole skein only to hate how the color reads in person. Crochet a small square and compare it to your other palette colors in different lights. Yarns can look lighter or darker once you’re under a lamp or outside, so check daylight and lamp light to see the true shade.
Keep notes on each yarn: color name, brand, weight, and how it behaved during stitch tension and gauge. If you’re unsure about how a color will read on skin or on facial features, test it on a simple face or paw piece first. You’ll learn which yarns show depth, which appear flat, and which bloom a little after washing. These tiny trials prevent big color mistakes later and keep your palette honest.
When a yarn passes your swatch test, you’ve got confidence to proceed. If it doesn’t, replace it with a closer match or save it for accessories like hats, scarves, or tiny bells. Small swatches are your fast track to a polished, consistent look across your collection.
Create a palette card
A palette card is your quick-reference cheat sheet. List your primary colors, their hex or color names, and a brief note on when you should use each one. Include swatch photos or small yarn samples so you can recognize textures and tones at a glance. Your card keeps your designs aligned and makes collaboration easier if you ever work with someone else.
Keep your palette card near your workspace and update it as you experiment. If you discover a new shade that fits your vibe, add it with a clear note on where it best belongs. A well-kept card saves you time and helps you build a steady, recognizable line of amigurumi.
Use stitches for texture
You’ll feel the difference when you start using stitches for texture. Texture is what makes your work pop, and stitches are your fastest route to that wow factor. Think about how a plain surface can suddenly feel alive with a simple change in stitch. When you add texture, your designs become more tactile and inviting, inviting viewers to reach out and touch. Use stitches to mimic fabrics, fur, or scales, and you’ll see your amigurumi gain depth without extra bulk.
Texture isn’t just about looks; it guides the eye and the hand. You can use puff stitches to create little puffed pockets, or seed stitches for a sandy, granular feel. Raised stitches add shadows that give your piece a three-dimensional vibe. Your goal is to let one stitch tell a story another stitch can’t. With careful planning, you’ll turn plain fabric into a landscape your characters can live in.
Experiment with stitch density, too. Tighten stitches for a smooth surface and loosen them for a bouncy, cushioned look. Use a basic color palette for the texture work to keep the pattern readable. And always test your rows on a scrap swatch first so you know how the texture reads in real life. This is how you learn what your audience will experience when they touch your work.
stitch texture techniques
If you want texture that catches the eye, mix stitches that play off each other. A row of single crochet followed by a row of half double crochet creates tiny ridges that read as fabric. Add a few bobbles or clusters to break the monotony and give your piece character. Don’t be afraid to layer textures in small sections—your eye will follow the rhythm, and your amigurumi will feel more alive.
Choose techniques that suit your character’s mood. A fluffy owl might use lots of looped stitches for that soft look, while a dragon could use compact stitches with a few scales built in. The trick is to balance texture with maintainable construction. You want the surface to look rich, but not so busy that it distracts from your character’s expression or pose.
Practice on a small sample pillow or a mini bear first. When you see how the stitches interact in real life, you’ll know exactly where to place each technique in your final piece. Keep notes on tension and how each stitch affects the feel, so you can repeat the effect later.
Mix stitches for contrast
Mixing stitches is your secret weapon for contrast. Use a sturdy stitch for the body and a delicate stitch for highlights, like a glossy edge along a seam. The contrast helps important areas pop and guides the viewer’s eye to the focal points. You can even switch color mid-row to emphasize the texture shift.
Be selective about where you apply heavy texture. A few concentrated patches look purposeful, but too much can overwhelm your design. Let the face and hands stay readable with simpler stitches, and reserve the fancy textures for clothing, fur, or scenery. Your goal is to create a rhythm: calm areas balance the textured accents, and your character feels both grounded and expressive.
Keep track of your stitch choices in a quick notebook. Note which colors, tensions, and stitch combos worked best on different shapes. That record becomes your personal toolkit, helping you create consistent texture across many characters.
Make a texture sampler
A texture sampler is your best friend for texture planning. Knit or crochet a small panel that tests each stitch you want to use. This isn’t extra work; it’s a map that saves you time and surprise later. Label each section with stitch type, needle size, and tension so you can recreate the effect exactly when you’re building your amigurumi.
Use the sampler to compare how different stitches look in your chosen yarn. Some stitches puff up nicely in cotton, while others behave better in acrylic blends. The sampler lets you see where edges may curl or where texture might snag on clothing or accessories. When you’re ready to commit to a full piece, you’ll move quickly and with confidence.
How to Develop a Unique Art Style for Your Amigurumi Characters
You want your characters to feel unmistakably yours. Start by choosing a couple of signature textures and stitch patterns you love, then build them into every piece you make. This consistency makes your work instantly recognizable. Don’t chase trends; let your preferences guide your choices. If you love fuzzy textures, make that your hallmark. If you lean toward crisp lines, let clean stitch work show in every character.
Use color thoughtfully. A restrained palette with a few bold accents can be your brand. Pair textures with color in a way that your audience can identify at a glance. Over time, your eye for composition and texture will become a logo you wear on every amigurumi you create. And remember the core question: How to Develop a Unique Art Style for Your Amigurumi Characters? Answer it in every project through deliberate texture choices, consistent stitching, and a voice that shines through in your poses and expressions.
Design memorable faces
You’ll shape faces that grab attention and stay with your audience. Start with a clear idea of the mood you want—cute, spooky, or bold—and keep that through every facial detail. Your goal is to communicate emotion in one glance, so choose features that sing together: eye shape, mouth curve, and how the cheeks blush or dim. When you design a face, you’re teaching your amigurumi to tell a story without words. Think of each facial choice as a brushstroke in a tiny portrait, and you’ll end up with characters that feel alive.
Your process should be deliberate, not accidental. Sketch quick variations to test different expressions, then pick the strongest one and refine. If a face reads flat, tweak contrast: widen the smile, lift an eyebrow, or soften the jawline. The point is to keep the character’s personality readable even at a small size. Your amigurumi will wear that face everywhere, so aim for consistency across different characters—your audience should recognize your style at a glance.
Remember to balance charm with clarity. Too many tiny details can blur at small scales, so prioritize bold shapes and clean lines. You’ll be surprised how a simple change—like widening the eyes or elongating the mouth—can transform a whole vibe. Before you know it, you’ll be crafting faces that feel instantly familiar, like a friend you meet again in every new project.
facial expression design for amigurumi
Your facial expression design hinges on three elements: eye shape, mouth line, and brow positioning. Start with big, clear eyes that read emotion even when plush. A curved mouth can read happiness, while a straight line leans serious. Raised or angled brows add attitude or surprise. Test a few combos on a quick mockup or a felt template to see how they read from a distance. The clearer the expression, the more your character communicates your intended feel.
Use contrast to keep expressions readable. If the face fabric is light, darken the eyes and mouth for emphasis. If you use bold yarn colors, keep the details simple so they don’t get lost. Remember, you’re guiding the viewer’s eye toward the focal point—usually the eyes or the mouth—so place features where they’ll be noticed first. A little shading around the cheeks can give warmth without crowding the face.
Practice different moods with the same head shape. Happy, surprised, shy, or grumpy—each mood gets a slightly different eye drama and smile curve. You’ll find that some characters click quickly, while others teach you what to adjust for next time. The more you experiment, the faster you’ll lock in a signature look that screams you.
Placement and size tips
Placement matters as much as the features themselves. Center the eyes at about one third from the top of the head for a friendly, open look. If you want a more mischievous vibe, shift the eyes slightly higher and give a smaller mouth. The size of the features should match the head scale: larger eyes for playful charm, smaller eyes for subtle expressions. Keep the mouth proportional—too big can overwhelm a tiny face, too small can rob emotion.
Measure with a quick template. Pinch a small circular piece of fabric or felt where the eyes will sit, then cut to a comfortable scale. You’ll avoid crowding and keep the face crisp even after stuffing. Don’t forget symmetry: use a mirror or fold marks to keep both sides aligned. A balanced face reads as intentional, and your AMIGURUMI will thank you with character that pops.
Experiment with spacing to fine-tune readability. A slight gap between eyes can soften a look, while closer eyes create intensity. If you’re ever unsure, compare to a real person’s smile or a cartoon face you love. Let those references guide your spacing decisions until you can trust your instincts.
Try different eye styles
Eye style choices change the entire feel. Try round, almond, oval, or slit shapes to see what fits your character’s mood. Pair big round eyes with bright highlights for innocence; slim almond eyes with a small pupil read sly or confident. Don’t neglect eyelids and lashes. A tiny upper fold can soften a harsh gaze, while a strong lash line can add drama. You’ll discover that eye styling is where your face gains its voice.
Play with pupils and highlights. A large highlight makes eyes look lively; a tiny one can feel shy or sad. Multi-highlight eyes can add sparkle for cheerful characters. Keep highlights consistent across multiple faces so your collection feels cohesive. If you’re using safety eyes, choose options that match your yarn color and don’t overpower the expression. You’ll learn which combos bring your characters to life without overdoing it.
Move from static to expressive. Swap in a small mouth tilt or eyebrow lift to convey a new emotion without changing other features. Your amigurumi will feel more versatile, and you’ll enjoy the freedom to experiment with fresh looks. This approach helps you craft a signature style that readers can recognize in your work.
Customize patterns easily
You can tailor your patterns to fit your project, your tools, and your style. Think of customization as a toolbox you can dip into anytime you need a fresh look. When you start, pick a pattern that already fits your idea and then adjust it with simple tweaks. This makes your work quicker and more personal, so your amigurumi feels truly yours. By focusing on what matters—shape, texture, and color—you can create a result that looks intentional, not accidental.
Your goal is to keep changes clean and repeatable. Use consistent stitches, yarn weights, and tension so your finished piece stays sturdy. If you’re unsure about a tweak, try a small sample first. This avoids bulky surprises at the final stage. Remember, customization isn’t about reinventing the wheel every time; it’s about making it roll in your direction with confidence.
As you tailor patterns, document what you changed and why. This habit saves you time later and helps you teach others the approach you love. When you feel stuck, return to your core idea and ask how the change serves it. If the answer is to better resemble my vision, you’re on the right track. Your pattern should support your creative intent from start to finish.
pattern customization techniques
Use proportion tricks to keep your amigurumi balanced. If a head looks oversized, scale down the body a touch or add subtle padding to the torso. Small adjustments can make a big difference without breaking the pattern’s rhythm. Try swapping a single stitch to a slightly taller or denser option to shift the silhouette without dramatic rewrites. These tiny edits keep your work cohesive and easy to repeat.
Layer textures to add personality. Mix smooth stitches with a few textured accents, like a row of beads, bobbles, or raised stitches. These touches catch the light and give your character life without complicating the build. When you plan textures, map where you want them first, then apply consistently along the same sections in future pieces to keep every character feeling related.
Play with color blocks to convey mood. Choose two to three colors that reflect your character’s vibe, then place them in deliberate zones: head, torso, limbs, and accessories. Changing color placement can dramatically change expression and storytelling. If you’re unsure, test color swaps on a small swatch before committing to the whole piece. Your colors should work together, not fight for attention.
Change scale and detail
Adjust scale by changing how many stitches you use in key areas. A longer neck, bigger ears, or a chunkier body shifts the entire feel without rewriting the pattern. Start with one area, test, and extend if you’re getting the look you want. This approach keeps the project manageable and lets you see results quickly.
Increase or decrease detail with strategic decisions. Add simple features like a stitched smile or a tiny nose, or go bold with embroidered eyes or tiny accessories. Each added detail should support the character’s story and your time budget. If detail feels overwhelming, prioritize essential traits first and add embellishments only after you’re happy with the core form.
Be mindful of yarn and hook choices when you scale. Heavier yarn can bulk up a shape fast, while lighter yarn may need extra stitches to keep size consistent. Note how different tools affect your final piece so you can replicate the look later with confidence.
Note edits in a pattern log
Keep a simple log for every change you make. Write down what you altered, why, and the exact counts or stitches you used. This is your quick-reference guide for future projects. A clear pattern log helps you reproduce a successful variation or share it with others without guesswork.
Your log should include a quick snapshot of the before-and-after visuals. If you can, add a tiny photo or sketch for quick reference. This makes it easy to see how your tweaks influence the final look and helps you spot where you might want to adjust next time.
Choose materials with purpose
You want your designs to last and look intentional, not like a random grab bag of yarn. Pick materials that fit your project’s feel—soft for cuddle toys, sturdy for display pieces, or sparkly for whimsical characters. When you choose with purpose, you save time later on fixes and you keep your creative direction clear. Consider how the yarn, stuffing, and tools will interact: does your fabric need stretch, or do you want a crisp stitch definition? Your decisions shape the final look and how easy it is to care for your amigurumi.
Behind every good amigurumi is a choice that matches your intended style. If you’re crafting a sleepy bear, you’ll want plush, dense yarn that’s easy to stuff and hold its shape. For a bright fantasy character, a contrast of textures or a touch of metallic thread can bring it to life without turning your project into a knot festival. Your materials should support your design goals, not fight them. Remember, the right combo helps you work faster and with more confidence.
If you’re ever unsure, test small swatches and a mini version before committing to a full piece. This quick check helps you see how the yarn behaves when you crochet, how it holds color, and how it feels to touch. You’ll spot problems early and keep your project on track. Your goal is a cohesive look from start to finish, with materials that sing together rather than clash.
materials yarn choice for amigurumi
You want yarn that fits your character’s vibe and your skill level. For beginners, choose a smooth, medium-weight yarn that’s easy to see stitches in and forgiving if you make a mistake. For more detailed work, a smaller weight yarn gives tighter stitches and cleaner features, but it requires patience. Always look for yarn labeled for amigurumi or one with a tight twist—this keeps the fabric from stretching out and holds your shapes better.
Color choice matters as much as texture. Pick a main color that looks compact and a couple of accent shades to bring eyes, noses, or little accessories to life. If you’re aiming for a vintage feel, muted tones work; for a playful character, bright pops can be your best friend. Keep color changes neat by weaving in ends as you go, so your seams stay invisible and your edges stay sharp. Your yarn palette sets the mood for your entire piece.
Safety and stuffing options
Safety first: choose stuffing that’s snug but not rigid, so joints stay soft and the toy remains cuddly. Polyester fiberfill is a common go-to because it’s lightweight, washable, and easy to shape. If you want a firmer feel for a stand-alone figure, combine fiberfill with a small foam core, but avoid over-packing—your stitches need room to breathe. For small pieces or those that will be chewed or handled a lot, consider pet-safe or non-flammable stuffing when required by your project.
When you sew in eyes or other features, pick options that stay secure for little hands. Safety eyes and noses should be anchored with washers or sewn tightly, and you can add a bead of crochet to hide the back. If you’re hand-sewing, keep stuffing even in all sections to prevent lumpy areas that catch on fingers. Your goal is a plush that’s delightful to touch and free of loose parts that could come loose over time.
Yarn care and washing
Your finished piece will last longer if you know how to care for it. Most amigurumi made with acrylic yarns can be machine washed on a gentle cycle and air dried, which makes life easier for you and the kids. If you used wool or specialty fibers, hand washing is often safer to avoid pilling or felting, and air drying helps maintain shape. Always check labels and test a small spot if you’re unsure how a new yarn reacts to water or heat.
Keep accessories like outfits or antennas in mind—washable parts should be colorfast and secure. If you expect dirt or frequent handling, choose yarns that hold color well and won’t bleed. Your care routine becomes part of your design story, showing you planned for real-life use as well as display.
Build a cohesive collection
You want your amigurumi to feel like a story, not a random jumble. Start by checking what you already have and where you want to go. Look at your strongest pieces and ask: which shapes, textures, or colors can thread through them? When you identify a unifying idea, you give your whole collection a clear voice. This isn’t about sameness; it’s about consistency that makes each piece feel intentional. Your goal is a collection that readers see as a single, evolving project rather than separate projects stuck together.
Your process should map out how your pieces relate. Create a simple mood board with a few keywords, a color vibe, and a couple of motifs you love. Then draft a quick timeline for releases so fans can follow the journey. Consistency helps your audience recognize your work at a glance, and it makes it easier for you to stay focused during design sessions. As you grow, that continuity will become your signature.
Remember, a cohesive collection should still feel exciting. Don’t be afraid to push a new color or tweak a familiar shape slightly to keep things fresh. If you’re ever unsure, step back and compare a new concept against your core idea. If it doesn’t fit, you’ve got a reason to refine, not abandon. Your collection should feel like a well-turnished room you keep adding to, not a random shelf full of odds and ends.
cohesive amigurumi collection design
Your cohesive amigurumi design starts with a core motif you love. Maybe you adore rounded bellies, tiny paws, or oversized ears. Pick one or two features you want to carry across every piece. Then build variations around that anchor. For example, you could keep a similar stitching style for texture, while swapping colors and accessories to create distinct characters. This approach helps you build variety without breaking the thread that ties your collection together.
Next, set a character of voice for the collection. Is your line playful, cozy, or a tad quirky? Your chosen vibe should guide your fabric choices, yarn textures, and embellishments. A unified vibe makes each new piece instantly recognizable as yours, even when details change. Keep a simple rule—if a new design would feel out of place in your lineup, it’s probably too far from your core idea. Your consistent rules keep the collection coherent.
Think about practical links too. Use the same type of stitches, same seam methods, and similar eye sizes if you’re adding features like eyes or facial expressions. Small technical choices add up to a strong sense of cohesion. Finally, invite feedback from fans or friends. Fresh eyes can spot when something feels off or when a new idea fits beautifully. Your gaps become opportunities to sharpen your design language.
Theme and color linking
Color is your strongest bridge between pieces, so start with a limited palette. Choose a primary color and two accents that recur across your characters. Repeating those colors in scarves, hats, or paw pads helps your eyes travel from one piece to the next without confusion. If your primary color is vibrant, balance it with softer neutrals so the collection stays harmonious rather than shouty.
Link texture as well as color. If you love a woven look, carry that texture into every piece in some form—even tiny, stitched surface patterns count. You can also repeat tiny details, like a stitch pattern or a small emblem, across items. These tiny echoes feel intentional and make your collection feel planned, not stitched together.
Think about mood and era. If your collection leans whimsical, you might lean on pastel tones and soft yarns; if you want a vintage vibe, swap to muted browns and sturdy fibers. Keeping the mood consistent helps your audience feel that every new piece belongs in the same room. And remember, you don’t need every piece to be identical—just clearly related through color, texture, or motif.
Plan collection releases
Set a release rhythm that you can actually keep. Plan three to five pieces ahead so you’re not scrambling before a drop. Align new pieces around a central color shift or theme moment, like Spring Tables or Cozy Winter Companions. Share a simple teaser calendar with your audience—behind-the-scenes shots, short progress notes, and a countdown. This builds anticipation and shows you’re invested in a long-term story, not one-off projects.
Describe a clear path for new fans too. If someone discovers you with one piece, they should see how it connects to what comes next. So include a short, visible note on each piece about the collection’s direction or a hint of the upcoming theme. Your fans will feel like insiders, waiting for the next part of your design journey.
Think big, but stay practical. You might plan seasonal drops or a quarterly mini-series. Either way, keep production steps simple and repeatable: draft concept, choose colors, test stitches, assemble, photograph, and publish. When your workflow is predictable, your cohesion stays strong, and your releases feel intentional.
Brand your signature characters
You want your characters to stand out, not blend in. Your signature characters are more than cute shapes; they’re your calling card. Think about what makes your work different and how you want people to feel when they see your crochet monsters, animals, or heroes. Your goal is to turn every amigurumi you create into a recognizable piece that speaks your name without saying a word. That starts with a clear, intentional brand you can carry through every project, photo, and post.
Your signature characters should tell a story with color, texture, and pose. Pick a few cues you’ll use every time—a distinctive eye style, a particular stitch pattern, or a signature accessory. When people spot your work, they should instantly think of you, even before you sign the tag. Consistency builds trust, and trust builds fans who keep coming back for more.
To make this real, map out your brand briefly. Decide on a vibe (playful, cozy, bold), a color palette, and a few recurring details. Then you’ll see your character design shift from random cute things to a cohesive collection. You’ll feel confident posting new pieces, because each one slips neatly into your brand story.
signature crochet characters
Your signature crochet characters aren’t just cute shapes; they’re a promise that every detail aligns with your brand. Start with a core idea for each character: what makes them unique, what mood they set, and what small detail will always show up in your work. This isn’t about copying trends; it’s about crafting a character that readers recognize as yours, every time.
Lock in a few defining features for your characters. It could be a particular ear shape, a certain stitching texture, or a recurring accessory like a hat or scarf. These tiny, repeatable details act like a badge of your personal style. When a viewer sees them, they know who created it, even if they don’t see your name.
Keep your character set cohesive. If you design one bold, chunky creature, you might balance it with a softer-bodied friend in the same color family. This keeps your portfolio feel intentional and helps buyers or fans recognize your work at a glance. Your signature crochet characters become a visual signature that travels with every post and product.
amigurumi character design
Amigurumi design is where you turn yarn into personality. Start with a clear silhouette so your character reads well at small sizes. If your shapes read as a friendly mug or a curious critter from a distance, you’ve nailed it. Think about how the pose, stitching, and colors convey character even before you add facial features.
Focus on contrast. Use a limited color palette that still offers variety—one main color, a secondary, and a highlight. This keeps your work readable in photos and easy to reproduce. It’s better to develop a small but strong color rule than to chase lots of mismatched hues.
Practice your facial expressions in a simple, repeatable way. Big eyes, a tiny mouth, and a certain tilt of the head can change the whole mood of a character. Your approach to expressions should feel like you, not a stereotype. When you nail the face, your amigurumi stops being a toy and starts feeling like a friend.
Build a clear brand voice
Your brand voice is how you tell your story through captions, posts, and product descriptions. Write in a way that reflects your personality and the feel of your characters. If your line is cozy and warm, choose words that warm the reader—soft, inviting, gentle. If your line is bold and funny, lean into confident cheer and a dash of humor. The voice should stay steady across every piece of content, from gallery photos to tutorials.
Use consistent phrasing for key ideas. A simple, repeatable framework in your descriptions—what it is, why it’s special, how it’s made—helps fans learn your process and feel involved. Highlight your signature details in bold so readers notice what makes your work unique. Your voice becomes a storytelling thread that ties all your pieces together.
Your brand voice isn’t just text. It’s how you respond to comments, how you present your work in tutorials, and how you explain your design choices. Keep it approachable and clear, and your audience will trust you to guide them through the world you’ve created.

Clara Fern — Crochet Artist & Amigurumi Designer
Clara Fern is a crochet artist and amigurumi designer based in Austin, Texas. With 9 years of experience working with yarn and hook, she transformed a lifelong passion for handcraft into a creative mission: making amigurumi accessible, fun, and deeply rewarding for crafters of all levels.
Clara discovered amigurumi during a trip to Japan in 2017, where she fell in love with the art of bringing tiny characters to life through crochet. Back home in Texas, she spent years studying color theory, design principles, and advanced crochet techniques — developing her own signature style that blends kawaii aesthetics with original character design.
Through maclafersa.com, Clara shares everything she has learned — from choosing the right yarn and reading your first pattern, to designing fully original amigurumi characters from scratch. Her writing is known for being clear, detailed, and genuinely helpful, with no steps skipped and no secrets kept.
When she’s not crocheting, Clara enjoys watercolor painting, visiting local yarn shops, and drinking way too much coffee while sketching new character ideas.


