
How you map the amigurumi design process
You map your amigurumi design process by breaking down every step from idea to finished piece. This keeps you organized, lets bold choices shine, and makes the final toy feel intentional rather than stitched together. Your map is a compass you can pivot around when a yarn knot or color choice goes off course, without losing momentum. Mapping also builds a dependable routine for every new character you dream up.
Start with awareness of your goals, then outline tasks that bring them to life. This creates predictable progress, keeps you from rushing, and protects your time. Notice patterns—like which stitches yield your favorite round shapes or where tension creeps. Writing these patterns down turns guessing into skill, and your hands learn to move with confidence.
As you map, keep your audience in mind. Your amigurumi isn’t just a statue of yarn; it’s a story-maker for someone seeking a friend, a desk buddy, or a cozy gift. The map guarantees that every choice serves that story, from head size to seam placement. When aligned, your design feels cohesive and thoughtful, not accidental.
Research character goals
Your first move is to ask who your character wants to be. Note goals like cute and huggable, expressive eyes, or sturdy for kids. These guide decisions from stitch density to proportions. When you know the character’s purpose, you can pick colors, textures, and features that support that purpose, not distract from it. Your research helps you avoid overcomplicating a design that should be simple and friendly.
Next, balance goals with your strengths. If you love big round cheeks, lean into that but test how it affects neck stability and balance. If tiny facial features challenge you, invest in larger embroidered details or bold yarn colors that read well from a distance. Aligning character goals with your skills makes the piece feel intentional and achievable. This is where your project stops being a random idea and starts becoming your signature.
Finally, translate goals into a quick checklist. Include items like soft body for hugging, machine-washable yarn, and no small detachable parts. This keeps you honest about safety and practicality while you design. A clear list helps you spot conflicts early, like a tiny bead posing a choking risk or a shade that doesn’t pop in your demo photo.
Set size and complexity limits
Set size and complexity limits to keep the project doable. Decide on height, max weight, and how many pieces you’ll sew together. Think of this as setting speed limits: you won’t push past what you can finish with clean stitches and good tension. Clear limits also help you estimate time and cost, so you’re not surprised by the yarn bill. You’ll feel calmer knowing you wrote down these boundaries before you start.
Determine the level of detail you can handle without losing quality. If you’re new to shaping ears or noses, keep features simple at first. As you practice, you can add layers of detail, like subtle shading or textured yarns. Your limits aren’t a cage—they’re a training wheel that lets you grow while keeping the project enjoyable and steady. By sticking to these boundaries, you protect your creativity and keep the end result polished.
Finally, test the limits with a small prototype. A mini version shows you if your proportions work, how your stitches hold up, and whether the color choices read well on camera. If the prototype screams not yet, you know where to tweak. This check-in pays off when you scale up to the full design.
Create a simple design brief
Your design brief is a tight guide you can reuse. It should cover the character’s name, mood, size, color palette, and any special features. Write it as a short, clear paragraph you can reread during your work session. This keeps you focused on the core idea and stops you from chasing shiny but unnecessary details. Your brief is where your vision starts to feel doable.
You’ll also include safety notes and care instructions in the brief. This makes your piece practical for everyday use. If you’re gifting it, add personalization options—like name embroidery or a color swap—to make it feel thoughtful. The brief is your contract with yourself, keeping you aligned from concept to finished amigurumi.
How you gather inspiration and references for character development in amigurumi
You start with curiosity, then narrow down to what feels true to your style. The best characters often come from real-life details you spot in everyday moments. When you think about a character, you’re not just stitching a cute shape—you’re telling a story with yarn. The Design Process: How Professional Amigurumi Artists Work serves as a roadmap you can follow, helping you gather ideas that feel personal and stand out.
Balance practical limits with bold imagination. You know you’ll need emotion in your amigurumi, so you study faces, gestures, and poses you can recreate with simple stitches. Test ideas in small sketches and quick swatches, so you don’t waste time on things that don’t fit your hands or mood. Inspiration is a habit you cultivate; the more you expose yourself to sources, the more natural your characters become.
Keep a critical eye on what moves you. If a design makes you smile or feel nostalgic, chase it. Build a library of moments you can borrow—a mitten-clad hand, a shy head tilt, a heroic cape—and mix what you love with what you can actually stitch. Your goal is to make characters feel alive and true.
Collect photos and toy references
Collect photos and toy references to ground designs in real details. Gather images of animals, people, and cute creatures that spark imagination, tagging notes about what you love. Notice textures, shapes, and expressions you can translate into yarn. Choose references that share a vibe with the character you want to make, not just pretty images. This keeps your project focused and doable.
Save toy references that show pose ideas and balance, so your amigurumi sits nicely or stands confidently. Look for materials that match your preferred yarn brands, needle sizes, and stuffing, so you know how the finished piece will feel. If a photo or toy inspires a specific pose, write it down and test it in a quick sketch. Concrete cues keep design practical while staying emotionally true.
Note safe and legal design limits
Know where references end and your own design begins. Avoid copying exact characters or distinctive logos. Study shapes, proportions, and general silhouettes to borrow vibe, not the copy. This keeps your work legal and honest while letting creativity breathe. Check licenses if you plan to sell pieces resembling protected characters, and lean into original twists that honor the source material without mimicking it.
Also keep safety in mind. Choose kid-friendly materials if your amigurumi is for children. Ensure stitches are tight enough to prevent stuffing leaks, and test durability. You’re aiming for a design that’s visually appealing and safe for hugs. Boundaries you set now save trouble later and help you grow as a creator.
Build a mood board for ideas
A mood board helps you collect feelings and details you want to capture. Include color swatches, texture samples, and snippets from inspiring photos. It’s a visual quick-reference you can glance at while you stitch to stay on track. Group ideas by mood—whimsical, cozy, bold—to see where your energy goes. It also becomes a timeline of your thought process, showing how your character grew from idea to reality. Keep it simple and readable so you can use it while you work, not just when you dream.
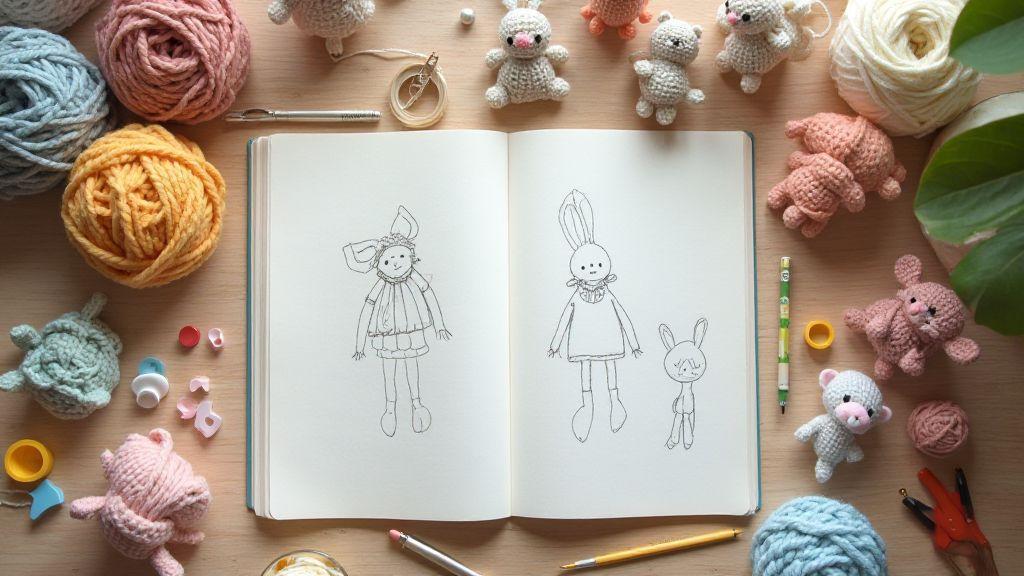
How you sketch concepts and define silhouettes
Your first move is to visualize the finished piece’s feel. Sketching turns ideas into touchable shapes, a practice of testing possibilities rather than crafting a masterpiece. Each line asks: does this pose feel right? Will this shape read well from a distance? Do quick roughs, then compare. Clarity, not polish, guides your next moves.
Capture movement and mood over tiny details. Think bold forms first: a big head, sturdy torso, limbs that hint at action. A strong silhouette should have a focal point that tells your story at a glance. If it doesn’t pop, adjust the silhouette until it does.
Consider reading from different angles. A silhouette should hold up in profile and from behind. Use overlays or cutouts to test shape readability. Keep sketches loose for fast iteration, but clear enough to translate into a pattern later.
Start with basic shapes
Begin with circles, ovals, rectangles, and triangles to map the core mass. The overall shape sets the tone—soft curves feel friendly; sharp angles feel dynamic. Block out the head, torso, hips, and limbs, tweaking size or orientation before adding features. This saves hours of rework.
A simple base keeps the design readable at small scales. A strong base makes scaling easier later. Small shape nudges can reveal personality: a tilted head implies curiosity; broader shoulders suggest confidence. Stay practical and playful, and concepts will take shape quickly.
As you iterate, switch between posing and shaping. Quick stick-figure poses reveal weight shifts; changing base shapes can rebalance the look. Don’t hesitate to redraw the skeleton if a pose feels stiff. The transformation from rough geometry to a living silhouette happens fast when you keep it tactile and fun.
Pick standout features to repeat
Choose two or three features to recur in your design for easy recognition from afar. It could be a crescent-shaped eye, a curled tail, or a striped back. Repetition creates rhythm, making your design memorable. Test how these features read at different scales and poses to keep them legible when you zoom out.
Make standout features bold but not overwhelming. Echo them across the silhouette so the look stays cohesive. Think contrast: light vs. dark, thick vs. thin, solid vs. textured. A signature look builds recognition for your audience.
Place features to guide the eye. A recurring motif should lead attention toward the face or the most expressive part. If too crowded, simplify. Balance here makes your design easy to reproduce in plushes, prints, and more.
How you choose materials and test yarns
Choose yarns that feel right as the project grows. Start by testing a few blends in small swatches—twist, pull, and feel how they tension. Note stitch visibility and shaping after blocking. Use a simple checklist: yarns should be smooth, non-shedding, and color-stable after washing. If unsure, opt for sturdier options for longevity. The Design Process: How Professional Amigurumi Artists Work emphasizes tiny-scale testing before scaling up.
Compare how different yarns behave with your technique. If crocheting, check slip and weave for rough edges. For amigurumi, you want a tight fabric that minimizes gaps. Do quick trials: make a small ball or mini animal with each yarn to see how stitches hold. You’ll learn which yarns bloom or stay firm, and which feel scratchy.
Document results in a simple chart—comfort, ease of use, durability, washability. The right yarn makes your design pop and saves you from redoing work later. The Design Process: How Professional Amigurumi Artists Work reminds you to test, compare, and record so your final piece shines.
Match yarn weight to size
Choose weight to fit your target size. For small pieces, DK or sport weight yields clean stitches; for larger forms, worsted or aran helps the shape hold. Crochet test rounds to confirm fabric length and adjust hook size as needed. The Design Process: How Professional Amigurumi Artists Work teaches you to measure before you commit, keeping proportions right.
Consider weight effects on texture. Heavier yarns yield a plush look but can blur details; lighter yarns preserve features but risk losing shape if stitches are too loose. Find a balance by making a small model to confirm feel and scale.
Also ensure pattern compatibility. Some patterns assume certain yarn weights; if you mix layers, ensure transitions read smoothly. A quick swatch helps verify density before you commit.
Compare stuffing and safety parts
Safety matters once you add stuffing. Compare polyester, natural fibers, or eco-friendly fills for softness, resilience, and washability. For little ones, choose machine-washable and hypoallergenic fills when possible. The Design Process: How Professional Amigurumi Artists Work pushes you to test compression and wash results so your piece stays safe and cute.
Evaluate safety parts like eyes, noses, and joints. Plastic safety eyes require secure backing and proper spacing to avoid choking hazards. Sew-on or embroidered alternatives reduce risk while keeping personality. Test how parts sit inside fabric; look for visible holes or gaps. Aim for a finished piece that looks intentional, not stitched around a safety issue.
Test durability under play. Joints and attachments should hold up after rough handling. The Design Process: How Professional Amigurumi Artists Work helps you choose parts that stay put over time.
How you develop and write clear amigurumi patterns
Approach patterns like a recipe you’ll actually follow. Start with a simple, relatable character and map its basic shapes. Break the design into small, repeatable steps you can test. Clarity is your compass: every stitch, round, and seam has a purpose, written so others can follow without guessing. With your audience in mind, write patterns that guide beginners and delight veterans. Note where you simplified steps or added tiny tips that save time.
Think in sections: head, body, limbs, and details. Sketch quick diagrams or checklist notes to stay steady while you crochet. Use plain language and short sentences. Include color cues, stitch counts, and variation options so patterns feel flexible, not fixed. Color the pattern with reminders like repeat until even and slip stitch to close, so readers don’t stumble at the end. The goal is a smooth flow from start to finish, with every line earning its keep.
Pattern testing shines when you try it yourself and invite others to test too. Document changes, note where readers stumble, and adjust wording to remove confusion. Maintain a friendly tone that respects the craft’s details. The Design Process: How Professional Amigurumi Artists Work is your north star for structure, clarity, and polish. Clear steps give readers a reliable map from hook to hugs.
Use standard abbreviations and counts
Keep abbreviations familiar and consistent—sc for single crochet, inc for increase, dec for decrease, and similar shorthand you’ve seen in good patterns. Spell out the first usage, then use the short form. Keep counts precise: stitches per round, total stitches, and any increases or decreases clearly stated. If you introduce a new technique, briefly describe it with a standard reference.
When you adjust a pattern, keep the math visible. Show how a gauge change affects size and where to compensate. Offer notes on what to adjust if a reader uses thicker yarn or a smaller hook. Standard counts and clear abbreviations make patterns accessible to learners and pros alike. Calm, predictable language helps readers crochet confidently without second-guessing every row.
Add photos, diagrams, and gauge notes
Attach a photo for each major stage: starting chain, first rounds, and finishing touches. If a step is tricky, include a close-up photo or diagram showing exact stitch placement. Labels like round 6–12 or arm seam keep readers oriented. Diagrams support the text without overwhelming it, speeding understanding. Add gauge notes so readers know the tension to aim for. A quick comparison (e.g., 40 stitches over 4 inches with 3.0 mm hook) helps readers match your size. Photos and diagrams make patterns practical, not theoretical, and save time and misreads.
Gauge notes matter because size changes how a finished toy reads. Explain how yarn weight, hook size, and tension influence the final piece. If gauge is off, offer a simple adjustment—change the hook or start with a different chain count. With good visuals and clear gauge guidance, readers stay confident and on track, turning your design into a reliable product they can replicate.
Proof and test the pattern before release
Test the pattern yourself from start to finish, then hand it to testers who represent different skill levels. Gather feedback on clarity, missing steps, and tricky parts. Fix vague phrases, tighten wording, and adjust steps that cause pauses or errors. After edits, do a final run-through to catch anything missed. The goal is to release something effortless to follow and capable of producing the intended results. A clean, tested pattern earns trust and reduces returns or questions.
How you prototype and shape pieces with sculpting techniques
Sculpting brings ideas into real form. Start with a simple base and build the imagined shape, using your hands as tools. Don’t fear rough edges at first—they guide the next pass. Map the silhouette in stages to see proportions shift and refine with each pass. Bold, deliberate motions lock in major planes before chasing tiny details.
Keep an eye on balance: weight, pose, and flow. If a limb looks off, compare to your reference and adjust just enough to restore harmony. Your tactile sense matters as much as sight; you’ll feel when a curve reads right. Texture decisions influence shape, so think about where smooth versus textured areas live on the final piece.
Pause and re-evaluate often. Each sculpture stage teaches you something about your style. You’ll learn which angles read strongest and which corners catch light best. The way you hold tools, the pressure you apply, and the speed of your strokes shape your character. Stay curious and let the sculpture guide you from rough mass to clear identity.
Make test swatches and limbs
Start with test swatches to compare how different surfaces catch light. Create small patches that mimic final materials. Use them as a quick feedback loop to settle on a consistent texture language. Your goal is to predict how the final look will read from a distance.
Test different limb shapes by sculpting short, simple forms first. This helps verify proportion and pose without getting bogged down in detail. If a limb feels stiff, loosen joints or tweak taper until it moves with natural intent. A small change in length or thickness can dramatically improve balance and expressiveness. Use these early limbs as a reference for how the rest should scale.
Sculpt stuffing to refine curves
Sculpting stuffing lets you fine-tune volume and curvature. Add or remove material where you notice hollow spots or hard edges. Subtle curve adjustments dramatically affect how light plays across the surface, making the piece feel alive. Keep strokes light and gradual to avoid overshooting.
As you refine, you’ll sense a rhythm in your contours. Smooth transitions between planes create cohesion; abrupt breaks should be reserved for emphasis or stylized features. The stuffing stage turns rough mass into friendly, approachable shape, so listen to what the piece wants to become.
Iterate prototypes until proportions fit
Proportions are the heartbeat of your sculpture. When iterating, test big and small changes to see how the whole reads. If a head feels too large, shrink it slightly and watch the neck and shoulders respond. If the torso reads squat, lengthen it and observe the stance shift. Each tweak nudges toward a balanced silhouette. Track what you change and why, so you can explain it to someone else in simple terms.
This is where your design language becomes consistent, letting you reproduce the effect in future projects with less trial and error.
How you plan color and texture for strong designs
Your design starts with a plan, not a guess. Map color and texture early so every detail fits. Bold choices set the mood; subtle shades keep things grounded. Consider where light hits and how the piece will be seen in real life, not just on a screen. Planning helps avoid clashes and dead zones, turning the plan into your guide from stitch to hug.
Aim for a cohesive look from first glance to last touch. Choose colors that speak to your theme and textures that support function and feel. Test fibers together in real life, not just a swatch book. When your plan aligns with the final piece, your audience feels the same story you do.
Keep your audience in mind as you outline. Will this read as playful or serious? Do textures invite touch or stay visually crisp? The right color and texture mix makes your design memorable, and your process shows in every detail.
Choose a limited palette for clarity
Narrow color choices to gain clarity. A few core colors give each decision weight and purpose. A simple trio can feel complete when you balance warm and cool tones, light and dark, contrast and harmony. A limited palette becomes a unifying thread through the piece.
With fewer colors, you can push contrast smarter. Let one color dominate and use others as accents to keep the eye moving without confusion. This saves time and speeds decisions during the build. A finished design reads clean, strong, and intentional.
A restrained palette also helps you adapt if you need to change course. If you switch yarns, you can choose alternatives within the same family without rewriting your plan. Your design stays coherent even as you experiment.
Add texture for interest and grip
Texture earns tactility and personality. Mix stitches, yarns, and surfaces to create a living feel. Smooth areas make patterns pop; fuzzy sections invite closer inspection and a gentle touch. Balance drama with usability so the piece feels exciting yet comfortable to hold.
Texture helps tell your story. Rough knits convey ruggedness; plush areas whisper comfort. Test how light catches each surface, since texture changes with lighting. Your goal is a surface that rewards inspection and play. Layer textures with intent to maintain a clear silhouette while rewarding those who look closely.
Keep scale in mind: tiny texture details may vanish from a distance, so layer textures thoughtfully to preserve overall shape.
How you joint and assemble parts for pose and safety
For poseable pieces, you want joints that feel natural and endure play. Start by choosing where each part connects, then plan movement without wobble. Balance matters: a top-heavy toy tips easily, so place joints where weight shifts. Test poses, adjusting tension and placement until you can hold a stance without Sagging. Joints should make the character feel alive, not stiff.
Decide how to connect parts with simple, sturdy methods you trust. You might blend fabric, thread, and small fasteners to keep movement smooth and safe. Aim for clean lines at joints with no rough edges that snag. Keep tiny pieces organized so nothing gets lost. This is where rough ideas become a functional, friendly figure your audience will hug and display.
Select sewing vs safety joints
Between sewing joints and safety joints, weigh flexibility against durability. Sewing joints offer clean, hidden seams and work well for lighter pieces or non-stressed parts, with easy adjustments if needed. But sewing alone can wear out with rough handling.
Safety joints use hardware or reinforced constructions that stand up to frequent use. They’re ideal for action poses and kids’ toys where durability matters. They often involve snap fasteners, strong thread, or discreet connectors that won’t snag. The trade-off is a more technical build, requiring space around the joint and extra fabric or padding. You can blend both approaches—sewing for look and feel with safety elements at the core for robust results.
The Design Process: How Professional Amigurumi Artists Work often shines here, showing how experts mix methods for optimal results.
Reinforce seams for play and washability
Seams take the most beating in a moving, washable toy. Reinforce them with double stitching or backstitch at every movement point. A seam test should feel solid, not give. Add a small fabric shield inside for extra protection against friction.
Finish edges neatly with a binding or serger to prevent frayed threads from wandering into stuffing. Hide knots inside seam allowances so nothing pokes through. If you choose washable fabric, prewash and press before sewing to prevent shrinkage that could tug seams later. You’re building a toy that stays presentable after lots of play.
Keep cleanliness and safety in mind. Use color-matched, strong thread and avoid loose threads near joints. Test with a gentle wash to confirm seams hold and the finish stays neat. Reinforced seams help your creation survive play and stay as fresh as the day you finished it.
How you set up a production workflow for amigurumi artists
You’re aiming to turn ideas into neat, market-ready amigurumi. Start by mapping steps from sketch to ship. This workflow keeps you honest: you know what to do next, every time. Your goal is consistency, speed, and quality that customers feel in every stitch. When you write down your steps, surprises fade, and your creative vibe scales with clarity.
Set a simple rhythm: design, prototype, test, adjust, and package. Lock in core decisions during design: yarn type, hook size, gauge, and target size. Prototype with a first sample, test how it sits in real life, and note tweaks. A steady cadence yields a workflow that feels natural, not chaotic, and your audience can feel your craft in every piece.
Finally, build a system for tracking progress. A quick project checklist, a photo log, and notes on what worked and what didn’t. This isn’t bureaucracy—it’s speed and quality, helping you grow. The Design Process: How Professional Amigurumi Artists Work is the backbone you rely on as you scale.
Create repeatable steps and time estimates
Break work into repeatable tasks: sketch the design, choose materials, crochet the prototype, stuff and finish, then review. Each task gets a time estimate to plan your week and hit deadlines. Keep a running log of actual times to establish realistic ranges for forecasting.
Set up standard templates for patterns and colorways. A single design template becomes a repeatable path: yarn choice, stitch count, assembly steps, finishing touches. This lets you clone success and batch similar pieces. When you have a predictable flow, you’re not re-learning the wheel with every project.
Include a built-in review after the prototype. Ask: does the form match the design? Is the finish neat? Do stuffing and joints hold up? This early check catches issues before you scale.
Implement quality checks and packaging
Quality checks happen at three levels: craft, durability, and presentation. Inspect stitches for consistency, check seam joins, and test how the piece sits when held or displayed. If you find a weak spot, fix it on the spot and note the change in your template. A small adjustment now saves returns and negative reviews later.
Packaging should protect the piece and tell your story. Use a sturdy inner bag, a clear care tag, and a note about the design. Your packaging should feel like a gift—present and on-brand. Include your colors and a friendly hello so customers feel the care you put into every detail.
Incorporate a quick post-packaging audit: confirm the correct item is sealed, the label is readable, and packaging aligns with your brand. This reduces mix-ups and boosts buyer confidence. With quality checks, you protect your reputation and make unboxing feel intentional.
Scale from one prototype to small batches
Start by multiplying your prototype into a small run. Test colorways, check pieces in real lighting, and evaluate shipping in a box. Begin with 3–5 units to learn what to tweak before scaling.
Build a simple production map for the batch. List steps, order, and time per unit. Decide whether to assemble fully by hand or split tasks to save time. A clear map keeps you steady as demand grows.
Finally, create a feedback loop. Ask customers what they love and what could improve. Use that insight to tweak design, materials, or packaging. Small batches teach you what works without waste and give you the confidence to scale further when you’re ready.
The Design Process: How Professional Amigurumi Artists Work
Think of The Design Process: How Professional Amigurumi Artists Work as the North Star guiding every decision—from goals and references to yarn tests and packaging. By embracing this framework, you build craft, safety, and clarity into each piece, turning ideas into hug-worthy realities.

Clara Fern — Crochet Artist & Amigurumi Designer
Clara Fern is a crochet artist and amigurumi designer based in Austin, Texas. With 9 years of experience working with yarn and hook, she transformed a lifelong passion for handcraft into a creative mission: making amigurumi accessible, fun, and deeply rewarding for crafters of all levels.
Clara discovered amigurumi during a trip to Japan in 2017, where she fell in love with the art of bringing tiny characters to life through crochet. Back home in Texas, she spent years studying color theory, design principles, and advanced crochet techniques — developing her own signature style that blends kawaii aesthetics with original character design.
Through maclafersa.com, Clara shares everything she has learned — from choosing the right yarn and reading your first pattern, to designing fully original amigurumi characters from scratch. Her writing is known for being clear, detailed, and genuinely helpful, with no steps skipped and no secrets kept.
When she’s not crocheting, Clara enjoys watercolor painting, visiting local yarn shops, and drinking way too much coffee while sketching new character ideas.


