
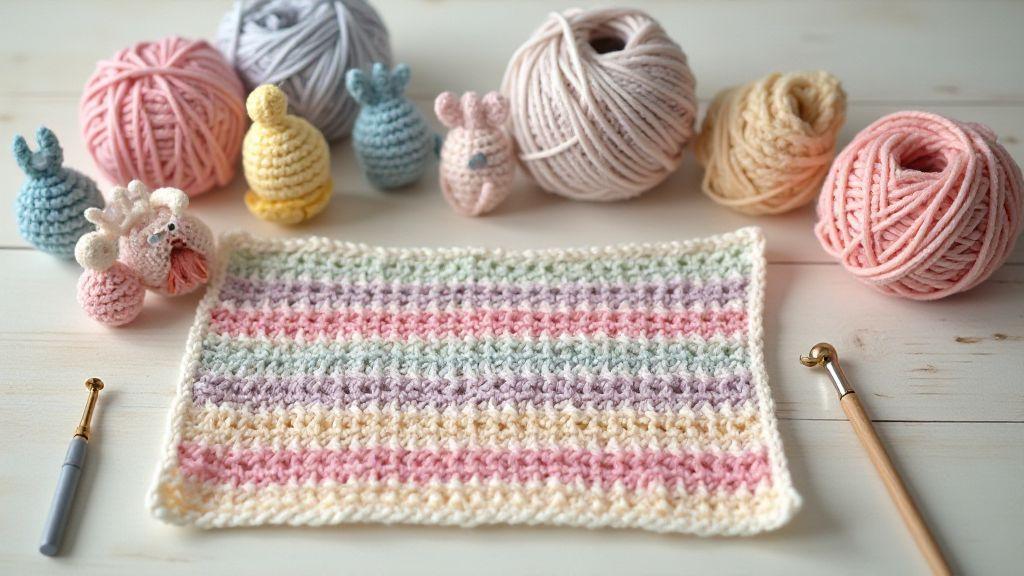
Master the Magic Ring Amigurumi Technique
You’ll unlock a smooth start every time when you master the magic ring. This technique creates a tight, neat center and helps you avoid a big hole at the start of a stuffed figure. With consistent yarn tension, your rounds stay compact and stitches sit evenly. Practice simple rounds to feel the difference in how your fabric looks and holds its shape. The key is consistency: tight rounds now mean cleaner joins later when you sew pieces together.
The magic ring is often the fastest way to begin and is adaptable for different yarn thicknesses. For thicker yarn, loop the ring more times to fill the center; with finer yarn, keep it tight but not squished. It helps you close the center completely as you work the first rounds, reducing gaps and giving you a confident start. This isn’t just technique; it’s a confidence boost for tackling heads, paws, and noses in amigurumi projects.
Mastery also means knowing when to switch methods. Some people start with a chain and join to form a circle, but the magic ring saves time and reduces gaps, especially in small pieces like ears or limbs. If you see a gap forming, you may need a slightly tighter loop or a few extra stitches in the first round. Keep testing to maintain a uniform fabric across pieces. The magic ring is your reliable tool for clean starts and professional-looking amigurumi.
How You Start Tight Rounds with the Magic Ring
Begin by making a loop, insert your hook into the center, and chain to start. This loop becomes the center you pull tight as you work the first round. Keep a steady hold so the ring doesn’t loosen. When you finish the first round, pull the tail to snug the center. With practice, you’ll insert, yarn over, pull through two, and repeat, creating a neat circle that forms a solid base.
Count stitches carefully to match your pattern. The magic ring is worked in a set number of stitches (often 6 or 8). If the ring feels too tight or too loose, adjust the loop size and tension as you go. A smooth starter round helps it blend into subsequent rounds, keeping the circle flat as you add rounds. If you wobble or the center is loopy, reset tension before continuing. Let the ring compress as you go and practice on scrap pieces to feel the right tightness for your yarn and hook size.
When the Magic Ring Saves Yarn and Gaps
The magic ring saves yarn by letting you pull the center closed, avoiding a wasteful big hole. A tight center reduces gaps in single rounds and makes the fabric look tighter overall, which matters in small parts like eyes or noses. When you finish the first round snugly, you’ll use less yarn for a clean start. This efficiency adds up, especially on larger toys with many pieces.
Gaps come from a too-loose starting loop or a first round that’s too spread out. The magic ring gives you control to keep each stitch tight and close to the center. If tiny gaps appear, rework the first rounds to be tighter before continuing. A well-tied center helps the rest of the shape stay round and smooth, saving you from fiddling later and keeping you on a quicker path to a polished finish. For variegated or textured yarns, the magic ring helps prevent start-line wobble, giving a steady base as you work outward. Clean centers make sewing easier and joins neater.
Quick Magic Ring Tip
Keep your working yarn tail tucked under your fingers and ready to pull tight. If the ring feels stubborn, give the loop a gentle tug and rotate the circle to even out tension before you begin.
Learn Single Crochet Amigurumi Basics
Single crochet is the backbone of amigurumi. Master it for tight, even fabric and small shapes that hold their form. Tight pulls keep pieces neat; relaxing grip prevents stiff, flat results. Start with a hook you’re comfortable with and light yarn, beginning with simple rounds. Each stitch sits on top of the previous row, like bricks in a tiny wall, giving your toy its structure and charm.
To get a clean start, keep rounds tight but not strangling. The secret is pulling each loop snugly without losing the yarn fiber or slipping your hook. If stitches feel loose, slow down and check tension from stitch to stitch. A steady rhythm—pull after yarn over to lock in the stitch—helps your amigurumi grow evenly and hides seams into a smooth surface.
As you stitch, your confidence will grow. Move from shaky first stitches to an even row that feels made with care. The goal is steady fabric that stays intact as you stuff. With time, your single crochet becomes second nature, and your amigurumi looks amazing from head to toe.
How You Make Neat Single Crochet Amigurumi Rows
Keep tension steady and guide the yarn gently. If a row rides high or low, pause, check your grip, and reset before continuing. Count stitches as you go; a small mismatch is usually a skipped stitch or an extra yarn over. Fix it before closing the round to keep your body symmetrical and your pieces aligned like puzzle pieces.
Use a consistent turning technique to keep edges tidy. If you work in spirals, mimic flat rows by avoiding turns unless the pattern says so. When you do turn, twist gently and keep turning chains to a minimum. Consistency is the hallmark of neatness—small habits now yield flawless rows later.
Tension Tips to Keep Your Stitches Even
- Use a light touch. Hold the hook comfortably and let the yarn flow with minimal resistance.
- Pace your work; give each stitch a moment to settle.
- If yarn twists or puffs, pause and straighten it before inserting the hook.
- Practice with swatches to test tension before starting a big project.
Single Crochet Reminder
Keep stitches even, rows neat, and grip comfortable. Steady tension, counted stitches, and proper turning bring your amigurumi from rough practice to polished toy. The 10 Essential Crochet Stitches Every Amigurumi Maker Must Know isn’t just a list—it’s your toolkit for building confident, cute creations.
Practice Single Crochet Increase Amigurumi
Single crochet increases shape your amigurumi, turning a flat piece into form. Inserting two stitches into a single base stitch creates a wider round that grows outward. Your first practice piece might be a small circle or a simple head to observe how stitch counts affect diameter and roundness. With practice, increases form smooth curves and a predictable fabric. Keep tension steady and count stitches so the shape grows evenly.
If you’re new to increases, mark the first stitch in every round to stay on track. A bright stitch marker helps you see the pattern clearly. As you gain comfort, experiment with different hook sizes for softer fills or sharper curves, depending on the project. The goal is to grow without gaps or holes between rounds, since looseness shows up after stuffing. The 10 Essential Crochet Stitches Every Amigurumi Maker Must Know will help you master increases and see how they influence the final look.
Where to Place Increases for Smooth Shaping
Place increases in a small, repeatable pattern to keep the form natural. Start with a spiral technique and add increases in the same two or three stitches across rounds to keep the surface even. For a rounded head, place increases evenly around the circle every other stitch for several rounds. When tapering into a neck or limb, spread increases more sparsely or shift them toward the center to maintain a sleek line.
For parts like a snout or muzzle, place increases along the bottom edge to push the surface outward gently. For flat surfaces like paws, minimize increases unless you need a small outward bump for definition. Consistency is key; the more you practice placing increases, the fewer jumps you’ll see in the fabric.
As you apply increases, compare both sides for symmetry. If one side grows faster, adjust by skipping an increase on the other side in the next round. The final look will read as crafted, with curves that feel intentional. The 10 Essential Crochet Stitches Every Amigurumi Maker Must Know will shine as you understand how increases shape the toy.
How Increases Change Toy Size and Stuffing Needs
Increases directly control how big your amigurumi gets. More increases per round mean faster growth; fewer increases slow expansion. As the toy widens, you’ll need more stuffing to keep curves full and even. Plan stuffing gradually to avoid distorting curves created by increases.
When starting a new section (head, neck, etc.), tally rounds and stitches to anticipate final dimensions and gauge whether to adjust pattern or starting count. If the piece grows too large, reduce future increases or adjust tension. Visualize the final toy and compare it with your current gauge, tweaking as needed. With practice, you’ll estimate final size from stitch count and keep stuffing neat and lump-free.
Increase Placement Tip
Place increases in a small, repeatable pattern you can memorize. For example, in a head-shaping round, place increases every second stitch for the first few rounds, then every third stitch as you taper. A simple marker helps you see the pattern at a glance and stay on track. Smart placement makes or breaks the silhouette; use even spacing and keep symmetry in check. The 10 essential stitches will shine when every curve sits where it should and stuffing stays neat.
Use Invisible Decrease Amigurumi for Smooth Joins
Invisible decreases help your stuffing flow with the shape you’re building. They create curves that breathe without obvious stair-steps or gaps. Keep stitches tight enough to hold shape but loose enough to let the fabric pull together neatly. Practice on a small piece, then apply the rhythm to wings, paws, or noses. The joins disappear as you go, making your amigurumi look polished from every angle.
When closing a part, think in terms of rhythm, not just rows. Start with a standard decrease, then switch to invisible before the last stitches to tuck the seam away. If you pull too tight too soon, you’ll kink the edge; too loose, and you’ll get gaps. The balance is the subtle artistry of invisible decreases.
If a project has many curved edges, plan decreases from the start. Mark where each invisible decrease will land to keep joins even. A smooth finish reads as professional.
How Invisible Decrease Hides Gaps on Curves
Invisible decreases stitch through the front and back loops, pulling the fabric evenly. This results in a flat seam that reads as one piece rather than a stitched boundary. On curved surfaces, the seam disappears, and the shape reads as continuous.
When you realize you can hide the seam, you’ll use invisible decreases more often. If you see a ridge, ease tension slightly and rework the last stitch. For long curves, count and compare sides to prevent gaps before they appear. The 10 Essential Crochet Stitches Every Amigurumi Maker Must Know is your guide to how these decreases shape final appearance.
When to Switch to Invisible Decrease While Closing Parts
Switch to invisible decreases in the final 3–6 stitches of a piece. If you’re shaping a rounded ear or tail tip, switch a bit earlier to let the fabric relax. A timely switch keeps lines smooth and hides the seam. If you notice puckering near the end, switch early to avoid visible joins. For large curves, plan a gradual shift from standard to invisible decreases to keep tension even.
Decrease Technique Hint
Always pull the yarn snug but not tight when removing the hook. Alternate between front and back post methods to keep the edge tidy. Practicing on a swatch helps you see if the edge stays flat after the final pull. Practice matters more than anything. If you’re stuck, count stitches and rework the last segment with invisible decreases.
Finish Seams with Slip Stitch Join Amigurumi
A slip stitch join can finish amigurumi with a clean, flat look. It’s faster than sewing and puts less stress on the fabric, keeping your work even and cute. Slip stitches are forgiving if tension isn’t perfect, and they work well on quick circles or small limbs. With practice, your amigurumi will look more professional after finishing with slip stitches. A near-invisible seam lies flat and keeps the yarn texture consistent. If you’re worried about visibility, match the yarn color closely or use a lighter shade for guidance.
How Slip Stitch Join Gives a Flat Seam
Slip stitch joins pull the yarn through the neighboring stitch and slip it back, aligning fibers along the surface. This creates a seam that lies flat because tension stays even. It’s a seamless look that reads as continuous rather than stitched.
For extra smoothness, choose a hook size that matches your yarn tension. A slightly larger hook can loosen the edge to lay flat, while a smaller hook keeps stitches tight without puckering. Practice on swatches to hear the fabric sigh into place as the stitch sits flush.
When to Use Slip Stitch vs Sewing Seams
Use slip stitch for a seamless, quick finish on flat areas and round shapes. For precise alignment between parts or tricky colorwork, sewing seams offers control that slip stitches can’t. In practice, start with slip stitch for most parts and switch to sewing for curved joins or complex color changes. Your craft will feel smoother, faster, and your amigurumi will look polished.
Seam Finishing Tip
Keep yarn tension consistent and the hook at a steady angle. Pull snug but not tight, then slide the stitch into place. If the seam feels gap-y, ease the next stitch a touch and re-check alignment. Gently run your finger along the seam to flatten fuzz and ensure an even line.
Add Neat Edges with Reverse Single Crochet Amigurumi
Reverse single crochet creates a tidy, sturdy border that helps your amigurumi hold its shape. As you work around the piece, stitches face inward, producing a clean finish that’s easy to sew closed. The edge sits flat and neat, not ruffled, giving your toy a polished look.
With practice, reverse single crochet becomes natural. You’ll glide around curves and tiny edges, keeping each loop snug but not tight. A small tip: catch just one chain stitch per step so the edge lays evenly along the surface. As you near the end, you’ll see the border frame your work and guide you to the next section.
This edge helps everything stay aligned on tiny appendages or a round head. It acts as a gentle framework, reducing gaps and producing a professional silhouette. The reverse edge elevates your toy’s look, framing the body and making color changes appear deliberate and neat. It also helps hide minor gaps at joins, so your toy reads as one piece.
How Reverse Single Crochet Creates a Sturdy Border
The border’s strength comes from how the stitch sits on the edge. Reverse single crochet forms a compact line that grips outer loops, providing rigidity without crowding. It helps prevent puckering and keeps larger parts smooth. Approach each stitch with a steady hand to mold a straight edge that reads as part of the whole.
On flat edges, the reverse edge is crisp; on curves, it adapts without bunching. The balance of strength and flexibility keeps you moving from one shape to another smoothly. You’ll feel the border doing its job, preserving proportions.
When a Reverse Edge Improves Your Toy’s Look
A reverse edge adds a refined finish. You’ll notice a cleaner silhouette and a more finished face, with borders framing color changes neatly. It helps hide minor gaps at joins so the toy reads as one piece. If you’re adding expressive features, the crisp line around the face makes features pop and look intentional.
Finish with confidence knowing the border frames your work and enhances overall workmanship.
Edge Finishing Trick
Finish the edge by completing the last reverse single crochet, then slip stitch to the first stitch to secure, cut, and weave in the tail. If you’re worried about leftover yarn, weave the end along the edge before hiding it. For extra firmness, go around again with a lighter reverse stitch. This creates a consistent, straight border even on bumpy shapes.
Use Half Double Crochet Amigurumi for Texture
Half double crochet (HDC) gives a softer, blockier texture than single crochet. The fabric breathes a bit more, helping stuffing settle without showing through tiny gaps. HDC adds body and can grow faster per row, which is helpful for limbs or heads needing more mass. It also introduces subtle texture without bulk, creating a gentle rib that reads well in photos and in hand.
Using HDC can prevent overly tight rounds that resist stuffing, and makes shaping easier for torsos, arms, and legs where you want gentle curves rather than sharp lines. The 10 Essential Crochet Stitches Every Amigurumi Maker Must Know stays relevant as you test stitches and their effects on texture and overall appearance.
How Half Double Crochet Changes Fabric Drape
HDC fabrics drape more than tight SC fabrics, offering a softer silhouette and fewer rows to reach the same measurement. When you switch from SC to HDC, edges relax, letting you position limbs more naturally. HDC can keep seams smooth and reduce stuffing show-through, contributing to a polished look. Try a swatch in both stitches to feel the difference.
When to Swap Single for Half Double Crochet in Patterns
Swap SC for HDC when you want more texture without bulk. Use HDC on torsos for a gentler line or on cheeks for subtle fullness. If yarn thickness changes, HDC can prevent stiffness while preserving gauge. Start with small sections to judge the texture impact before rewriting an entire pattern. Remember to adjust tension as needed; HDC sits a touch looser, so you may need to tighten a bit or size down the hook.
Texture Swap Tip
For a quick texture boost, swap to HDC on surface rounds like cheeks or top edges, then revert to SC for the rest. Create a tiny practice square in both stitches to compare before committing. You’ll see how HDC changes tension and color pooling, helping you decide where texture makes your amigurumi livelier.
Use Half Double Crochet Amigurumi for Texture (Continued)
Continuing with HDC for texture keeps projects cohesive, giving a soft drape across different parts. A touch of HDC around cheeks or mouth can add a friendly vibe without shouting texture. If a pattern fights rigidity, swap back to HDC on specific rounds to soften lines. The 10 Essential Crochet Stitches Every Amigurumi Maker Must Know reminds you that stitch choice shapes the final appearance and feel. The right texture makes your toy inviting and cuddly.
Read Patterns and the Crochet Stitch Glossary Amigurumi
Reading patterns becomes easier when you know the stitches. A pattern is a map, and the stitch glossary is your legend. Abbreviations, gauge notes, and special instructions tell you where to place each stitch. Keep a gloss handy to check terms quickly, saving time and avoiding mistakes. The glossary helps you learn essential stitches faster and gives you confidence to tackle new patterns. The 10 Essential Crochet Stitches Every Amigurumi Maker Must Know is your starting point and quick reference.
How You Track Stitch Counts in Amigurumi Crochet Stitches
Stitch counts are your project’s heartbeat. Count as you go, especially in rounds. Start cleanly, maintain a steady pace, and correct gently if you lose track. Mismatches often show up as a loose edge or a wonky seam, so tracking counts early keeps you on track.
Use a method that fits your style: markers every 10 stitches, or a tally on paper. The key is consistency—use the same method on every round. Double-check your total when you finish a round. If a pattern calls for increases or hidden stitches, mark them so they don’t slip away. Tracking counts makes rounds predictable and keeps your amigurumi symmetrical and snug.
Why a Stitch Glossary Helps You Learn Essential Stitches for Amigurumi
A stitch glossary is your pocket guide. Each entry explains a stitch and where it belongs in a pattern. For beginners, it replaces guesswork with clear, repeatable steps. The glossary helps you understand pattern rebasing and recognize common stitches you’ll see in many patterns. The 10 Essential Crochet Stitches Every Amigurumi Maker Must Know becomes your foundation, showing you how these basics show up again and again. With a solid glossary, you become a more independent maker who can tackle new designs with less fear.
Pattern Reading Tip
When reading patterns, skim for gauge, materials, and overall shape. Then dive into stitch instructions and counts. If you encounter an unknown term, check the glossary before proceeding. Keeping a small cheatsheet nearby helps you stay in the flow. The best patterns reward patience with clearer steps and fewer fiddly stitches.
Troubleshoot Amigurumi Crochet Stitches and Shaping
If your amigurumi isn’t cooperating, start with tension. Too-tight stitches yield puckers; too-loose stitches create gaps. Maintain a comfortable grip and consider a smaller hook if rounds push or pucker, or a larger hook if fabric stays stiff. Shaping comes from controlled decreases and increases, so map where you add or reduce stitches across rounds. Compare crown and body shapes to keep proportionality, and adjust starting rounds or the pace of increases as needed.
Gaps between rounds usually come from inconsistent tension or finishing rounds too tightly. If you see gaps, snug the loops gently and continue. For more serious shaping issues, adjust turning chain height or skip the chain in certain rounds. Keep a notebook of where tighter or looser stitches occurred to replicate fixes later. The goal is a smooth surface and true-to-pattern shape.
If your amigurumi looks flat where it should curve, try adding an extra increase or a decrease earlier to shape better. Map pattern sections like shoulders, hips, and cheeks, and don’t fear frogging a small section to rework tension or hook size. Small tweaks can transform a flat piece into three-dimensional charm. The 10 Essential Crochet Stitches Every Amigurumi Maker Must Know will guide you as you refine technique.
How to Fix Common Gaps, Loose Ends, and Uneven Rows
- Gaps: tuck tails inside and snug the working yarn; ensure you’re turning correctly.
- Loose ends: weave securely and trim close to fabric.
- Uneven rows: adjust tension or hook size; ensure you’re not skipping stitches when turning; use a swatch to test.
- Hook/yarn changes: test a swatch to decide if you need a different hook size or yarn type.
When to Adjust Hook Size or Yarn for Better Shaping
If the fabric seems mushroomed or lacks defined shaping, switch hooks. A smaller hook gives crisper stitches for tiny parts; a larger hook helps when fabric is too stiff or when using thick yarn. If your piece is overly puffy, try a smaller hook; if too flat, switch to a larger one. Consider yarn type as well; some yarns tighten more than others. Smooth or plied yarns hold shape better; fuzzy yarns may require a larger hook to maintain stitch visibility. For lots of small increases, lighter yarn with a smaller hook can help. For large rounded parts, a loftier yarn with a sturdy hook can keep curves smooth.
Quick Troubleshooting Guide
- Check tension: make small adjustments to tension and hook size.
- Gap control: snug loops gently and avoid skipping turns.
- End weaving: secure ends inside with a blunt needle and trim flush.
- Shape fixes: adjust increases/decreases by 1–2 stitches and rework.
- Hook and yarn swap: swatch first to pick the right combination.
The 10 Essential Crochet Stitches Every Amigurumi Maker Must Know is your ongoing reference for building confident, cute amigurumi. Use these stitches as your toolkit, and your projects will look polished, balanced, and ready for gifting.

Clara Fern — Crochet Artist & Amigurumi Designer
Clara Fern is a crochet artist and amigurumi designer based in Austin, Texas. With 9 years of experience working with yarn and hook, she transformed a lifelong passion for handcraft into a creative mission: making amigurumi accessible, fun, and deeply rewarding for crafters of all levels.
Clara discovered amigurumi during a trip to Japan in 2017, where she fell in love with the art of bringing tiny characters to life through crochet. Back home in Texas, she spent years studying color theory, design principles, and advanced crochet techniques — developing her own signature style that blends kawaii aesthetics with original character design.
Through maclafersa.com, Clara shares everything she has learned — from choosing the right yarn and reading your first pattern, to designing fully original amigurumi characters from scratch. Her writing is known for being clear, detailed, and genuinely helpful, with no steps skipped and no secrets kept.
When she’s not crocheting, Clara enjoys watercolor painting, visiting local yarn shops, and drinking way too much coffee while sketching new character ideas.


