
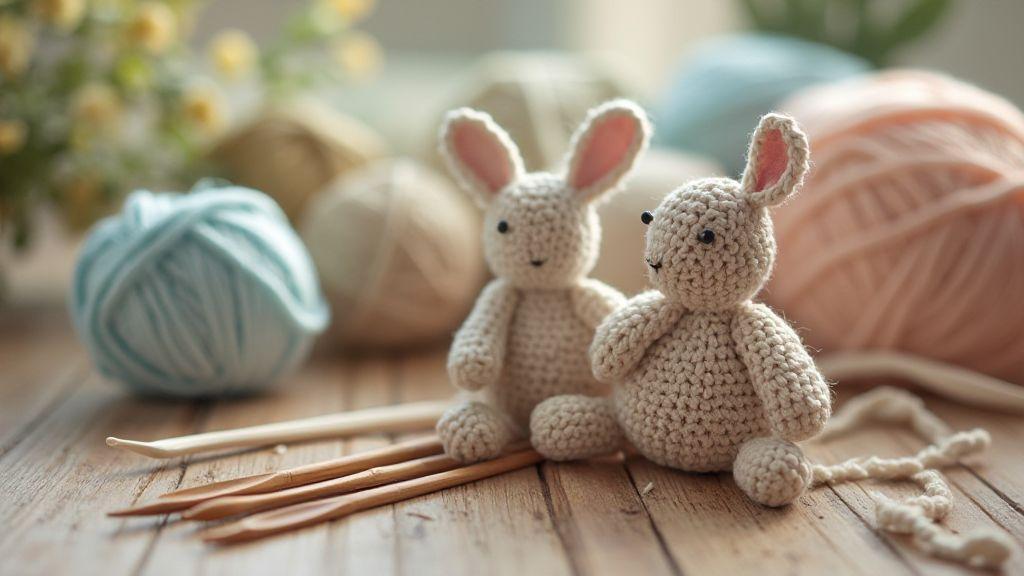
Hook Size and Gauge Basics
Understanding Why Hook Size Matters More Than You Think in Amigurumi helps you craft a smooth, firm finish. The hook size interacts with your yarn’s personality, and gauge is the rhythm you keep while you work. Different yarns behave differently with the same hook; a thicker yarn usually needs a larger hook to prevent gaps, while a finer yarn may require a smaller hook for tight stitches. Always check the yarn label for the recommended hook size and swatch to confirm, adjusting as needed.
Consistency is key for a predictable fabric, so stuffing sits right and seams connect neatly. Start with the recommended hook size, then compare your swatch. If needed, go up or down a hook size. Once you nail the balance, your projects flow more smoothly and look professional.
How hook size sets your gauge
Your hook size determines how many stitches fit in a given measurement. A smaller hook makes tighter stitches; a larger hook makes looser stitches. This is your gauge, and changing hooks changes gauge even with the same yarn. To stay on pattern, match the pattern’s gauge or intentionally adjust and document the change for future projects.
If stitches are too tight, the fabric and stuffing feel stiff; if too loose, you’ll see gaps. Fix by adjusting the hook size and testing with a swatch. You’ll quickly learn how a single hook change shifts the whole fabric.
Read gauge with a swatch
A swatch is your best friend. Crochet or knit a small square with your planned hook and yarn, following the pattern’s stitch count. Measure and compare to the gauge. If it’s off, adjust before committing to the full toy. Keep notes: hook size, yarn, and rounds used. When you reproduce the gauge, you’ll finish faster with fewer surprises.
Stitch Tightness for Amigurumi
Stitch tightness dictates how your Amigurumi shapes hold together. Consistently tight stitches keep the fabric firm and reduce gaps that reveal stuffing. Develop a rhythm: pull, count, recheck. The aim is a steady fabric that holds form without puckering. As you practice, you’ll adjust tension for different parts—firm for a head, flexible for limbs, plump for the body.
Tight stitches also improve seam concealment. They help color changes and joins look seamless and reduce loose ends snagging. A durable, evenly tight fabric resists wear, keeping your finished toy looking crisp through play.
Read your work like a map. If you notice gaps or flopping stitches, adjust your grip and yarn flow. With practice, you’ll know where your tightness should land for each toy part.
Small hooks make tight stitches
Smaller hooks let you wrap yarn snugly, producing denser stitches. They help your fabric stay firm and reduce air pockets. Start with a hook slightly smaller than you’re used to to train your hands for close, even stitches without sacrificing comfort. If stitches loosen, try a touch smaller hook and adjust your grip.
Tight stitches hide stuffing
Tight stitches keep stuffing in place. They prevent lumps and keep seams neat across round heads or blocky bodies. If stuffing shifts or becomes visible, your stitches may be too loose or tension uneven. Tight stitches give you a predictable surface for precise stuffing.
Yarn and Hook Compatibility
Choosing yarn and hook that work well together is essential for a tidy Amigurumi. The goal is a fabric that’s tight enough to hold shape without feeling stiff, and comfortable to crochet. The right pairing also helps stuffing look smooth and details pop.
You’ll notice yarn weight and hook size are closely linked. A heavy yarn with a tiny hook tightens; a thin yarn with a large hook loosens. Check both to keep proportions right. Texture matters too: soft, fuzzy yarns can hide mistakes, while slick yarns reveal them. Your yarn-hook compatibility sets the stage for a clean, charming finish.
Match hook to yarn weight
Align hook size with the yarn weight. With medium yarns (category 4), start with the label’s suggestion. Too small a hook stiffens the fabric; too large makes shapes blur. Test and adjust to find a comfortable, precise fit.
Use yarn labels and charts
Always read the yarn label: recommended hook size, weight, yardage, and care. Use the chart on the label or manufacturer’s online chart to pick a starting hook. If you switch yarns within a project, re-check the chart to stay consistent.
Test with the yarn you will use
Test with a swatch for each yarn to confirm gauge and texture. Tiny parts like eyes and ears may require adjustments for that specific yarn and part.
Fabric Density and Toy Durability
Fabric density directly affects durability. Dense fabric wears less because fibers Are packed, reducing snagging and loose threads. If you want a toy that survives hugs and rough play, opt for denser fabric or tighter stitches. Balance is key: too dense can make the toy stiff; too loose weakens seams. Test by gently tugging seams to ensure they stay put.
Dense fabric lasts longer: it resists pilling, keeps shape, and sustains seams after months of play. The trade-off is potential stiffness, so choose a yarn that balances strength with softness. Test a small patch to evaluate how density feels in real life.
Dense fabric acts like armor, protecting the stuffing and keeping form. As you gain confidence, you’ll learn which yarns deliver the right density for your look without sacrificing softness.
Dense fabric lasts longer
Dense fabric resists pilling, holds its shape, and keeps seams tight after months of play. It’s especially beneficial for high-handling pieces like keychains. The downside is that stuffing may be harder to compress; pick a yarn that offers both strength and softness and test a small patch first.
Loose fabric stresses seams
Loose fabric shifts stuffing and can cause gaps at seams, especially in tiny parts. Slightly smaller hook or a denser stitch pattern can keep edges neat and strong.
Smaller hooks increase durability
Smaller hooks tighten stitches, packing the fabric more densely and keeping seams closed. Don’t go too small, or you’ll fight with the yarn. Find a balance with a swatch: neat, tight stitches that remain soft.
Stuffing Visibility and Hole Size
Control stuffing visibility and hole size to keep the finish clean and plush. Holes should be just big enough for fiberfill and small enough to hide it once the seam is closed. A quick check from multiple angles helps ensure stuffing stays tucked in.
If wisps peek out, you’re overstuffing or the hole is too large. If the piece looks flat or the seam is loose, you may need more stuffing or a tighter reach through the hole. Practice with small adjustments to keep stuffing hidden and the body shaped.
Think of the hole as a doorway. A doorway too wide lets stuffing peek out; too narrow makes it hard to fill. Tiny adjustments in hole size and tension can dramatically improve the final look.
Big holes reveal fiberfill
Big openings invite stuffing to show. Keep openings small enough to hide stuffing, yet large enough to push in enough material for a solid shape. For light or fuzzy yarns, big holes are riskier as fibers can stick out. A tighter hole and careful finishing help.
Tight stitches prevent fuzz showing
Tight stitches seal seams and keep fuzz from escaping through the seam. If you see looseness, tighten a bit and re-seal in small increments. Consistent tension yields a smoother finish with less visible fuzz.
Adjust hook to hide stuffing
Use a hook that fits your yarn and preferred stitch but doesn’t leave large holes. A slightly smaller hook can help you pull stuffing into the body without widening the opening. Practice with a sample to confirm the hook size and tension work together.
Safety and visibility checks
Always test with a tiny sample to ensure the hook size and tension hide stuffing. The more you experiment, the more consistent your results will be across projects.
Safety rules: Hook size and child toys
Safe Amigurumi starts with the right hook size and design. A too-big hook can rush stitches and loosen the toy; a too-small hook can overwhelm yarn and obscure details. Keep joints secure and seams tight to prevent small parts from loosening. Check for gaps as you sew and before finishing—the safer path is a snug, well-made toy.
Small gaps are your red flags
In Amigurumi, every seam and stitch matters because kids tug and explore. Tiny gaps can allow parts to slip or stuffing to show. Keep seams tight and inspect joints to prevent hazards.
Firm fabric reduces choking risk
Dense fabric reduces the chance of small parts becoming exposed. If fabric sags or gaps appear, adjust tension or add stitches to secure the area.
Use smaller hooks for safe toys
Smaller hooks help you pull tight stitches, closing gaps and securing joints. For eyes, ears, or noses, use small hooks to keep parts firmly attached. Test by pulling lightly on each part to ensure everything stays put with your chosen hook size.
Stitch Definition and Surface Look
Stitch choice shapes texture and overall vibe. Tight, compact stitches yield a dense surface; looser stitches reveal more of the yarn’s character. The surface look—whether bumpy or smooth—depends on tension and the number of stitches per row. Your stitch choice sets the stage for how the project will feel and look when finished.
Different yarns behave with different stitches. Plush yarns may require tighter stitches to hold shape, while thinner yarns can look airy with looser tension. Your surface look reflects your control, hook, and how you pull through each loop. You guide the finished feel from start to finish.
Bigger hooks show texture
A bigger hook creates more yarn per stitch, producing noticeable texture—great for fur, scales, or chunky fabric. The rough surface can also hide mistakes. Don’t overdo it; too-large hooks can distort proportions. If needed, switch to a smaller hook later to tighten up the piece.
Smaller hooks make a smooth surface
Smaller hooks yield compact stitches that sit flush, giving a smooth surface. This works well for rounded faces, small paws, and clean joins. Maintain tension so you don’t lose flexibility or create gaps.
Pick hook for the look you want
Hook size should match the desired look. If you want bold texture, use a bigger hook; for a sleek surface, choose a smaller one. It’s common to switch hooks between parts to balance texture and smoothness. Do a quick swatch to confirm your tension and look before committing to a full project.
Adjusting Patterns for Hook Size
Hook size changes the overall appearance of your Amigurumi. If your gauge is off, stuffing may show or the toy may look undersized or oversized. You’ll learn to adjust patterns to achieve the intended size while keeping stitches tight and shapes rounded.
Start with a practical hook choice; if stitches are loose, move to a smaller hook. If stitches are too tight, switch to a larger hook. Keep a toolkit handy—several hooks, a stitch marker, and a note pad. Test gauges and document what works. Patterns become flexible and easier to tailor to your hands and goals.
Change hook to match gauge
Pattern gauges often appear as 8 dc = 1 inch or similar. If your swatch is looser, switch to a smaller hook; if tighter, switch to a larger hook. Test until your swatch matches the pattern’s gauge on average. This helps your Amigurumi stay the intended size.
Recalculate rows and rounds as needed
Gauge changes affect how many rows or rounds you need. A larger hook may require more rounds to reach the same height; a smaller hook may require fewer. Trace the pattern’s measurements, compare to your swatch, and adjust accordingly. Document changes for future projects.
Keep notes when you modify patterns
Document every tweak: new hook size, added or removed rounds, gauge target, and why you changed it. Notes become a personal adjustment playbook you can reuse, making future Amigurumi faster and more consistent.
Tools, Hook Brands, and Consistency
Start with the right tools to keep Amigurumi neat and durable. Choose a comfortable crochet hook and have a few sizes on hand. A case keeps hooks organized, and a small file helps smooth rough tips. Consistency in tools translates to consistency in results; stick with brands you trust once you find them.
Brands and materials change feel
Different brands and fiber contents change how your hook feels with the yarn. Test a few combos on a small sample to find the pairing that gives you the look you want. Some hooks wear differently; replace worn hooks to maintain gauge and symmetry.
Measure hook mm, not US sizes
Hook sizes in millimeters give a true measure of how the tool will behave with a given yarn. If you’re between sizes, test with a gauge swatch to ensure even stitches and steady gauge. The mm measurement reduces guesswork and helps keep your final toy consistent.
Replace worn hooks to hold gauge
A worn hook can alter yarn movement and throw off gauge. Replace any hook with a rounded tip or nicked shaft to maintain uniform rows and consistent gauge.
Why Hook Size Matters More Than You Think in Amigurumi
Why Hook Size Matters More Than You Think in Amigurumi is the key to density, surface look, and overall finish. The right hook size keeps rounds flat and edges neat, crucial for tiny limbs and round heads. When you choose the correct hook size for your yarn, your Amigurumi achieves consistent size, shape, and durability from start to finish.

Clara Fern — Crochet Artist & Amigurumi Designer
Clara Fern is a crochet artist and amigurumi designer based in Austin, Texas. With 9 years of experience working with yarn and hook, she transformed a lifelong passion for handcraft into a creative mission: making amigurumi accessible, fun, and deeply rewarding for crafters of all levels.
Clara discovered amigurumi during a trip to Japan in 2017, where she fell in love with the art of bringing tiny characters to life through crochet. Back home in Texas, she spent years studying color theory, design principles, and advanced crochet techniques — developing her own signature style that blends kawaii aesthetics with original character design.
Through maclafersa.com, Clara shares everything she has learned — from choosing the right yarn and reading your first pattern, to designing fully original amigurumi characters from scratch. Her writing is known for being clear, detailed, and genuinely helpful, with no steps skipped and no secrets kept.
When she’s not crocheting, Clara enjoys watercolor painting, visiting local yarn shops, and drinking way too much coffee while sketching new character ideas.


