
Why you should learn how to make a magic ring
Learning the magic ring is your first step to clean starts and tight stitches in amigurumi. A snug center makes rounds sit flat, shapes stay sturdy, and small parts like ears, noses, and paws look professional. Mastering the pull to close the loop reduces gaps and gives you confidence to experiment with different yarns and hooks. It also speeds up starts, letting you focus on crochet as you build your project.
With a solid magic ring, you’ll spend less time fiddling with starts and more time crocheting, which means quicker projects and fewer frustrations, even on intricate details. The center stays closed, so your piece looks polished from first stitch to last and you won’t end up with a telltale hole.
How it helps your amigurumi fit tight
A tight start keeps your amigurumi compact as you add pieces. The center closes well, so your first round sits near the core, reducing gaps along the belly, head, or limbs. A closed center also helps your stitches stay in place, supporting the intended size of the final piece.
As you work, that steady beginning keeps yarn tension consistent. A firm start makes it easier to maintain even fabric and neat edges throughout the project.
Faster starts for small pieces
Small pieces benefit from a quick, clean start. The magic ring eliminates a fiddly center, so you can shape tiny parts like eyes, ears, or paws sooner. This momentum translates to more projects finished with less frustration at the start.
Quick benefits summary
- You get a near-perfect, tight center.
- First rounds hug the core, reducing gaps.
- Small parts start faster with less fiddling.
- Overall project flow improves and pieces look cleaner.
Tools and yarn choices for crochet magic ring for beginners
Your toolkit matters as much as your hands. Start with a comfortable hook size that fits your yarn and grip—the right hook helps stitches sit neatly. For beginners, a familiar, smooth hook helps you focus on technique rather than tool handling.
Yarn choice can change the feel of your ring. Finer yarns give a tighter center; bulkier yarns create a chunkier circle and can be more forgiving as you learn. A medium-weight yarn (worsted) with a medium hook is forgiving and easy to grip. Test a few stitches to ensure smooth tension when you pull through.
Also consider the yarn’s feel: choose fibers that behave predictably—no fibers that shed into the loop. A slightly shiny yarn can improve visibility of stitches; a matte finish may feel softer. Pick a yarn that helps you see the stitches clearly and stays comfortable in your hands.
Pick the right hook size
For a first magic ring, pick a hook size that matches your grip and makes stitches visible. A common starting point is 3.5–4.0 mm for DK to worsted weight. If stitches look loose or the ring slides, try a smaller hook; if they’re too tight to insert, try a larger hook. Consistency matters: once you find a size that feels right, use it for the entire ring. A quick gauge test helps confirm stitch size before you proceed.
Choose yarn weight and fiber
For absolute beginners, a medium-weight (worsted) yarn is a smart starting point. If you prefer a lighter feel, DK weight can work with a smaller hook. Cotton fibers give a sturdy, durable center that closes tightly. Acrylic blends are friendly on the hands and offer a wide color range to help you see stitches. Whichever you pick, aim for smooth yarn that moves through your hook without shedding into the loop.
Simple materials checklist
You’ll need:
- A crochet hook in your chosen size
- Your yarn
- A yarn needle for weaving ends
- Small scissors
Optional: a stitch marker to track rounds
End of materials checklist note: with these basics, you’re ready to start practicing How to Make a Magic Ring: Step-by-Step for Absolute Beginners, and you’ll see confidence grow quickly.
How to Make a Magic Ring: Step-by-Step for Absolute Beginners
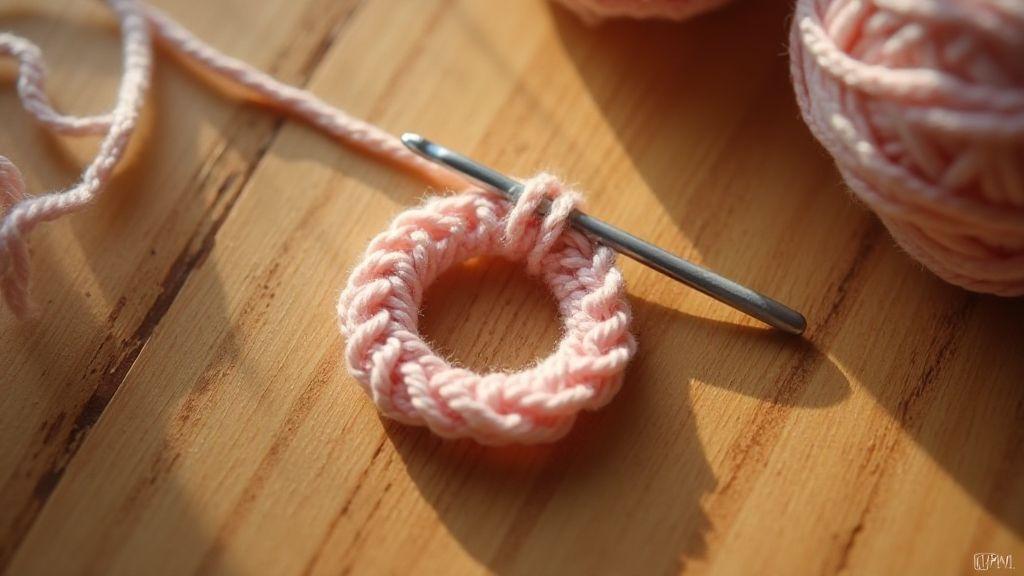
Starting with a magic ring lays a strong foundation for a toy that lasts. Form a loop with your yarn, hold the loop so the working yarn rests over your finger, then chain a few stitches. The tail end should be pulled to close the center tightly as you add your first round. Stitch around the loop, tightening again to close the hole, creating a tidy center that won’t gape as you add more rounds. Your first attempt may feel awkward, but practice builds accuracy and speed.
As you progress, count stitches and keep tension even. Switch to a longer chain to start your first round, and watch the small blob become round and shapable. Don’t chase perfection initially—focus on consistency. With practice, your ring becomes snug, and you’ll move into increases and stitches around the ring with ease.
How to form the loop
Create a small loop with your working yarn. Chain one to secure the loop, then insert your hook into the loop, yarn over, and pull through. Repeat until you reach the pattern’s required number of stitches. The loop lets you pull from the inside, keeping the center closed as you work.
As you stitch, the loop may tighten slightly. Maintain even tension and avoid distortion. If the ring loosens, tug the tail to re-close it before finishing the round. With practice, you’ll insert, yarn over, pull through, and maintain steady tension.
Where to place your first stitches
Place your first stitches directly into the center of the ring. For single crochet, insert into the ring, yarn over, pull through, yarn over again, and pull through both loops. Repeat until you reach the pattern’s stitch count. The center should feel like a tight pocket that anchors the round. You’ll know you did it right when you can pull the tail and keep the ring compact.
If needed, adjust stitches toward the center as you go to keep them evenly spaced around the middle. When you finish the round, pull the tail to close the center and fasten off if required. The center should be nearly invisible and the stitches flat without puckering.
Easy start sequence
Start with a slip knot and your hook ready. Make a small loop in the working yarn, hold it, chain one to secure, then insert your hook into the loop and begin your first stitch. Usually 6–12 stitches for a basic starter. When done, gently pull the tail to tighten the center, and your ring should close cleanly with a neat, barely visible hole.
If you’re new, keep the start simple: count as you go, don’t rush. A steady pace helps you keep even tension and a tidy center. With practice, you’ll produce perfect little rings that snap into place.
Step-by-step magic ring basics
The magic ring basics focus on a tight, centered start. With the ring, you pull the loop closed after placing stitches, ensuring no hole in the center. Your goal is a smooth, nearly invisible center that sits flat as you build rounds outward. Begin with a steady rhythm: form the loop, hold it, chain once or twice, insert the hook into the loop, and crochet. Tighten the loop at the end to close the center further. If the center is loose, tug the tail and the working yarn together until the hole disappears.
Remember: the first stitches form the foundation. If the stitches aren’t even, pause, reseat, and rework the loop. A tight center and even stitches separate beginners from pros.
How to form the loop
- Create a small loop with your working yarn.
- Chain one to secure.
- Insert your hook into the loop, yarn over, and pull through.
- Repeat until you reach the pattern’s stitch count.
- The loop lets you pull from the inside, keeping the center closed.
Where to place your first stitches
- Place your first stitches into the center of the ring.
- For single crochet, insert into the ring, yarn over, pull through, yarn over, and pull through two loops.
- Repeat until you reach the required stitch count.
Easy start sequence
- Slip knot, loop, chain one, insert hook, begin stitches (6–12 for starter).
- Pull tail to close center, ring sits neat.
How to form the loop (additional tips)
- Keep fingers steady as you pull the tail to close the loop.
- If the center is loose, tug the tail and working yarn together.
- Hold the center with your thumb while you pull the loop tight for stability.
Where to place your first stitches (extra notes)
- Start stitches in the ring’s center for anchor stability.
- If needed, shift stitches toward the center to keep rounds even.
- After finishing the round, pull the tail to close the center and weave if required.
Easy start sequence (extra tips)
- Begin with a calm pace, count as you go, and avoid rushing.
- A deliberate start yields consistent tension and a tidy center.
Tight magic ring technique for neat rounds
A tight magic ring keeps amigurumi neat from the first stitch, helping rounds lie flat and reducing gaps where stuffing could peek through. Practice wrapping around your yarn and hook, then close slowly to avoid a loose edge. Maintain steady tension—not too tight to impede stitches, not too loose to wobble. A tightly closed ring hides joins and keeps the fabric smooth as you add more stitches.
If you notice a hole peeking through, tug the tail while you close the ring and ensure the center is compact before the first round. With practice, increases sit cleanly and rounds stay flat. A well-tied ring also minimizes stuffing show-through later.
Keep technique consistent: avoid changing grip or tension mid-project. Time yourself on a practice swatch: after three rounds, check for a tight center and adjust your grip if needed. The goal is uniform fabric around the circle, not a bumpy center. Nail the tight magic ring and your amigurumi looks polished.
How to pull the loop tight
- Wrap the yarn around your hook once, insert through the loop, and draw the working yarn through.
- Keep the tail tucked and pull evenly so the loop closes without pinching.
- If the loop slips, re-grip and pull slowly and steadily.
- Hold the center with your thumb while pulling the loop tight for a clean finish.
When to use a tight ring in amigurumi
A tight ring is essential for round parts like heads, bodies, and limbs that need a flat base. It reduces gaps and keeps stuffing from showing. It also makes seam blending easier later, as rounds stay compact. With bulkier yarn or a larger hook, a tight ring is even more valuable to keep the core stable.
Secure closing trick
To secure closing, insert the hook into the first stitch of the round and pull the running thread through, weaving the end to the inside. Tug the tail to cinch the ring fully closed and anchor the end. This helps the center stay tight as you stuff and continue stitching.
Magic circle crochet vs slip knot starts
Crochet amigurumi starts often come down to choice: the magic circle or the slip knot start. The magic circle creates a tight center; the slip knot can be quicker and simpler at times. Both work, but the choice affects the center’s look and tension control as you go. For a neat crown, the magic circle is usually better. If you’re learning or in a rush, the slip knot start can feel friendlier.
For beginners, the magic circle may seem tricky at first, but it pays off with a closed center that hides the yarn tail. The slip knot start is forgiving when you’re just getting comfortable with hooks and loops, and rounds lie flat quickly. You can mix starts depending on the piece. The magic circle works best where the center must disappear, while the slip knot start suits quick practice or teaching. Know both to switch as needed.
Why the magic circle gives a closed center
The magic circle locks in tight control from the first rounds, creating a compact, nearly invisible hole. This closed center makes your amigurumi look polished and provides a stable base to build outward.
When a slip knot is easier
A slip knot start shines for speed or when you’re new to crochet. It’s forgiving for beginners who are still learning loops and tightening. The center may not close immediately, but you’ll gain confidence quickly. If you’re teaching or working on many small parts, the slip knot start reduces mental load. You might adjust later for a flawless center, especially for pieces that sit flat.
Pick the right start
Choose based on the piece and your comfort level. If a perfect, invisible center and durable base are priorities, use the magic circle. If speed or teaching is key, a slip knot start is smart. Practice both so you can switch without losing time.
When you start a project, read the pattern’s notes on starts first. If it calls for a closed center, choose the magic circle; if it emphasizes quick setup, the slip knot start might be best. You can even test both on a small swatch to feel the difference before committing.
How to Make a Magic Ring: Step-by-Step for Absolute Beginners (revisited)
To begin with the magic ring, form a loop with your working yarn and crochet into that loop. Your first stitch goes into the loop, not the chain. Crochet a set number of stitches into the loop, then pull the tail to tighten. The goal is a snug center that closes as you begin building outward. If you’re following a pattern, this starting point is commonly used to keep the center neat and compact.
As you continue, slip stitch or chain into place as directed, then begin the next round outward. Mastering the magic circle helps your toy feel polished and professional as you add stuffing and shaping. For yarn beginners, this method gives a clear, repeatable starting point with payoff as the piece grows.
How to Make a Slip Knot Start
With a slip knot start, form a loop with the working yarn but don’t pull tight before you chain or begin stitches. Work your first stitches into the loop’s hole, and tension is more controllable as you build. The loop remains adjustable, so you can tighten later if the center feels loose. This method keeps things simple for beginners still getting a feel for tension and stitch placement.
Practice small starts, then assess how the fabric lays. If you see gaps or loose spots, adjust your grip and pull a bit tighter next round. The slip knot start is forgiving and helps you gain confidence fast to tackle more complex forms later.
Magic loop crochet for larger rounds
For larger rounds, the magic loop (adjustable loop) starts and closes cleanly, keeping stitches tight and neat. The starting circle becomes nearly invisible with practice, and stitches stay evenly tensioned as the project grows. This method is a game changer if you’ve struggled with gaps in the center.
Benefits include control and consistency: a clean center and the ability to tighten after weaving in ends. For bigger rounds, you won’t waste time fixing gaps or pulling stitches tight. Maintain a steady pace, count stitches, and keep your work flat and round.
Spread more stitches evenly
- Start with a slightly larger magic loop and more stitches in the first round to create a wider base.
- Keep loops loose enough to slide your hook but tight enough that the center doesn’t collapse.
- Space stitches evenly and rotate your work so each stitch sits in its own pocket.
- Mark the first stitch of each round to check alignment before closing the round.
As rounds grow, you may loosen grip slightly to place stitches more evenly without collapsing the center. This pays off in smooth transitions and uniform rounds.
Adjust loop size for big pieces
For large pieces, use a loop just a touch larger than your usual start. The looser loop helps you maneuver and place stitches evenly. If the center pulls in, loosen the initial loop and rework the first rounds. If the edge is wavy, tighten the loop a bit. Treat the loop as a living part of the project and tweak as you grow. Avoid a one-size-fits-all approach; adjust after a few stitches and re-evaluate.
Loop placement tips
- Place the loop in the middle of your starting chain to center your first stitches.
- Hold the loop with enough tension to stay put, but not so tight you can’t slide your hook.
- Pull yarn through steadily; quick pulls can warp the center.
- If the ring feels loose, give the loop a final tug after the first few stitches.
- Use a stitch marker to track your first stitch.
Troubleshooting your magic ring
If your magic ring isn’t behaving, focus on the center and tightening the first rounds. A solid center makes the rest of your stitches sit neatly, and you’ll count more easily when you start in the right place. You’ll become quicker at recognizing issues and won’t waste time undoing many stitches. Keep a calm rhythm and you’ll see progress fast.
Fix a loose center quickly
Insert your hook into the center, yarn over, and pull a small loop through to tighten. Then work the first round tightly, but not so hard you distort stitches. If the center still looks loose, rework the first few stitches with a touch more tension. The center should lie flat and the stitches hug the ring. If the ring won’t stay closed, try pulling the last stitch a bit more before closing.
Untwist loops and count stitches
Untwist loops to keep them from crossing as you tighten. If loops are twisted, reposition them so they lie flat before inserting the hook. Count stitches carefully as you go, pausing after a few stitches to confirm counts. If a stitch is missing or twists occur, reset and restart with a clean center.
Common fixes you can try
If stuck, re-tighten the center, re-count stitches, and confirm you’re using the correct stitch count. Beginners benefit from checking the first round after a few stitches. If a loop looks loose, rework just that area with a tiny extra tug. If the center still looks off, remake the magic ring—often faster than salvaging a poorly tightened center.
Using the magic ring in amigurumi
Begin with a careful, deliberate start to build a clean, compact core. When the ring is tight, your stitches stay close and the center doesn’t puff, giving your plush toy a neat look from the first round. Practice a few slow rounds to feel the difference in tension. Your goal is a smooth start that forms a strong base for what follows.
As you gain confidence, your work will grow evenly outward, making shaping easier as you add rounds or color changes. If a ring feels loose, gently tug the center after finishing the first round to set the pace. Your future projects will look cleaner because you started with a careful, deliberate approach.
Start heads, eyes, and paws cleanly
Begin with a clean, tight circle so heads stay round and center stitches don’t peek out. Hug the ring with the first rounds, then pull the ring to close the center as you go. When placing eyes and facial features, use a secure technique to prevent loosening over time. A firm back loop or small pad behind the fabric helps keep expressions steady.
For paws, use the same tight start for consistency. Repeat the same number of stitches into the ring for uniform paws. If you’re changing colors, secure the end of the last color before switching to keep edges neat.
If you notice gaps around stitches, tighten a little more on the next round. Early correction is easier than fixing a wobble later. Clean stitches around the face and paws enhance the overall lifelike feel.
Close and stuff without gaps
Close the ring for a tight, invisible finish. Stop before over-tightening, then tuck the end into the stitches. A secure center helps the last rounds stay in place as you stuff. If you see a tiny gap, weave the end through nearby stitches to seal it, but avoid overdoing it.
Stuff gently to balance fullness: not too firm, not too soft. Pack in small amounts and ensure the form holds its shape. When satisfied, secure the last stitch and weave the end neatly into the body. Your amigurumi will hold its pose.
Finish and weave in ends
Finish with a neat, invisible anchor. Weave the end through several stitches in a zigzag pattern, then snip close to the fabric without cutting the yarn you’re keeping. Tuck multiple ends securely into nearby stitches to avoid color flares along the edges. Blend the final tails into surrounding stitches for a polished finish.
Find the best crochet magic ring video and tutorial
Look for videos that cover basics—how to hold your hook, where to place the first stitch, and how to close the ring without twisting. A good tutorial shows both the traditional method and a no-slip variant, with clear close-ups on the yarn entering the ring, stitch counts, and end security. Captions help if your eyes drift, and a patient presenter who explains mistakes and fixes is invaluable.
Prefer creators who pause to let you mimic the move, then resume. Replays at slower speeds and quick recaps after each section can save time. A stitch marker demonstrated on screen is a plus, as is guidance on when to move from single to double crochets. A calm pace and a mentor you can revisit are key.
Finally, choose tutorials with downloadable notes or printable cheat sheets, so you practice on the exact same steps as you rewatch sections. A good video ends with a quick checklist for the magic ring, including ring size, stitch count, and how to close without gaps. If the host explains why each move matters—like how tension shapes your piece—that clarity will save time and frustration.
What to watch in a magic ring crochet tutorial
- A clear, step-by-step flow from the first slip knot to the last tight stitch.
- Clear guidance on ring placement, starting stitch count, and how to tighten the ring to avoid wandering.
- Demonstrations of adding rounds without forming a blob, counting stitches aloud, using a stitch marker, and when to start a new round.
- Discussion of common trouble spots, such as a loose first round and how to fix it before continuing.
- Coverage of different yarn weights and how the ring behaves with thin vs. thick fibers.
- Endings with a recap and a practice assignment, like starting with a small ring (6–8 stitches) and progressing to 12 or 14. Encouragement that perfection isn’t required on the first try, with a simple progress check.
Practice drills from beginner crochet tutorial magic ring
- Drill 1: Make a ring, chain, and a first round of 6 SC. Keep tension consistent and check that the ring closes with no central hole. If a gap appears, adjust by pulling the tail or tightening nearby stitches.
- Drill 2: Move to 12 stitches in the round, keep the ring centered and flat, and use a stitch marker. Pause at the end of each round to avoid twisting your work. Rewatch the marker placement if needed.
- Drill 3: Transition drill—start from the magic ring and perform a few increases each round to balance shape. If the ring slips, pause and realign before continuing. Repeat to see stitches sit neatly and the amigurumi take shape.
Top video tips for faster learning
- Watch with a notebook; jot reminders like first-stitch placement, starting count, and how to close the ring snugly.
- Emphasize steady tension and imitate the pace—steady, not rushed.
- Pause to try the move yourself, then resume to confirm accuracy.
- If you juggle multiple starters or no-twist variants, note which method feels easier and stick with it for a while.

Clara Fern — Crochet Artist & Amigurumi Designer
Clara Fern is a crochet artist and amigurumi designer based in Austin, Texas. With 9 years of experience working with yarn and hook, she transformed a lifelong passion for handcraft into a creative mission: making amigurumi accessible, fun, and deeply rewarding for crafters of all levels.
Clara discovered amigurumi during a trip to Japan in 2017, where she fell in love with the art of bringing tiny characters to life through crochet. Back home in Texas, she spent years studying color theory, design principles, and advanced crochet techniques — developing her own signature style that blends kawaii aesthetics with original character design.
Through maclafersa.com, Clara shares everything she has learned — from choosing the right yarn and reading your first pattern, to designing fully original amigurumi characters from scratch. Her writing is known for being clear, detailed, and genuinely helpful, with no steps skipped and no secrets kept.
When she’s not crocheting, Clara enjoys watercolor painting, visiting local yarn shops, and drinking way too much coffee while sketching new character ideas.


