
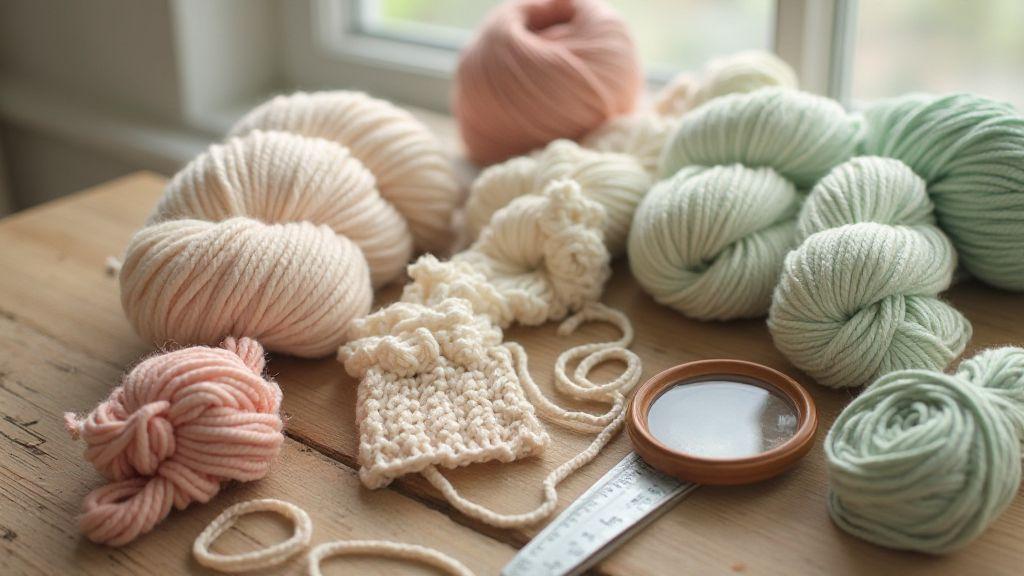
Quick checks for how to test yarn quality
You want to work with yarn you can trust, especially for Amigurumi. Treat this as a quick pre-flight before you start wrapping yarn around a hook. The goal is to spot obvious issues and get a feel for how the yarn will behave as you crochet, reducing loose stitches, pulling, or frayed ends mid-project.
Start with the label and fiber content, then handle the yarn to judge its feel, and finally map out the right hook and weight. These steps help you decide if the yarn fits your pattern and tension. For beginners, treat these checks as non-negotiables to save time and frustration later on. You want consistency, not surprises, when shaping small shapes and neat stitches.
Keep these checks nearby as your go-to routine: confirm fiber content, feel for smoothness and elasticity, and note the recommended hook and weight. Doing so sets you up for clean stitches and tight density, which is key for cute, durable amigurumi pieces. You’re building a foundation that affects every round you crochet, so it pays to be thorough but simple.
Do a yarn fiber content test from the label
Read the label first to know what you’re dealing with. Look for fiber composition and care instructions, and note blends and the proportion of each fiber. Focus on how the fiber feels when you pull. A balance of wool or acrylic often gives good stitch definition and durability. A rough texture signals potential pulling and snagging as you crochet.
Check colorfastness and dye lot. You want yarn that won’t run or rub off onto hands or the project. If the label says hand wash, plan gentler care later. Acrylic or cotton blends are common for amigurumi and forgiving for beginners. If unsure about a blend, test a small swatch on scrap to see how it behaves when pulled.
Trust the label but also your hands. If the fiber feels stiff or oddly slick, it can affect stitch sit. You’re aiming for a yarn that holds its shape, recovers after slight stretching, and doesn’t shed fibers into stitches. A good balance of stretch and structure on the label suggests a solid match for neat amigurumi fabric.
Feel and stretch yarn to check hand
Touch the yarn and ensure it feels smooth, not too slippery or rough. Give it a gentle pull to test elasticity. If it stretches evenly and returns to thickness, you’ve got even tension. If it stays stretched or gaps appear, expect looser stitches or uneven fabric.
Consider how the yarn handles color changes and small loops. A yarn that glides through fingers reduces fatigue and keeps a steady rhythm on tiny amigurumi rounds. Snags, splits, or shedding fibers indicate you might want a different option. A smooth hand with good memory makes a big difference in the look and durability of your stitches.
Think about your project: tight, uniform stitches with clean edges. If the yarn feels soft yet firm with good memory, you’ve found a great match. If it feels dull or tires your hand, choose differently. Your hands are your tool; a comfortable hand helps you crochet confidently and keep stitches neat.
Record recommended hook and weight
Keep a simple note of the best fit for your yarn. Record the suggested hook size and the yarn weight category (e.g., DK, worsted, bulky). If you’re between sizes, try your normal hook and then a slightly smaller one to test definition. Recording helps you pick patterns that work with your yarn, so your amigurumi looks as intended.
Note any label tips, like whether metal hooks are preferred or special care during washing. If stitches look loose, you may need a smaller hook; if too dense, try a larger one. A clear record helps you reproduce results across projects and grow a consistent technique.
Write actionable notes, such as DK weight, 3.0 mm hook, tight stitches. Save these in your project log for quick reference on new pieces.
Check yarn gauge and tension for amigurumi
You want your yarn gauge and tension to match your pattern’s gauge so your amigurumi comes out the intended size. Tight stitches can crowd stuffing; loose stitches create gaps. Start with a comfortable yarn and hook, then compare a swatch to the pattern’s gauge. The aim is a consistent fabric that holds shape without causing hand fatigue. Observe whether stitches sit even, compact, and not squishy.
If stitches look uneven, recheck your tension. Loosen or adjust how you wrap the yarn around your hook. Keep notes on hook size, yarn brand, used tension, and post-wash gauge to reproduce results later.
Remember: gauge isn’t the only factor. Yarn thickness, stitch height, and whether you crochet in the round or flat affect size. Treat gauge like a map, guiding you toward the desired result, with adjustments as needed.
Make a tension swatch to check gauge
Chain a few extra stitches and crochet a square using the same stitches as the body. Compare stitches per inch to the pattern’s gauge. Fewer stitches per inch mean looser fabric; more mean tighter fabric. This quick check tells you if you need a different hook size or technique. Keep the swatch flat to measure the real fabric.
Wash and block the swatch the same way you’ll treat the finished amigurumi. Blocking can change gauge, so this step matters. If post-wash gauge changes, adjust hook size or yarn choice. Record the post-wash gauge to apply to the actual project and avoid surprises during assembly.
Measure stitches per inch with your hook
Count stitches in a straight inch on a flat swatch, measuring in several spots. If stitches per inch don’t match the pattern, you may need a different hook size or yarn. This isn’t about perfection, but consistency so the fabric feels the same throughout.
If you’re between hook sizes, test multiple options to find the most stable fabric. A small adjustment can significantly affect how parts fit together and how seams sit.
Adjust hook size to match gauge
If you’re off the gauge mark, switch to a hook size that brings you back in line. Move up to loosen; down to tighten. Change gradually—half a hook size at a time—and recheck with a new swatch. When the swatch matches the pattern’s gauge, you’re ready to start with confidence.
If you’re using a new yarn and pattern, you may need to test a couple of hooks in the same size range to find the sweet spot. Note the exact hook used so you don’t guess next time. Your future projects will thank you for the consistency.
How to Test Yarn Quality Before Starting Your Amigurumi Project
In practice, you’ll want a quick, repeatable check: pull, twist, and squish the yarn to feel stiffness and bounce. Look for even thickness and a smooth twist with minimal splitting. Run a few stitches in a small swatch to confirm the yarn stays even under tension. By testing, you’ll avoid surprises once you start the full project.
Take time to read the label: fiber content, care instructions, and recommended hook size all influence your result. If you plan to wash or dry in a specific way, ensure the yarn can handle it without fading or shrinking. A quality yarn yields cleaner stitches and fewer shocks later.
Test yarn durability and pilling
You want to know how your yarn behaves during the project, so you can predict longevity. Pilling and wear are clues: they indicate whether the yarn will felt, fuzz, or shed after use. As you work, notice differences between fibers like acrylic, cotton, or wool, and pick a yarn that suits your pattern and aging expectations. This quick trial saves time and yarn.
How you test matters as much as what you test. Use a light touch when rubbing and pulling to avoid biasing results. The goal is to see if the yarn pills, sheds, or loses elasticity with friction. If pilling starts after a few passes, it may not be ideal for a plush, long-lasting amigurumi. If it stays smooth with little pilling, you’ve found a durable candidate.
The best yarn balances look, feel, and durability. A little pilling isn’t a deal breaker, but heavy pilling or rapid fuzzing usually signals a yarn that won’t stand up to daily play. Identify a yarn that stays neat, keeps stitches crisp, and returns to shape after a few cuddles.
Rub a sample to observe yarn pilling and wear
Rub a yarn sample and watch for pills forming on the surface. Many pills after light rubbing indicate shedding or snagging easily. If the surface roughens quickly with more rubbing, the fabric isn’t rugged enough for a plush amigurumi. Keep a small log noting fiber type, twist, and colors that fuzz or rub off to compare skeins.
If a yarn pills but cleans up with a finger combing, you may accept it for a cuddly toy. Persistent pills suggest skipping that yarn.
Pull a short strand to test strength
Gently pull a short strand. If it stretches smoothly and returns without breaking, the yarn has good elasticity. If it snaps or feels chalky, it may be too weak for tight stitches or frequent handling. Test at the join between plies and watch for fraying. A slip or break means you should not push that yarn in your stitch pattern.
Note wear and break points as you test. Mark where wear starts near high-stress areas so you know how the yarn behaves in your project.
Do a wash test for yarn colorfastness
Color bleed can ruin a project. Do a wash test with a small swatch using your planned washing method and temperature. If colors stay bright and don’t transfer, you’re in good shape. If color transfer occurs, choose colorfast yarn or different colors. Also note if the yarn feathers or pills after washing.
Dry and inspect texture and shrinkage
After drying, feel for texture changes. Check for fuzziness, stiffness, shrinkage, or puffing that could alter proportions. Take measurements before and after washing to estimate how your finished piece will hold shape.
Check stitch definition and yarn weight suitability
You want stitches that look neat and stay even, so your amigurumi keeps its shape. Start with a hook size that matches your yarn weight and pattern, then test a few stitches on a scrap swatch. The goal is crisp, tight stitches that don’t gap or puff. If stitches look loose or uneven, you might be using too large a hook or the yarn is too fluffy for the project. Amigurumi loves a snug fabric; pay attention to how the yarn slides and how its twist affects the hook stab.
Compare how the same pattern works across different yarn weights. Lightweight yarns yield tiny, delicate details but reveal tension issues more easily. Medium or DK yarns balance ease of crocheting with visible stitches. Bulky yarns give a chunky look but may require bigger hooks to avoid a stiff fabric. Make a small motif in each weight to see how stitch definition changes. Your aim is a readable, durable fabric.
Consider how stitches read in your chosen weight. If you can clearly see each stitch and the fabric looks uniform, you’re on track. If a weight makes stitches look bulky or quilt-like, adjust tension or switch hook size. The final check is whether the toy sits flat and holds shape after a quick tug test.
Crochet a small motif for stitch definition test yarn
Create a tiny square or circle with a handful of stitches in each yarn. Work at least two rows per yarn and compare stitch visibility. If the motif shows clear V-stitching and consistent tension, you’re close. If you see gaps or loose threads, adjust tension or swap hooks. This is a practical preview of your final amigurumi.
Compare detail across yarn weights for amigurumi
Run the same motif in light, medium, and bulky weights to observe how tiny increases and decreases read. Note how twist and ply affect the stitch’s look, and how a slightly tighter tension in one weight can keep edges sharp. Use these observations to decide which weight gives the cleanest, most durable finish for your toy.
Decide if stitches read well for your toy
After testing, you should be able to say: stitches read clearly, fabric is firm, and the toy will hold its shape in play. If readability is muddled, tweak tension, hook size, or yarn weight. The final choice should make features pop without sacrificing durability.
Use a yarn quality test for amigurumi before buying
Before buying, run a quick test. Crochet a small sample and look for even tension, smooth stitches, and how the yarn moves through your hook. If the yarn splits easily or sheds fibers, skip it. Test colorfastness by dampening a corner of your swatch and rubbing gently; if color transfers, mark it as a no. Check stretch and recovery by tugging the swatch—if it stays stretched, the final piece may have looser stitches. Consider softness and warmth in your hand, since you’ll be stitching for hours. Compare expected yardage to your project plan to avoid running out mid-piece.
Your notes become a personal checklist you reuse for future projects. Remember the phrase How to Test Yarn Quality Before Starting Your Amigurumi Project to reference your method quickly and share it with friends.
Finalize your yarn choice based on tests
After testing, your final choice should feel obvious in your hands: it stitches cleanly, matches the toy’s look, and holds up to care. For crisp details on small figures, pick yarn with tight, even stitches. For plush finishes, choose softer yarns with a gentle halo. Your final pick should balance ease of use, durability, and how your amigurumi will be enjoyed.

Clara Fern — Crochet Artist & Amigurumi Designer
Clara Fern is a crochet artist and amigurumi designer based in Austin, Texas. With 9 years of experience working with yarn and hook, she transformed a lifelong passion for handcraft into a creative mission: making amigurumi accessible, fun, and deeply rewarding for crafters of all levels.
Clara discovered amigurumi during a trip to Japan in 2017, where she fell in love with the art of bringing tiny characters to life through crochet. Back home in Texas, she spent years studying color theory, design principles, and advanced crochet techniques — developing her own signature style that blends kawaii aesthetics with original character design.
Through maclafersa.com, Clara shares everything she has learned — from choosing the right yarn and reading your first pattern, to designing fully original amigurumi characters from scratch. Her writing is known for being clear, detailed, and genuinely helpful, with no steps skipped and no secrets kept.
When she’s not crocheting, Clara enjoys watercolor painting, visiting local yarn shops, and drinking way too much coffee while sketching new character ideas.


