
Materials for New Year Amigurumi Ideas: Clocks, Fireworks and Celebration Characters
You’ll get excited when your projects come to life, and the right materials make that happen. For New Year Amigurumi Ideas: Clocks, Fireworks and Celebration Characters, choose supplies that are sturdy, safe, and easy to work with. Choosing the right yarn, hooks, and stuffing sets the base for clean stitches and durable toys you’ll be proud to display. I’ll walk you through practical choices you can trust, with simple rules to follow so your toys hold their shape and charm from the first stitch to the final seam. With the clock and fireworks themes, yarn texture and stuffing density affect the look of tiny gears, sparkling bursts, and happy faces. Your projects will feel cohesive when you pick materials that play well together, not just what looks pretty in the store.
When you gather your tools, think about how you’ll handle detail work. Safety eyes, thread, and finishing touches give clocks and celebration characters personality without losing safety or durability. A balanced kit includes sturdy eyes that won’t pull out, color-matched thread for neat finishing, and a few decorative beads or tiny buttons that don’t weigh down the piece. A small, organized tray with the bits you use most keeps the process smooth. Plan ahead for small parts that can surprise you during assembly to keep everything polished.
Crochet an amigurumi clock step by step
Crochet an amigurumi clock from start to finish with simple, clear steps. Begin with a cozy face circle, then add a tiny ring for numbers and the clock hands. The stitches build a sturdy toy that can sit on a shelf or be a playful gift. Use bright yarns for a bold clock, or soft pastels for a calmer look. Keep tension steady and count stitches to keep the clock round and even. Finish with a small case for gears and a strap if you want wall-hanging.
Attach the hands and the dial neatly and durably. Sew the hands on with a touch of stuffing behind them so they don’t flop, or secure from the back. The dial should show bold numbers or tick marks for easy time-telling. Don’t rush the stuffing; a little goes a long way to prevent floppiness. When done, you’ll have a charming, huggable clock perfect for play or display.
Add finishing touches like a tiny bell, a hanging ring, or a soft pendulum. These details bring the clock to life, and you can embed a small internal sound maker or a subtle rattle for extra fun. Each stitch grows your skills, turning your clock into a special piece to show off.
Follow an amigurumi clock pattern for a midnight clock toy
Start by crocheting a round face with a tight gauge to keep shape. Work in single crochets and increase evenly to form a flat circle. Create the back and sides, possibly using a contrasting color for a two-tone look. Jot down stitch counts as you go to stay on track. For a midnight vibe, stitch the face in dark blue or black and add silver or white for numbers and hands. This contrast makes the clock readable and evokes a magical midnight mood.
Craft the clock hands from smaller yarn pieces or a separate strip, then sew them on. Position hands at twelve o’clock to begin, and test from different angles. Secure well so they don’t twist during play. Embroider a few tiny stars or a crescent moon around the dial to reinforce the midnight motif. The clock will feel magical and ready for bedtime storytelling on a shelf or toy stand.
Assemble the body with a small ring of stuffing to keep the interior firm. Attach a simple strap or loop if you want wall-hanging or a toy stand. Check for loose ends and weave them securely. The midnight clock becomes a cozy, collectible toy suited for quiet moments or imaginative play.
Add a simple New Year countdown amigurumi dial
Begin with a small circular dial that fits neatly on the clock face. Use bright, festive colors and add digits from 0 to 9 to suggest countdown increments. Stitch the digits so they stay clear against the dial. Embroider them or crochet tiny beads for a playful, tactile surface. Make the dial lightweight enough to spin or rotate a little, adding an interactive New Year element to New Year Amigurumi Ideas: Clocks, Fireworks and Celebration Characters.
Create a simple mechanism with a removable ring or Velcro tab so the countdown dial can be swapped for different days or celebrations. Test the fit against the clock face and adjust as needed. When you’re happy with the look and feel, secure the dial to the clock body so it stays put during play. Your dial becomes a tiny party, marking the seconds as the year turns.
Size and gauge tips
Keep a consistent gauge by measuring swatches and comparing with your pattern. If stitches are loose, switch to a smaller hook; if they’re tight, try a larger hook so your clock stays round and sturdy. Count stitches at the end of each round to catch mistakes early. If making multiple clocks, label projects with yarn type and hook size for easy reference. Adjust the starting round to make a larger toy, or scale down for a mini version, while maintaining the same increases and stuffing ratio to preserve shape.
Make fireworks themed amigurumi ornaments
Fireworks themed amigurumi ornaments add a burst of color to your tree. Plan shapes and sizes so they balance on a branch, and include a few styles—starbursts, tails, and sparkles—for variety. Choose bright, contrasting colors that pop under tree lights. Keep stitches tight so stuffing doesn’t peek through, and consider a small crochet stand or hook for storage to avoid losing pieces. Your goal is ornaments you can reuse year after year without fraying.
Decide on core structure: a simple round ball for the main body, and longer tubes for tails. Use basic stitches for speed and sturdiness. For extra shine, weave a touch of metallic thread into final rounds and add tiny seed beads to mimic sparks. Balance technique and sparkle to keep designs lively, not flat.
Attach loops securely at the top for hanging. Use thicker yarn or a short chain for the loop and sew it tightly into the crown. Add a bit of sparkle with metallic thread along the edge or a line of beads on the tail, but anchor embellishments firmly to avoid detaching during display. You can add ribbons or hairpin loops for alternative hanging options, and stitch a subtle starburst pattern to emphasize the theme. Test the hanger by pulling gently to ensure it won’t pull away.
Color combos that pop
Choose bright, contrasting colors that glow under lights. Royal blue body with gold sparks reads as a true firework; hot pink and electric lime create a neon burst; or a red-to-yellow gradient mimics real bursts. Finish with a dark outline or white/sparkly specks to mimic sparks.
Create celebration character amigurumi for your party
Turn your party into a cozy display with celebration character amigurumi. Start with a few cute, event-matching figures—bright colors for a birthday, metallic threads for New Year’s Eve, or pastels for a baby shower. Small, hugable dolls boost mood and make memorable photo props. Use simple shapes first, then layer in hats, mini balloons, or confetti accents. Build a few stitches to get the right texture so figures feel joyful and inviting. You’ll have charming keepsakes that double as favors and decor.
Choose patterns that scale up with your skill. Crochet a running cast of friends in different outfits—one with a party hat, another with a bow tie, and a third in a glittery scarf. This variety makes the display feel special without requiring hours per piece. For tight timelines, use quick color changes and simple facial features to convey character quickly. Store pieces in labeled bags by character or accessory to stay organized. The joy is in the process as your party squad comes to life, and guests will love a handmade memento.
Crochet party hat amigurumi and costume accessories
A crochet party hat amigurumi is a quick win for celebrations. Start with a cone base, add a tiny brim and a pom-pom on top. Use bright yarns with metallic or glitter thread to make the hat pop under party lights. Stitch small embellishments like stars or numbers to mark the occasion. Keep shapes rounded so the hat sits snugly on your amigurumi’s head for a balanced look.
Add costume accessories to build a mini scene—tiny scarves, bow ties, or sunglasses tailored to your character’s vibe. Match party themes—glitter for New Year, florals for spring, etc.—and keep two or three accessory styles consistent across characters for cohesion. Attach hats and accessories securely with strong yarn or fabric glue; consider removable options like snaps or Velcro for photos. This keeps figures versatile and the display lively.
Make an amigurumi champagne bottle pattern for celebration characters
A champagne bottle amigurumi adds festive flair. Start with a tall, slim shape that tapers at the neck; base in champagne color with a tiny gold foil cap. Create a small label using a felt circle or crochet patch in a contrasting color, then embroider a simple emblem. Round edges keep the bottle friendly and approachable.
Pair the bottle with a cork and a toast gesture—hand raised in a cheer. Add beads or embroidery to mimic bubbles rising through the neck. Vary bottle colors across characters to reflect different flavors or moods. Sew pieces securely and stuff to maintain a compact, sturdy finish that endures hugs and photos. This accessory amplifies the celebratory feel and makes a lovely centerpiece or party favor.
Simple faces and expressions
Give celebration characters life with simple, friendly faces. Start with tiny embroidered or safety eyes and a small mouth. Keep expressions soft and happy—curved mouths, sparkly eyes, and blush dots read as approachable. Swap eye shapes or mouth curves to show mood variety, but avoid harsh features. Color accents like a pink cheek or a tiny wink can change how the amigurumi reads in photos. Simple expressions work well for quick projects and keep hosts inviting.
Convert patterns into DIY New Year crochet plushies
Turn basic patterns into cute plushies for New Year celebrations. Start with a base pattern and imagine it wearing party gear or a tiny hat. Small touches—like a sparkle eye or a bell—make the plush feel unique. Keep stitches steady and colors bold for photos and hand-holds.
Scale patterns to fit different roles—pinata, stocking, desk buddy—by adjusting yarn weight and hook size. Use softer yarn for cuddliness or lighter yarn for a sleeker look. Finish plushies with firm stuffing and add tiny accents with a fine needle. Attach clocks or stars as charms on paws or scarves. Mixing familiar patterns with fresh props makes the plushies playful and personal.
Scale patterns to make larger or smaller plushies
Adjust pattern scale by changing hook size and yarn weight. For larger plushies, use thicker yarn and a bigger hook; for smaller ones, go thinner. Test tension with a quick swatch. Consistent gauge yields balanced, professional-looking results.
Scale affects stuffing as well: bigger plushies need firmer stuffing; smaller ones can stay light. Use softer fiberfill or add a small weight inside the head for balance. If you scale down, emphasize bold facial features with contrasting thread to keep expressions clear. Rework proportions carefully to maintain balance, and photograph progress to compare and tweak before finishing.
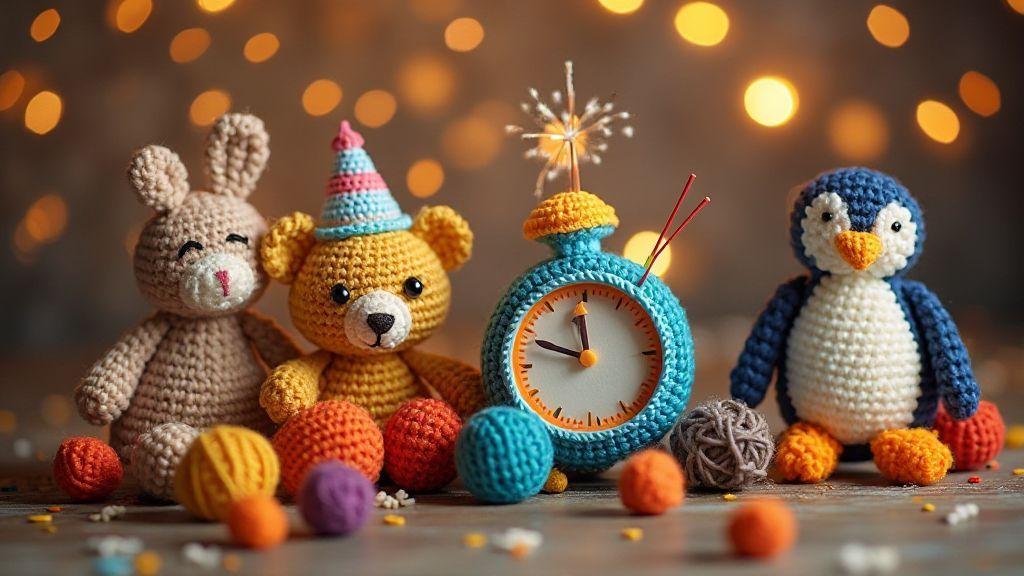
Combine clock, fireworks, and character ideas into one project
Weave a New Year story into one plush by starting with a clock centerpiece, adding fireworks as embroidered bursts, and finishing with a character element like a mascot beside the clock. Choose a harmonious color palette; metallic thread or shiny yarn makes fireworks pop in photos, while the clock features simple but expressive faces. Give the character a distinct feature—hat, cape, or scarf—that ties the design together.
Assemble with secure stitching and balanced weight, so the clock stays upright, fireworks sit nicely, and the character feels cozy. This fusion creates a memorable New Year keepsake perfect for photos and gifts.
Plan your color palette
Choose colors that celebrate the season without clashing. Start with a base color for the main shape, then add a few accents for clocks, fireworks, and character details. Use three to five colors to keep the piece cohesive. If unsure, begin with a neutral base and add pops of red, blue, or gold for New Year fireworks.
Consider lighting in photos: shiny yarns catch attention, while matte reads as cozy. Use metallic or sparkly yarns sparingly to mimic glittery fireworks without overpowering the design. Bold accents should highlight features, not compete with the overall shape.
Care, display, and gifting for New Year Amigurumi Ideas: Clocks, Fireworks and Celebration Characters
To keep your amigurumi cute and sturdy through New Year cheer, start with a gentle wash on a delicate cycle or by hand in lukewarm water with mild soap. Rinse well and gently squeeze to remove excess water, then lay flat to dry, turning occasionally to prevent misshaping. If fibers tend to frizz, a light fabric-safe starch can help. Store pieces in breathable bags with soft inner lining, and include silica gel packets to control moisture. Attach a care card with washing steps and safe handling tips when gifting.
Display away from direct sunlight and heat vents. A dedicated shelf or decorative garland works as a mini gallery—arrange clocks, fireworks, and celebration characters at different heights using risers or small boxes. Group items by theme or color for a festive vibe. If you rotate displays, swap in new accents like a mini party hat or banner to keep things fresh. When gifting, wrap in tissue and add a simple care note.
Gifting is about sharing joy with a personal touch. Include a photo of a display you built so the recipient can recreate the look, and offer a quick how to tip card for safe placement and gentle handling. For larger sets, consider a coordinated box or tote that holds each piece and a tiny calendar page showing the countdown idea. Tailor the presentation to the recipient’s space to make New Year Amigurumi Ideas: Clocks, Fireworks and Celebration Characters feel special.
Wash, store, and kid-proof your crochet pieces
Start with a gentle wash to remove dust and oils. Use cool or lukewarm water with a mild detergent, then rinse well. Gently press out water (don’t wring) and lay flat to dry. Test colorfastness on a swatch if you’ve used dark yarns. Once dry, consider a light fabric sealer to keep stitches neat, especially on busy textures like clocks and confetti.
Store pieces in breathable containers with soft inner layers, and label each item with its theme and care needs. For gifts, add a care card and a simple display or schedule card. Avoid stacking heavy items on fragile pieces; use shallow containers kept low to the ground. If kids are around, choose pieces with safety in mind: firmly sewn eyes and beads, and no small detachable parts.
To kid-proof a display, place delicate pieces beyond reach or inside a clear display case. Use soft lines and avoid sharp edges or loose accessories. Create a dedicated display area for safe, supervised admiration. Longevity comes from thoughtful placement and a simple cleaning routine.
Build a countdown display or garland with your creations
Design a countdown setup using clocks, fireworks, and celebration characters as markers. Space pieces evenly and add a number card near each to indicate days left. Hang the garland on a mantle, railing, or wall with twine and clothespins, ensuring pieces have room to breathe. For an interactive twist, add a soft bell or rattle behind one or two pieces to tap for countdown moments.
For a dynamic display, rotate characters daily in a mini countdown theater. Switch in a new clock or firework piece each morning with a short caption for photos. Use festive colors and balanced spacing so every piece gets noticed. Choose soft ambient lighting and avoid harsh direct light that could fade colors. A well-kept countdown display invites guests to count down with you to the New Year.
If you’re looking for a cohesive project lineup, these New Year Amigurumi Ideas: Clocks, Fireworks and Celebration Characters can mix and match to suit your party mood, decor, and gifting plans.

Clara Fern — Crochet Artist & Amigurumi Designer
Clara Fern is a crochet artist and amigurumi designer based in Austin, Texas. With 9 years of experience working with yarn and hook, she transformed a lifelong passion for handcraft into a creative mission: making amigurumi accessible, fun, and deeply rewarding for crafters of all levels.
Clara discovered amigurumi during a trip to Japan in 2017, where she fell in love with the art of bringing tiny characters to life through crochet. Back home in Texas, she spent years studying color theory, design principles, and advanced crochet techniques — developing her own signature style that blends kawaii aesthetics with original character design.
Through maclafersa.com, Clara shares everything she has learned — from choosing the right yarn and reading your first pattern, to designing fully original amigurumi characters from scratch. Her writing is known for being clear, detailed, and genuinely helpful, with no steps skipped and no secrets kept.
When she’s not crocheting, Clara enjoys watercolor painting, visiting local yarn shops, and drinking way too much coffee while sketching new character ideas.


