
Choose yarn and hooks for summer amigurumi patterns
You want yarn that feels light in the heat but still holds shape. Opt for lightweight, breathable fibers so your creations don’t feel heavy. Cotton is a reliable choice for crisp stitch definition and quick drying, perfect for seaside pals. If you prefer a softer feel, acrylic blends work well and come in bright colors that scream summer. When picking, consider how you’ll display or play with the finished piece—cotton stays crisper, while acrylic is forgiving if your tension isn’t perfect yet. The right yarn makes your stitches sing, not fade into the background.
For your project, think about how you’ll wash or wear your amigurumi. If you want something sturdy for kids or outdoor decor, choose an acrylic or a cotton-acrylic blend that’s easy to clean. If you want a crisper look for seaside characters, go with 100% cotton and a smaller hook to keep the fabric tight. Check the yarn label for recommended hook sizes and gauge. Matching your yarn to your pattern’s tension is key to those cute, compact stitches that hold up in summer sun.
Think about color and texture as part of the summer vibe. Bright corals, sky blues, and sandy yellows read as summer instantly. If you’re learning, test a small swatch in both cotton and acrylic to feel the difference in stretch and drape. For seaside amigurumi, cotton often gives the cleanest stitch definition for seashells and little fish, while acrylic can add a soft, squishy feel to characters like ice cream cones. Your yarn choice should make your summer character look intentional, not rushed.
Pick cotton or acrylic for seaside amigurumi patterns
Cotton delivers crisp stitches that pop in photos and hold shapes like shells and boats. When you crochet with cotton, the stitches stay neat, helping define details like fins or sails. It’s ideal for small waves or tiny crabs where edges need to stay sharp. Cotton is naturally breathable, which makes it comfortable to handle during long sessions in the sun.
If you want a softer, warmer feel, choose acrylic. Acrylic is forgiving and comes in a wide color range, great for playful beach characters like a popsicle or a smiling sun. It’s a bit stretchier, so shapes may relax a touch after stuffing. Acrylic can be more beginner-friendly for even tension. Either choice works—just align your yarn with your comfort and the look you’re after.
If you’re torn, do a quick test: crochet a small 2-inch square in both yarns, measure gauge, and compare how your stitches sit. For seaside vibes, cotton often wins for clarity and crisp lines, while acrylic wins for flexibility and color variety. Your pattern will thank you when you know which yarn makes your Summer Amigurumi Pattern Ideas: Sun, Ice Cream and Beach Characters feel right in hand and on display.
Match hook size to your tension for beginner summer crochet patterns
Your hook size affects how your stitches sit. If your tension runs tight, you’ll want a larger hook to loosen up and keep your amigurumi from looking stiff. If your tension is loose, a smaller hook helps bring the stitches tighter so stuffing doesn’t peek through. For beginners, start with a hook size that fits your yarn label’s recommended range and adjust by feel. You should be able to pull your loop through with a smooth, confident motion, not a tug-of-war.
When you’re practicing summer patterns, use a comfortable grip and steady pace. Don’t rush the first rows—these set your fabric’s foundation. If your stitches look uneven, switch hooks or re-tie your work. A quick tip: make a practice mini-thing with your chosen yarn and hook to test your tension before you begin your main project. You’ll save time and frustration by adjusting early.
Remember, the goal is even stitches and clean edges, especially for seaside characters that need crisp lines. Your hook choice should feel natural in your hand, and you should be able to crochet for a steady stretch of time without discomfort. With the right hook size, your Summer Amigurumi Pattern Ideas: Sun, Ice Cream and Beach Characters will come to life with confidence.
Summer Amigurumi Pattern Ideas Spotlight
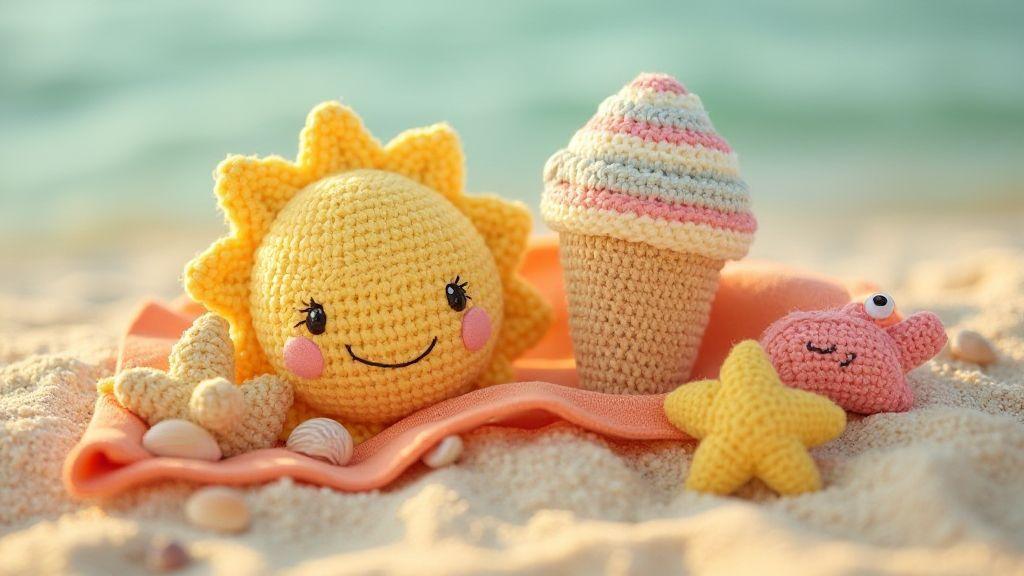
This collection—Summer Amigurumi Pattern Ideas: Sun, Ice Cream and Beach Characters—helps guide color palettes, textures, and safe parts for toy lovers. Pair cotton for crisp shells and fish with acrylic for squishy cones to bring the beach to life.
Gather stuffing, safety eyes, and stitch markers
Have a few basics close by so you can finish smoothly. Soft stuffing gives a gentle, plump shape. For face details, grab safety eyes or embroidered features, depending on your pattern’s safety needs. Keep stitch markers on hand to track rounds, especially when working in continuous spirals. Marking the start of rounds helps you stay on track as you shape bodies, eyes, and tiny limbs.
Make a sun plushie with an easy sun amigurumi pattern
Start with a simple round for the head, then move to a flat circle for the body. Crochet in the round, keeping stitches tight where the sun’s rays attach. Choose a bright sun color and a small amount of orange for the ray tips. Count stitches to keep rounds even for a neat finish that holds up to little hands.
Attach the rays by crocheting short strips or triangles radiating from the body. Secure each ray firmly so the plushie stays sunny after hugs. You can crochet the rays separately and sew them on later for placement control. This step gives the sun its cheerful silhouette and helps it stand up to playtime.
Stuff and sew with a small amount of fiberfill, pressing firmly to avoid lumps. Sew the body to the rays with tight stitches so seams stay durable. A crisp sun plushie is ready for adventures in the summer sun.
Crochet a flat circle and add rays for a sun plushie crochet pattern
Begin with a flat circle as the sun’s core, working in continuous rounds with a consistent stitch count. When happy with the circle’s size, switch to a contrasting yarn for rays. Crochet small triangles or rectangular strips separately to place precisely. Sew each ray to the circle’s edge with sturdy stitches. If you prefer, crochet rays into the edge as you go, but separate rays help you avoid holes. Weave in ends neatly for a tidy, durable finish.
Use simple embroidery for face details on sun amigurumi pattern
Keep the face friendly with a small embroidered smile, two tiny eyes, and a blush in a contrasting yarn so features pop. Mark spots with a removable fabric pen first to place details symmetrically. For a quick option, stitch on a tiny felt circle for the mouth or eyes, then secure it firmly. If you skip features, the rays alone tell the story. Keep stitches small and snug for durability.
Secure seams and hide tails for durability
Sew pieces with a whip stitch or mattress stitch for near-invisible seams. Hide tails inside the stuffing to prevent poking through. Tug gently as you sew to keep fabric taut and avoid loose stitches. A solid seam line makes the sun plushie look professional and ready for everyday adventures.
Create a crochet ice cream plush with an ice cream amigurumi pattern
Shape the cone first, then build a fluffy scoop and join them into a cute ice cream plush. Use a basic single crochet to keep stitches tight and stuffing secure. Consider the contrast between warm cone tones and bright scoop colors to make the plush pop in photos. Increases widen the base of the cone; decreases taper the scoop for a rounded, cuddly look. Crochet tightly around the plush so stuffing stays hidden, and change colors at stitch ends for clean transitions. Weave ends as you go to avoid extra bulk.
Plan color choices and row order—start with an angled cone, then move to a steady, flat body. Choose a summery scoop color; a small white highlight can simulate light, with a dash of pink or mint for a kawaii vibe. When switching colors, do so at the end of a stitch to keep transitions neat, and weave ends to reduce bulk.
Add tiny details like pretzel streaks or chocolate dots for texture, and consider a seed bead for a melted-squish shine to sparkle in photos. The result is a cozy, huggable ice cream that’s perfect for gifting or decor.
Shape cone and scoop with increases and decreases for crochet ice cream plush
Shape the cone with gradual increases to widen the base, then ease into a steady, flat body as you reach the cone’s base. Slow increases on the scoop so the top stays round and plush. If gaps appear, tighten a touch and resew the seam for a clean line. Use a few decreases to round the scoop, then attach it to the cone with a neat whip stitch. Aim for a seamless transition so the ice cream looks soft and squishy, not stiff.
Join the pieces by centering the scoop on the cone and stitching through both layers evenly. Check symmetry as you go and adjust if one side seems off. End with secure knots and hide tails inside.
Add color changes and sprinkles for kawaii summer crochet toys
Color changes are your friends for a cheerful, kawaii look. Change colors at the end of rounds or stitches, bringing in lighter shades for highlights. A touch of white or pale yellow can mimic a glossy shine on the scoop, while a contrasting cone color pops in photos. For sprinkles, use short color changes or tiny embroidery stitches on the scoop’s surface. Keep colors vibrant but cohesive so the ice cream reads as one playful character.
Sprinkles should be tiny and evenly spaced—plan placement before sewing. Use simple satin stitches or tiny French knots. If durability is a concern, choose embroidery floss or thinner yarn for sprinkles and weave ends well. The result should feel whimsical and light, like a summer cartoon come to life.
Attach parts with whip stitch and secure ends
To attach the scoop securely, center it on the cone and stitch around the base with a whip stitch. Keep threads taut and sew slowly to prevent gaps. When you finish, knot securely and weave ends inside for a tidy, durable finish.
Build beach character amigurumi and beach animal amigurumi
Learn to create charming beach friends that belong in a sunlit shoreline scene. Start with simple shapes for a crab, starfish, or seashell, then add a friendly beach character like a sun hat-wearing kid or a tiny shell backpack. Use a light palette—sandy beige, ocean blues, and coral pops—to keep everything cohesive. Practice gauge and tension for tidy stitches that hold up to play and gifting.
Give each piece its own personality: a sunny smile and a tiny sun hat for the beach character, bold eyes and a waving claw for the crab, sunglasses or a scarf for the starfish, and a ribbed seashell pulled into a little purse for the seashell. Arrange the pieces to form a dynamic, story-ready scene for photos or keepsakes.
Texture matters on the shore. Use surface slip stitches or small bobbles to mimic sand, and front post stitches to create shell ridges. Plush hair or a fluffy beard can be simulated with a fluffy yarn or alternate stitch. Mix plain popcorn stitches for shells with simple half-double stitches for bodies to add tactile variety.
Make crabs, starfish, and seashells from seaside amigurumi patterns
Shape a crab with a rounded body and two big claws that curve outward. Give it bold eyes and a friendly smile, and angle the claws so it looks like it’s waving. The starfish should have five arms radiating from a central circle, with a tiny contrasting color at each tip. The seashell can feature ribbing along the edge with front post stitches to mimic natural ridges, finished with a soft satin interior or a tiny pearl bead for extra shine. Keep pieces sized for safe play.
Hook choice matters: use a medium-weight yarn for sturdy shells and a lighter weight for delicate limbs. Colors should stay seaside: coral, teal, sandy beige, white with soft peach accents. When stuffing, fill neatly to the natural curves so the shapes stay soft without becoming rigid.
Use texture stitches for shells and sand details in beach character amigurumi
Texture stitches create sand specks and shell ridges. Alternate rows of single crochet with small bobble stitches to simulate sand across clothing or skin. Use front post stitches to rib shells, then finish with a row of slip stitches to smooth the edge. Weave ends as you go to keep texture uniform. Consider a small fabric tag or sea-themed charm for a sentimental touch without compromising safety.
Choose child-safe parts for giftable beach toys
Aim for safe toys for little hands. Use small, smooth buttons sparingly or replace with embroidered eyes or felt safety eyes backed securely. Avoid sharp hooks or metal pieces; choose soft, rounded parts for limbs and accents. Attach accessories firmly so they don’t detach during play. Keep overall size friendly for kids—roughly 6 to 8 inches tall.
Seal wooden or plastic embellishments with a non-toxic toy sealant. Check safety standards for your region, especially for very young kids. You want to preserve texture while keeping everything sturdy and safe.
Follow beginner summer crochet patterns and core techniques
Start with a simple, season-appropriate project using basic stitches and light yarn you can see clearly. Maintain even tension and use a comfortable hook to build confidence. Patterns are guidelines—gauge, stitches, and rounds matter, but adaptability makes summer projects enjoyable and doable.
Read patterns in sections labeled gauge, stitches, and rounds, and compare to your swatches. If gauge is off, adjust with a different hook size or yarn weight. Keep your workspace tidy with a set of hooks, a pencil for notes, and a stitch marker to save time and avoid mistakes.
Learn single crochet, increase, and decrease for summer amigurumi patterns
Begin with single crochet to create a solid fabric. Tuck yarn in your palm to avoid snagging the hook. As you grow your amigurumi, add increases to widen and decreases to taper. Practice on a tiny ball to feel the rhythm before tackling a full sun or ice cream cone.
Count stitches as you go and keep a steady tempo with increases. Slow down for decreases to prevent holes. If you miss a stitch, insert it back in and continue. With practice, your Summer Amigurumi Pattern Ideas: Sun, Ice Cream and Beach Characters will come to life—bright, friendly characters you’re proud to display.
Practice simple color changes for sun and ice cream amigurumi pattern
Color changes don’t have to be scary. Carry yarn neatly or weave in ends, depending on your technique. Start with two colors on a small project to build confidence, then apply to your sun or ice cream. Clean edges and smooth color shifts elevate the finished piece. Use lighter and brighter tones for summertime vibes, like sunny yellow for the sun and creamy pastels for ice cream. Pause to switch colors mid-row if the pattern allows, ensuring a polished look.
Test gauge and tension with small practice pieces
Make tiny gauge swatches before diving into a full project. A gauge test shows if your stitches are too tight or too loose. If your gauge is off, adjust the hook size and re-swatch until it matches the pattern. This saves frustration when making Sun, Ice Cream, and Beach Characters true to size.
Care, safety, and selling tips for seaside amigurumi patterns
Choose sturdy materials. Use cotton or acrylic yarn labeled for toy use, and match hooks to your yarn weight to keep stitches even. When stuffing, use polyester fiberfill and pack firmly but not so tight you warp shapes. Sealed seams are a must; finish knots slowly and weave ends neatly inside. Avoid small loose parts; if you add rings or beads, secure them with a stitched loop and double-knot them. A consistent gauge helps your Summer Amigurumi Pattern Ideas: Sun, Ice Cream and Beach Characters hold their shape after washing, so you can enjoy them longer.
If you plan to sell, include a care label and safety notes. Add washing instructions that match your yarn choice: hand wash with mild soap and lay flat to dry. Document construction methods and embellishments so buyers know what to expect. Price by accounting for time, yarn, stuffing, and extras. Be transparent about flaws or color-fastness limits. Good packaging and a care card add value and reduce returns. By communicating clearly, you protect your reputation and support buyers’ confidence in your beach-themed pieces.
Test your pieces by gently pulling limbs and checking seams after sewing. If you use wire for poseable limbs, cushion it well and keep it hidden. Store finished toys in a dry, cool place away from direct sunlight to prevent color fading. If selling patterns, include licensing notes and keep records of patterns or inspirations. Your careful approach shows you care about your customers and your craft.
Wash and dry crochet toys safely and care for crochet ice cream plush
Start with a gentle wash plan—cold water and mild detergent. Hand wash for intricate stitches, then air dry. If machine washing is necessary, use a laundry bag on a delicate cycle with cold water and air dry. Reshape limbs while damp and let everything dry completely before displaying. Avoid heat sources like dryers or direct sun, which can shrink stitches or fade colors. Your crochet ice cream plush benefits from careful handling and a little extra care to stay fresh for seasons.
Test colorfastness first if you’re worried about bleeding. If color transfers, blot with a clean towel and re-fold the seams to minimize rubbing. Brush lint away gently after drying. Store pieces in breathable bags and avoid piling heavy items on top. If a seam loosens after washing, repair from the inside to keep visible fixings minimal. Your goal is bright, clean toys that stay ready for a sunny day at the shore.
Check copyright and licensing before selling beach character amigurumi
Before listing toys, verify you’re allowed to sell your designs. Check pattern licenses for commercial use; some designers permit selling finished objects but not patterns, or require attribution. If you’ve created your own variations, rights are clearer, but avoid copying protected designs. Respect trademarked shapes or logos; permission may be needed if using branding. Clear licensing keeps your shop online and your creativity flowing.
When selling, include a brief note about materials and safety guidelines. Do not claim your piece is official or tied to a brand if it isn’t. If unsure about a license, ask the designer or check the sales platform’s policy. Keeping records of pattern sources defends your work and protects your shop and future projects.
Photograph and price your kawaii summer crochet toys
Take bright, clean photos from multiple angles in natural light. Show stitches, texture, and any unique shell or sea-shell accents. Include a short care note so buyers know how to wash and store it. Price by adding up yarn, stuffing, labor, and a modest profit for your time, then compare with competitors. Clear pricing and a quick care guide build buyer trust and help your seaside pieces stand out.

Clara Fern — Crochet Artist & Amigurumi Designer
Clara Fern is a crochet artist and amigurumi designer based in Austin, Texas. With 9 years of experience working with yarn and hook, she transformed a lifelong passion for handcraft into a creative mission: making amigurumi accessible, fun, and deeply rewarding for crafters of all levels.
Clara discovered amigurumi during a trip to Japan in 2017, where she fell in love with the art of bringing tiny characters to life through crochet. Back home in Texas, she spent years studying color theory, design principles, and advanced crochet techniques — developing her own signature style that blends kawaii aesthetics with original character design.
Through maclafersa.com, Clara shares everything she has learned — from choosing the right yarn and reading your first pattern, to designing fully original amigurumi characters from scratch. Her writing is known for being clear, detailed, and genuinely helpful, with no steps skipped and no secrets kept.
When she’s not crocheting, Clara enjoys watercolor painting, visiting local yarn shops, and drinking way too much coffee while sketching new character ideas.


