
Spot inconsistent crochet tension
You’ll notice tension issues when stitches don’t look uniform from row to row. Some areas may bulge or have gaps where loops seem loose. Spotting signs early helps you fix the problem before your whole project looks uneven. Think of tension as the zipper on a jacket: if it’s off, everything else feels unsettled. You want consistent stitches so your fabric lies flat and smooth, from start to finish.
Your first clue is how your stitches feel as you work. If a section feels easy and loose while another feels tight, you’re likely dealing with inconsistent tension. You may also notice if your fabric curls or skims the hook, indicating your grip or yarn flow is changing as you crochet. In amigurumi, small tension shifts can twist shapes, so catching them early saves you from unpicking later. Keep an eye on both your hands and your yarn path as you crochet.
When you compare rows, you should see a steady rhythm, not a zigzag of tight and loose spots. A pocket of tight stitches that pulls your work in or a loose area that puddles signals a tension gap you need to fix. Do a quick check as you go: pinch a small sample and measure if needed, but mostly look for visual consistency. Your goal is one even fabric, no surprises.
Check gauge and stitch size
Check your gauge—the number of stitches and rows per inch. If gauge is off, later work will be too small or too large. Make a swatch with the same hook and yarn you plan to use, following the project’s stitch pattern. Compare your swatch to the pattern’s gauge. If you’re off, adjust your hook size up or down until the measurement matches. This step saves you from surprises when moving from swatch to project.
Look at stitch size as you crochet. If stitches look longer or shorter than they should, you’re either pulling too tight or letting the yarn slide too freely. Slow down a notch and pay attention to how you wrap the yarn and how firmly you pull. A simple trick is to pause after each stitch and feel the tug on the yarn. If it’s too tense, loosen; if it’s too floppy, tighten a bit. The goal is stitches that sit evenly without warping or bunching.
Gauge matters even more in amigurumi because 3D shapes depend on consistent stitch counts. A small gauge shift can distort a face or limb. Recheck your gauge whenever you switch yarn brands or hook sizes.
Look for tight or loose rows
Chasing a steady line across your fabric helps you spot tension issues. Tight rows pull the fabric in, making it stiff and wavy. Loose rows wiggle and gape, creating a floppy edge that won’t hold shape. This shows up clearly along the sides of a blanket or the belly of an amigurumi character. The goal is clean, even rows that sit flat.
To fix tight rows, ease up on yarn wrapping and how firmly you pull. Try a slightly larger hook or loosen your grip a bit. For loose rows, you might need to tighten your grip or switch to a smaller hook. Practice pattern by pattern until you find your natural tension range. Don’t lock your hand into one position; be relaxed but controlled.
If you’re crocheting a garment or accessory, compare edges as you go. Uneven edges signal row tension issues that will show up in the final item. Adjust early to avoid a saggy hem or curved edge that’s hard to correct later.
Mark problem rows with stitch markers tension tips
Mark rows that feel off with stitch markers so you don’t lose track. Place a marker at the first stitch of each suspect row, then note how that row compares to neighboring rows. Repeating this for several rows reveals a pattern: tight stretches here, loose stretches there. This helps pinpoint where tension changes began.
Once you’ve marked the problem area, work a few rows with deliberate tension tweaks before committing. Try a slightly looser wrap on the next rows or switch back to your previous hook size for a quick test. If the marked rows blend in with surrounding rows, you’ve found your balance. Keep markers in place until you’re sure you’ve stabilized your tension.
Adjust hook and yarn to maintain even tension
You want stitches that look the same size from start to finish, with no bumpy or tight spots. Start by checking your grip and how you hold your yarn. If your yarn slides or you feel you’re pulling too hard, loosen your grip a notch. If stitches look too loose, tighten a bit. The goal is a steady, comfortable rhythm where each stitch takes the same amount of yarn and space. Your tension should feel like a gentle tug of war you can win without cramping your fingers.
If your fabric seems skewed or edges pop out, you might need to adjust your tools. Switching to a lighter or heavier yarn can change the yarn’s drape and how the hook bites into it. You want the yarn to glide, not drag. Try a smoother yarn with less fuzz to help your hands move fluidly and keep stitches uniform. Remember, the hook size interacts with yarn weight, so small changes here can make a big difference.
Keep notes on what works for each project. For a small amigurumi, you might favor tighter tension; for a shawl, looser tension can add drape. Your goal is consistency, not extremes. With practice, you’ll feel when your hook and yarn are behaving together rather than fighting each other.
Try changing hook one size up or down
When stitches are too tight, try a hook one size larger. A bigger hook lets the yarn slide more easily between stitches, reducing pull and easing tension. If stitches loosen up too much, go one size down. A smaller hook grabs the yarn more and tightens the loops into steadier stitches. Do a quick test in a couple of rows to see the difference.
Make a small swatch to test each change. You’ll see how the fabric behaves with a different hook size and decide whether you’re closer to target tension. If unsure, start with one size up and adjust from there. The aim is steady stitches that don’t cuff or flare at the edges.
If you’re aiming for a specific gauge, remember that changing hook size can shift overall size, which matters for seams and patterns. Use a swatch to confirm you’re hitting the right tension before committing to the whole piece.
Match yarn weight to hook size
Your yarn weight and hook size are a teamwork pair. If the hook is too big for the yarn, stitches may look loose and airy; if the hook is too small, they’ll be tight and stiff. For beginners, follow the yarn label’s recommendation as a starting point. If the fabric doesn’t look right, try one size up or down from the recommendation.
Think of it like shoes and socks: the right combination keeps your hands comfy and steady. The right hook-yarn pairing keeps your hands relaxed and stitches even. You’ll know you’ve nailed it when stitches sit neatly with minimal effort and the fabric holds its shape.
Keep a small chart in your project notebook: yarn weight, hook size, and how it felt while crocheting. This quick reference saves guesswork next time and speeds up achieving the tension you want. Your consistency improves when you trust the pairing you’ve found.
Test hook changes on a swatch
Before diving into a big project, make a simple swatch with the hook and yarn combination you’re considering. Crochet a few rows, then measure the fabric or compare to your gauge needs. If your swatch looks and feels right, you’re likely to keep that tension across the whole piece.
If inconsistencies remain, adjust again. Swatches save you from wasting time and yarn on projects that won’t meet your target tension. Keep notes on what worked so you can replicate the feel next time.
Use yarn tension techniques in your hold
Your yarn tension sets the pace of your stitches. By adjusting how you hold the yarn, you can keep stitches even and neat. Start with a comfortable grip and ensure the yarn feeds smoothly without pulling. Keep the motion simple: a steady flow, not a tug-of-war. You’ll feel more confident with practice, and your amigurumi will look more uniform.
Different holds affect how you control tension. If you switch between wraps and a loose loop, you can find what feels most natural. A firmer grip can help with tight stitches, while a looser hold helps with looser stitches. The key is a balance that lets your hands move freely without forcing the yarn. Pause and check your work. If you see uneven stitches, adjust your hold by relaxing a bit or opening your fingers a touch. Your goal is smooth, even tension that stays consistent round after round.
Add stitch markers and row counters
Stitch markers help you track where each round or row starts and ends. Place a marker at the beginning of each round to keep edges clean. This is especially helpful for beginners worried about missing stitches or twisting rounds. As you crochet, keeping track becomes automatic, and your tension stays steady.
Row counters take the guesswork out of how many rounds you’ve completed. You’ll know exactly where you are, so you can pause to check your tension without recounting stitches. A simple counter or pin-on-counter fits into your workflow. When you know your progress, you breathe easier and your stitches stay uniform. You’ll notice fewer miscounts and tighter edges.
Stitch markers and row counters work together to protect consistency. You’ll see fewer rip-outs when you maintain a steady rhythm. Markers remind you where to place your hook, and counters remind you when to stop or change technique. This habit translates to smoother amigurumi pieces and fewer shaping issues.
Use a tension ring or yarn guide
A tension ring or yarn guide helps control how much yarn feeds into your hook. Set the guide so the yarn feeds smoothly without pulling on your fingers. This small adjustment can make a big difference in your fabric’s appearance.
If your yarn keeps snagging on your fingers, a tension ring can help you loosen that grip. You’ll feel less fatigue and more control. A yarn guide sits near your work and directs the yarn into the hook with less effort. Your stitches stay consistent because the yarn isn’t tugging your hand in different directions.
Using these tools makes your technique repeatable. You’ll find it easier to keep your tension the same from start to finish. A steady setup helps you learn speed without sacrificing stitch size. Your amigurumi will look smoother, and you’ll finish projects with less frustration.
Do tension training exercises daily
Tension training exercises daily help your crochet get steadier, almost like training for a sport. Start with simple grips: hold the hook lightly, then press your thumb and finger together as you pull through stitches. The goal is consistency, not strength, so keep it gentle. If your fingers tire, take a short break and shake them out.
Practice alternating between loose and tight stitches on scrap yarn. The aim is to hear when the yarn wants to glide versus grip. Think of tuning a radio: you want a clean signal, not static. A few minutes each day helps you reach a natural, comfortable tension that translates to your real project. Keep a calm rhythm, and let muscle memory guide your hands.
Finally, track progress with quick checks. After a row, compare two stitches about an inch apart. If they’re not similar, adjust your grip slightly and try again. This is how you build a solid habit: tiny, consistent corrections. How to Keep Consistent Tension Throughout Your Amigurumi becomes easier when you treat tension like a friend you practice with, not a fault you fix in passing.
Make small swatches to build muscle memory
Small swatches teach you where your tension should sit. Learn how tight or loose you should hold the yarn for different stitches by doing several short practice pieces. Start with a simple chain and a row of single crochet, then compare how each swatch sits in your hands. Practice makes your fingers recognize the right grip without thinking about it.
Use these swatches to test your gauge and adjust as needed. If a swatch looks uneven, note which part of your hand felt too tense or too relaxed. Build a library of micro-lessons you can pull from when you work on real projects. Treat each swatch as a tiny lesson: note what you did, how it felt, and what you’ll change next time.
As you grow, extend your swatch variety. Try different stitches and textures, but keep the goal simple: steady, even stitches with smooth yarn flow. Your muscle memory will thank you as your hands move with less thought and more precision. By building a collection of swatches, you’ll know exactly how your tension should look across techniques.
Work even stitches amigurumi for 10 minutes
If you’re making amigurumi, you want stitches that stay uniform through long rounds. Spend 10 minutes practicing even stitches on your amigurumi piece. Focus on keeping a consistent pull and a steady pace. It’s not about speed; it’s about keeping stitches in line, with no gaps or bumps. This short session sets you up for smoother seams and a neater overall look.
During the 10-minute drill, imagine carving a tiny path with your hook. Each stitch should land neatly, with the same amount of yarn showing on the front and back. If you feel one area getting looser, pause, reset your grip, and continue. The key is repetition: small, repeated efforts that reinforce the right feel for your amigurumi.
Finish with a quick appraisal: look for stitches that stand out as off and note them for future sessions. Focusing on evenness now saves you from reworking later and builds confidence as you see progress in small, manageable chunks.
Repeat a 20-stitch swatch everyday
Repeat a 20-stitch swatch daily to lock in your technique. This steady, short practice helps you build automatic control. Each day, start fresh and aim for a uniform gauge across the swatch. You’ll feel your hands settle into a rhythm as you progress.
Treat the 20-stitch swatch as a diagnostic tool. If stitches look uneven, adjust your grip or yarn tension before you continue. The consistency you build here carries over to larger projects, including amigurumi and garments. Make this a daily habit so your tension becomes second nature.
End each day by noting one improvement for tomorrow. Small, honest tweaks add up fast and keep you moving forward. Your daily 20-stitch swatch becomes a personal barometer for how you’re keeping consistent tension throughout your amigurumi and beyond.
Finish with blocking and shaping for amigurumi tension consistency
Finish your amigurumi by controlling tension so every piece sits nicely together. Blocking and shaping are final steps that help stitches stay even and pieces feel cohesive. The fabric relaxes into a uniform texture, giving your plush a neat, professional look. This is about care and guiding stitches to settle where you want them, not forcing a particular shape.
When you block, you invite the yarn to release tight spots and even out small variances in stitch height. Be mindful of how much water or steam you apply; too much can stretch delicate areas. Think of it as a gentle nap for your work. The goal is a calm, even fabric that helps your amigurumi hold shape without stiffness.
As you finish, check balance across the whole piece. If one area seems uneven, re-block with lighter pressure or adjust shaping by pinning and steaming again. You’re shaping with intention, not forcing. The result is consistent tension that makes your amigurumi look polished and sturdy.
Stuff and shape pieces as you crochet
While you crochet, keep a light hand on stuffing to avoid altering tension. Test the gauge by lightly pulling on the fabric and feeling how it holds its shape. If you notice saggy spots, add a little stuffing in those areas before finishing the seam. Fill evenly, not tightly packed, so stitches stay visible and neat.
Shape by working from the center outward and check symmetry often. If a limb seems too short or a head looks off, adjust by adding or shifting stuffing before sewing pieces together. The goal is a balanced silhouette that reads consistently from every angle, not a lumpy finish that catches the eye.
Block parts lightly to even stitches amigurumi
Blocking parts lightly helps even your stitches and keeps your amigurumi cohesive. Dampening or steaming should be very gentle, focusing on an even surface rather than changing the yarn’s character. Pin edges carefully to avoid distorting seams, then let the piece rest until dry. The result is smoother rows and fewer visible joins when you sew pieces together.
If you notice curl or tight columns in certain sections, a light block can relax those areas without flattening the texture you’ve worked so hard to achieve. It’s about consistency across your parts so the final figure sits with the same tension throughout.
Pin and steam gently to shape pieces
Pin edges where you want them to meet and use a light steam to set the shape without soaking the yarn. Move slowly and check often, since you want shaping to hold after the pieces dry. Leave pins in place until the fabric cools and sets. This step helps your parts hold correct forms and reduces distortion when you sew them together. It also helps keep your amigurumi looking proportional from every angle. You’re guiding the fibers, not bending them out of shape.
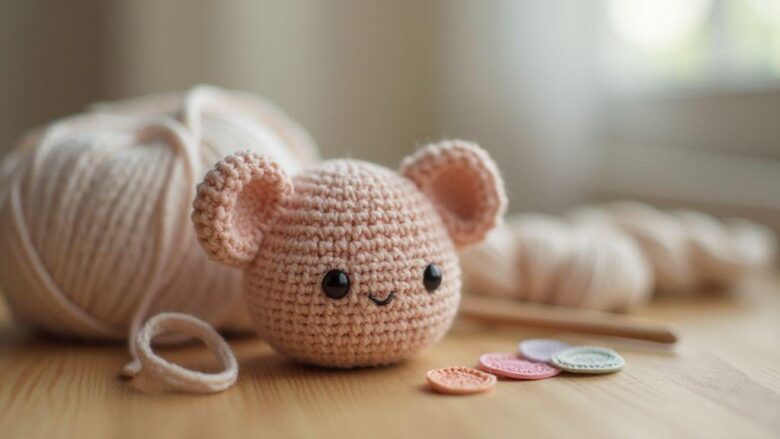
How to Keep Consistent Tension Throughout Your Amigurumi
How to Keep Consistent Tension Throughout Your Amigurumi is a practical goal you can achieve with the right habits. Focus on steady yarn flow, relaxed holds, and regular checks as you crochet. Use gauges, swatches, and markers to track performance, and adjust hook size, yarn weight, and technique until your stitches sit evenly. Daily tension drills, small swatches, and mindful blocking all reinforce consistent tension, helping your amigurumi hold its shape from start to finish. With patience and practice, you’ll notice your stitches marching in line, round after round.

Clara Fern — Crochet Artist & Amigurumi Designer
Clara Fern is a crochet artist and amigurumi designer based in Austin, Texas. With 9 years of experience working with yarn and hook, she transformed a lifelong passion for handcraft into a creative mission: making amigurumi accessible, fun, and deeply rewarding for crafters of all levels.
Clara discovered amigurumi during a trip to Japan in 2017, where she fell in love with the art of bringing tiny characters to life through crochet. Back home in Texas, she spent years studying color theory, design principles, and advanced crochet techniques — developing her own signature style that blends kawaii aesthetics with original character design.
Through maclafersa.com, Clara shares everything she has learned — from choosing the right yarn and reading your first pattern, to designing fully original amigurumi characters from scratch. Her writing is known for being clear, detailed, and genuinely helpful, with no steps skipped and no secrets kept.
When she’s not crocheting, Clara enjoys watercolor painting, visiting local yarn shops, and drinking way too much coffee while sketching new character ideas.


