
Basic Stitches for 3D Shapes
You’ll build stronger shapes when you know the basics. Start with tight, consistent tension so your 3D forms stay round and sturdy. Practice with a few swatches, then move to small spheres, ovals, and cylinders. Your stitches should feel deliberate, not loose or sloppy. When you keep your stitches even, your shapes will hold their form and look neat from every angle—like sketching with a pencil: the straights and curves must be intentional to read as 3D.
Your goal is to control how each round grows. Use a steady rhythm and count your stitches aloud if you need to. The more you stitch, the more you’ll sense where the fabric wants to puff or flatten. If a round comes out uneven, don’t panic—adjust your tension and rework just a few stitches. Small tweaks now save bigger fixes later.
Practice tips you can trust: mark the beginning of each round, pause to check symmetry, and keep a mental glossary of your terms. When you can predict how many stitches a round needs, you’ll align your curves with less effort. Your hands will thank you for the muscle memory you build by stitching with intention, not guesswork.
How to Crochet Perfect Spheres, Ovals and Cylinders overview
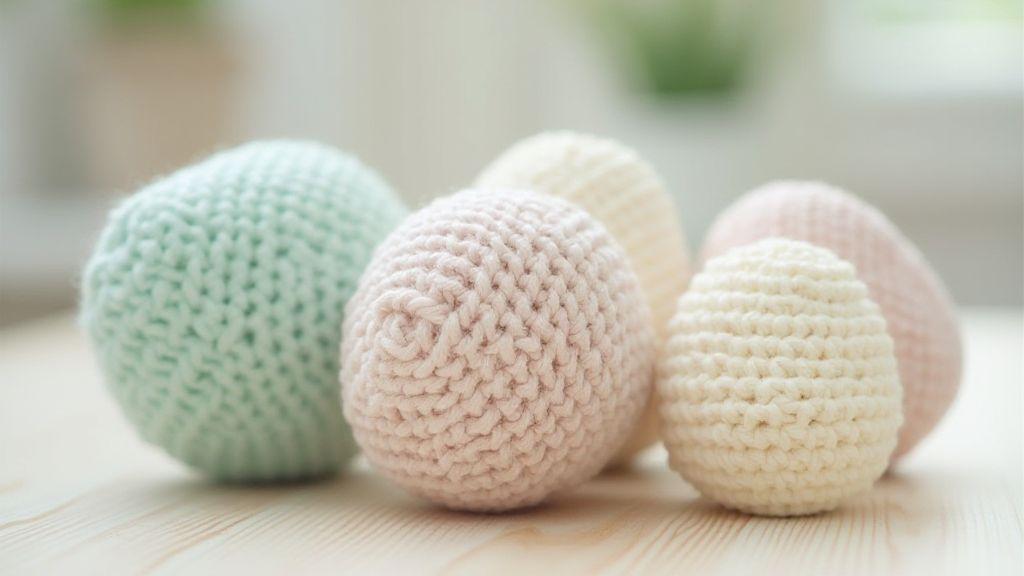
Mastering spheres, ovals, and cylinders starts with choosing the right base stitches and shaping methods. Count stitches, adjust increases, and keep edges neat as you transition between rounds. Vary increases and decreases just enough to create a smooth outer surface without ridges. Test on a practice ball before committing to a final piece—that’s smart design, not failure.
Spheres demand even distribution around all axes, ovals need a longer stretch in one direction and a shorter in the other, while cylinders stay straight up and down with steady, uniform rounds. You’ll use the same tools—single crochet, magic ring, and careful round counts—but apply them with patterns that suit each shape. Keep the fabric tight at the core and looser at the outer edges where it needs to breathe.
As you work, you’ll notice how changing where you add increases or place decreases changes the silhouette. This is your design language in yarn form. The goal is to predict how the stitches push the fabric outward and choose increases or decreases accordingly. Practice makes these shapes come to life in your hands.
Single crochet and magic ring use
Single crochet gives clean, tight stitches for starting a sphere or cylinder. Start with a magic ring to avoid a center hole, and stay consistent with tension so the center doesn’t puck.
- For a sphere, keep increases evenly spaced so it stays round as it grows.
- For an oval, add more stitches in the direction you want to elongate and reduce where you want it to pinch.
- For a cylinder, work in smooth rounds with minimal increases so the sides stay straight.
A steady rhythm helps edges stay neat, and with practice your work becomes more predictable.
Read round counts
Read round counts like a map. Each round length tells you how many stitches should exist around your circumference. Adjust increases or decreases to hit exact counts, keeping your 3D form balanced. If a round isn’t the right count, fix it before moving on. Mark or note counts to guide future projects and keep spheres, ovals, and cylinders consistent.
Yarn and Hook Choices
- Pick fiber for firmness: For firm shapes, cotton stays crisp and acrylic blends provide structure without weight. A mercerized cotton blend can give crisp edges; feel the fiber and swap if it lacks body.
- Hook size and gauge rules: Smaller hooks yield tighter fabric and more density; larger hooks relax the fabric. If your fabric is too loose, go down a hook size; if too stiff, go up. Maintain a consistent gauge for uniform shapes.
- Check yarn label: Start with the recommended hook size and gauge, swatch, and note what works. If the label reads 5.0 mm, test that size first. Keep notes to reproduce the same firmness and symmetry in future pieces.
How to Crochet Perfect Spheres, Ovals and Cylinders
- Pick fiber for firmness: Use fibers that hold shape—cotton for crisp edges, sturdy acrylic blends for structure. If results are floppy, choose a firmer fiber and tighten stitches slightly.
- Hook size and gauge: Hook choice changes fabric density and roundness. Match your swatch to the target pattern, adjusting until the fabric feels right.
- Check yarn label: Use the label as a starting guide, then swatch to confirm the feel and firmness you want. Track what works for reproducibility.
Tension and Swatching
Swatching unlocks better shapes. Treat tension as the breathing room in your fabric: too tight pulls edges; too loose causes drift. Crochet with your actual yarn and hook, compare gauge to the pattern, and adjust by changing hook size until the swatch sits flat and even. Keep tension notes for repeatable results across projects.
- Swatching is about how your hands move with yarn. Relax your grip, crochet with steady, even motions, and use a timer for short swatches if you’re new. Your goal is consistent fabric across the whole piece.
- Swatching is a planning tool, not a chore. It pays off later by guiding hook or yarn choices and helping you decide early whether to adjust tension for tighter spheres or looser ovals.
Swatch to match shape size
- Match your swatch to the target shape size using the same stitches as your final piece. If you want a compact sphere, swatch density should reflect that; for a soft oval, the drape should mirror its intended feel.
- Record exact stitch and row counts that yield the desired width and height, then compare to the pattern. If the swatch diverges, adjust the hook or yarn weight until it matches the intended size.
- Use your swatch as a blueprint for the final piece. If it’s off, don’t force the final piece to fit—change the materials or tension until the swatch aligns with your plan.
Even increases and decreases crochet
- Practice even increases for smooth spheres and even decreases for clean tapering. If increases cluster or decreases bunch, the shape will be lumpy.
- Count stitches after key changes to stay on track. Maintain a steady rhythm; if a wobble appears, re-check placement. Consistency yields a clean, professional silhouette.
Measure rows and rounds
- Count stitches across rows to verify width; measure circumference at several points for rounds to ensure even circles. Small errors add up, so correct early.
- Frequent early measurement helps lock in the curve for spheres; for ovals and cylinders, check both length and girth to avoid warping.
- Use a soft tape measure and compare against your notes to stay true to your design.
Increase and Decrease Patterns
Increases and decreases shape your form. Maintain even spacing to keep a sphere smooth and a cylinder straight. If increases cluster or decreases bunch, adjust spacing for a steady silhouette. Keep track of stitch totals after every few rounds to stay on course.
- Even spacing creates a round look; skip or cluster spacing leads to flattening or bulges.
- Count aloud or mark increments to maintain rhythm. For spheres, gradually reduce increases as you rise through rounds and begin decreasing at the right moment.
- This approach yields a polished, deliberate final piece.
Even spacing for round shapes
- Place increases at regular intervals to mimic spokes. Consistent spacing keeps the fabric flat and smooth.
- Use markers or a rhythm you can count to guide placements. Practice with a simple sphere to dial in spacing before moving to more complex shapes.
Invisible decreases for smooth joins
- Invisible decreases hide within the fabric, giving clean joins for spheres, ovals, and cylinders.
- Practice on a swatch: slip a stitch, then slip off a neighboring stitch to close gaps with the same stitch height and tension.
- If a lump appears at a join, rework the row and adjust your technique for a seamless transition.
Track stitch totals
- Write down starting stitches, increases per round, and when you begin to decrease. This math mindset makes shaping predictable.
- Count stitches at the end of each round and compare to your notes. This helps you stay on pattern and reliably reproduce the shape.
Stuffing and Internal Support
Stuffing decisions matter as much as stitch choices. Use a combination of fill and internal supports to hold form, from polyester fiberfill to ribbed channels that stop sagging. Plan stuffing around the final pose of your piece.
- Assess firmness needs for each area: heads with lighter bulk, limbs and torsos with denser cores. Test by pressing to feel uniform resistance.
- Keep interiors clean of gaps; place extra fill near joints or curves to prevent flattening. Sew pieces together with inner stuffing so seams stay smooth.
Stuffing techniques for crochet shapes
- Choose fill that matches shape and feel. Pack gradually with a blunt tool to reach tight corners for even distribution.
- For tricky parts, use a denser core then wrap with softer fill. Test with a gentle squeeze to avoid flat spots.
Maintaining shape in crocheted toys
- Start with light filling in flat areas and build density where structure is needed. Use subtle internal supports (e.g., a pipe cleaner or wrapped wire) for poseable parts, hidden under soft fill and stitched securely.
- Double-check edges and curves for tension lines; adjust stuffing depth at joints as needed to maintain smooth surfaces.
Stuff in layers
- Layering stuffing creates a firm base and a soft outer shell, preventing flat spots and helping the shape hold under use.
Seamless Finishing Tricks
Seamless finishing hides the work and showcases your skill. Plan joins in advance to hide work and keep texture even.
- Finish with even tension and a flat lie. If stitches look uneven, backtrack a few rows and even out tension.
- A seamless finish isn’t magic; it’s repeatable technique that strengthens your capability for more complex shapes.
Seamless spherical crochet methods
- Align increases evenly around the sphere and match decreases to keep it round. Keep working yarn tension consistent when switching sections.
- Use invisible joins when closing the final round. Practice with a few small spheres to dial in the method.
Hidden joins and weaving tails
- Weave tails through neighboring stitches to hide them; slip the tail under multiple layers.
- Use short, precise passes and flatten as you go to avoid showing the tail. When finished, tuck the tail inside and trim close but not flush.
Close with slip stitch
- Close with a slip stitch for the smoothest possible line. Insert into the back loop of the final stitch and pull through gently to avoid puckering.
- A light pass with a needle can smooth minor texture changes caused by closing. If color changes or textured yarns are used, ensure the slip stitch doesn’t interrupt the pattern.
Crochet Sphere Tutorial for Amigurumi
You’re about to master shaping a perfect amigurumi sphere. This tutorial helps you create round, snug spheres for heads, bodies, or decorative balls. With consistent tension, even increases, and clean closures, your spheres will look pro and integrate neatly with features like eyes or noses.
- Start with lightweight yarn and a matched hook; settle tension so the stitches aren’t too tight or too loose. Pause to count stitches and check rounds stay circular. Pull tight on the final slip stitch so the end is tucked neatly.
- Finish with an invisible seam. Keep rounds tight and height consistent so the sphere sits evenly. If making a larger body, ease tension slightly to prevent puckering.
- Test spheres in real projects by comparing side-by-side to spot differences and refine future attempts. With patience and practice, you’ll use spheres as reliable foundations for ovals and cylinders.
Amigurumi sphere shaping tips
- Use a tight but flexible grip to maintain steady tension. Evenly spaced increases keep the sphere balanced; flat spots signal sparse increases or uneven tension.
- Close the final round with a whisper of extra yarn to hide the end. For tiny spheres, use a smaller hook for the last rounds to keep the surface tight.
- Roll the sphere between your fingers to detect wobble; if present, return to the previous round and adjust tension. A stitch marker at the round start helps you see where increases should land.
Eye placement and safety parts
- Place safety eyes evenly apart and test expression from the front. If using embroidery, secure ends tightly.
- Insert eyes or noses before finishing to sew in ends from inside. For slippery yarns, double-knot ends or use a dab of fabric glue.
- Slightly lower eyes for a shy look; higher eyes give a surprised vibe. Place a mouth below the eyes to maintain balance. Practice on a practice piece before finalizing.
Make matching halves
- Crochet two identical hemispheres for a seamless sphere. Use the same foundation and rounds for both halves, matching heights and color changes if stripes are used. When joining, stitch in the round so the seam sits flat and hidden.
- Tighten or loosen the final rounds of one half as needed to achieve perfect symmetry before joining. A matched pair holds its shape when stuffed and posed.
Oval Shaping Techniques
You’ll treat ovals as small crochet sculptures. Plan the oval’s length and width, then adjust with increases and decreases to shape edges smoothly. Even simple stitches can yield a precise oval with steady symmetry and tension.
- Begin by monitoring edges for even growth; if one side becomes more rounded, re-check stitch counts and adjust.
- Start rounds to prevent a wonky center; practice helps you predict how many rows or rounds you need to reach the target size.
- Finish with a flat, neat oval ready for the next step.
Crochet oval shaping techniques
- Use a foundation with a multiple of stitches; add increases at ends to form the oval. Mark first and last increases to keep counts straight.
- Balance sides by adding stitches on the lagging side; gentle tapering toward ends prevents sharp corners.
- To lengthen or widen an oval, adjust foundation stitches and increases proportionally. Pause between rounds to check alignment.
Shaping flat vs 3D ovals
- Flat ovals require calm, even edges with symmetric increases. If tips drift, straighten by re-checking counts.
- 3D ovals need extra height or depth; space increases evenly to avoid lumps. Always check symmetry after rounds.
Use stitch markers
- Mark the start and key increases to stay aligned. Markers prevent miscounts as you move stitches toward the oval ends.
Cylinder Patterns and Uses
You’ll discover practical cylinder patterns you can use today. Treat cylinders as the backbone of many projects—from toy limbs to decorative stems. Choose a tight gauge for stability or a looser one for a soft feel. A cylinder is a rolled, open form that holds its shape with careful stitch placement and enough rounds to stay sturdy.
- Cylinders open doors to repeatable forms in art and craft. Scale patterns by changing rounds or hook size; pair with spheres and ovals for more complex shapes.
- In daily projects, cylinders save time for handles, legs, or architectural accents. Keep notes on row counts, stitch counts, and increases/decreases to reproduce reliably.
Crochet cylinder pattern basics
- Start with a tight, even foundation. Cast on stitches to match circumference and join with a slip stitch to begin the first round; keep stitches snug but not tight.
- Use simple increases to build an even tube: increase evenly across rounds, then continue with no increases for the body. For a closed end, taper with a few rounds of fewer stitches.
- Maintain edge consistency and gauge; count stitches regularly. When you reach the desired length, switch to a slip-stitch round or a few rounds around the edge to lock it neatly.
- Finish with a secure closure if needed: for a capped cylinder, crochet a flat disc and sew to the end; for a hollow tube, weave ends at the start or end to keep the inside tidy.
Shaping crochet spheres ovals cylinders for limbs
- Spheres make round ends for heads or limbs; start small and increase evenly, then slow increases to finish with a gentle curve.
- Ovals balance proportion by elongating in one direction; cylinders narrow toward the end with decreases or a conical shaping in the last rounds.
- Combine shapes for dynamic forms: join a sphere to a cylinder for a rounded limb end, or insert an oval into a torso. Use secure seams and light stuffing to keep everything aligned.
Reinforce bases for stability
- Add a solid base to prevent wobble: a small disc attached to the bottom of a cylinder helps balance.
- For larger cylinders, consider an internal core (e.g., a small circular support) to keep form upright and reduce sag. This improves weight distribution and stability.

Clara Fern — Crochet Artist & Amigurumi Designer
Clara Fern is a crochet artist and amigurumi designer based in Austin, Texas. With 9 years of experience working with yarn and hook, she transformed a lifelong passion for handcraft into a creative mission: making amigurumi accessible, fun, and deeply rewarding for crafters of all levels.
Clara discovered amigurumi during a trip to Japan in 2017, where she fell in love with the art of bringing tiny characters to life through crochet. Back home in Texas, she spent years studying color theory, design principles, and advanced crochet techniques — developing her own signature style that blends kawaii aesthetics with original character design.
Through maclafersa.com, Clara shares everything she has learned — from choosing the right yarn and reading your first pattern, to designing fully original amigurumi characters from scratch. Her writing is known for being clear, detailed, and genuinely helpful, with no steps skipped and no secrets kept.
When she’s not crocheting, Clara enjoys watercolor painting, visiting local yarn shops, and drinking way too much coffee while sketching new character ideas.


