
Pick the Right Needle for Your Tiny Amigurumi
When you’re stitching tiny amigurumi, the needle you choose can make or break your project. The goal is smooth movement through yarn, leaving clean, tiny stitches with even tension and neat seams. Think of the needle as an extension of your hand: the right one feels almost invisible as you work. Start with a needle that matches your yarn weight, and you’ll notice straighter seams and less frustration in the long run.
Comfort matters too. If your hands cramp after a few minutes, you’ll lose control and miss small stitches. Choose a needle with a comfortable grip and balanced length. Keep a small set handy to switch as you move from body to limbs. With the right tools at your side, you’ll see fewer skipped stitches and fewer headaches as you bring your tiny characters to life.
Ultimately, the best needle is the one you can control without forcing your yarn. The key is to avoid snagging and to maintain control over your tension. This is part of the craft that helps you achieve the clean lines your amigurumi deserves.
Needle selection for amigurumi
Your first choice is the needle type. Blunt needles are kinder to stuffing and prevent splitting, helping keep seams smooth. Sharp needles can pierce tight stitches or tricky fabric, giving precise placement when building tiny limbs. If you’re just starting, a blunt needle is safe and lets you get comfortable with the stitch rhythm first. For finer yarns, a sharper tip can help you thread through dense areas, but use it carefully to avoid splitting.
Next, consider needle gauge and length. A small gauge (thinner) needle works well for lightweight yarns, while a larger gauge handles thicker yarns with more control. Shorter needles are easier to maneuver in tight spaces, which is exactly what you want for shaping tiny parts. If stitches wander, switch to a shorter needle to keep work tight and accurate. The right combination of type, gauge, and length yields crisp, even stitches every time.
Finally, match the needle to your project phase. For stuffing holes and closing seams, blunt needles reduce snagging. For detailing and embroidery on tiny parts, a sharper needle can be useful, but use it in bursts to avoid loose, uneven threads. Keep a few needles ready; you’ll adapt quickly to whatever your tiny creature needs next.
Use blunt vs sharp needles
Blunt needles are gentle on yarn and stuffing, helping you finish with neat, tidy stitches and minimal snagging. They’re ideal for finishing touches and small openings.
Sharp needles excel at precision, allowing you to tackle tight spots or delicate details. Use them sparingly for specific tasks, then switch back to blunt for bulk work. This blend gives you clean edges and solid control.
If you’re unsure, start with blunt for most of the project and bring in sharp only for tricky spots. A steady rhythm and confidence grow as you master each needle type.
Needle length and control tips
Shorter needles give you control in tight spaces; longer needles reach awkward angles without pulling the yarn. For tiny amigurumi, a compact length helps you stay precise. Hold the needle with a light touch; smooth, controlled movements keep tension even. If stitches pull or the yarn snags, pause, reset your grip, and try a lighter touch with the same needle.
Practice a few test stitches to build muscle memory. Maintain steady yarn tension and let the needle guide your work. A calm, deliberate rhythm beats rushing every time.
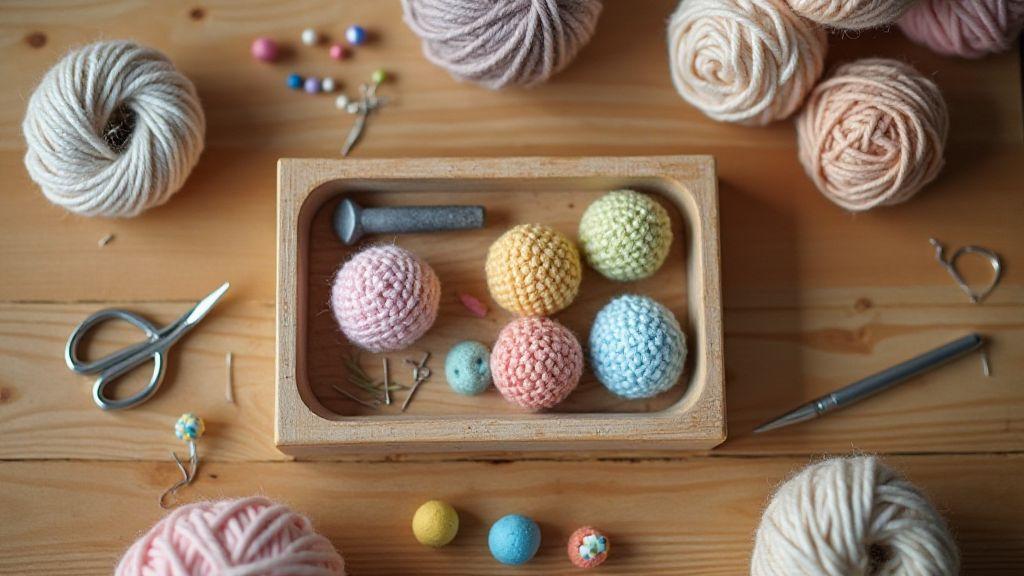
Gather Tools You Need for Tiny Sewing
The right tools make all the difference in tiny sewing. Start with a sharp, small needle and fine thread that won’t bulk your stitches. You’ll also want tiny scissors, a seam ripper, and a couple of pins to hold pieces in place. A quality toolkit leads to steadier hands and a more confident finish.
Beyond the basics, add a fine crochet hook for tidying up stubborn areas, and a ruler or measuring tape to keep proportions on track. A small pin cushion and portable, well-lit workspace help you see every stitch clearly. Organized tools reduce guesswork and keep projects moving smoothly.
Keep your toolkit tidy: use a small container to separate needles, threads, and scissors. Labeling helps you find what you need quickly, especially when you’re mid-project. Clean tools and a dedicated workspace prevent hunting for lost pins and frayed threads.
Tools for sewing tiny amigurumi
Your toolkit should include ultra-fine needles, soft thread that sheds minimally, and a tiny pair of scissors that can reach tight spots. Keep a few needle sizes on hand for different seams. A thin crochet hook helps pull yarn through tight corners without tearing fabric. Lightweight thread and a color-matched option help seams blend in. A fabric marker or chalk outlines stitch positions to keep proportions. If knotting is tricky, a small bead or needle threader can help. The goal is a minimal but mighty set that covers every tiny detail.
How a thimble and magnifier help you
A thimble protects your finger and provides leverage when threading tiny beads. A magnifier or magnifying headlamp helps you see the smallest stitches clearly, reducing eye strain and keeping your work crisper. Pair magnification with good lighting for best results. Choose a comfortable thimble to wear for long sessions.
Tool care and storage tips
Clean tools after each project to prevent rust or dull blades. Wipe with a clean cloth and apply a small drop of oil to metal parts. Store sharp needles and scissors in a protective case to prevent accidents. Keep thread in good condition by replacing frayed skeins. Return tools to labeled spots to maintain a tidy setup and quick access next time. Regular upkeep helps you avoid tangles and damaged yarn.
Choose Yarn and Thread for Secure Seams
Durable seams start with the right yarn and thread. Choose a yarn with a tight twist and clear stitch definition to keep stitches neat and resistant to pulling. Pair it with a thread that matches the yarn weight so stitches stay even and sturdy. Consider how the finished amigurumi will be handled: soft toys need a little give, while small parts benefit from stronger thread.
Color and finish matter too. A darker thread on light yarn can reveal every stitch, while a close color match hides minor imperfections. For secure seams, you can use a slightly thicker thread for final passes, but keep it consistent to avoid puckering. Test on a small swatch to feel the balance. The right combination makes inseams look clean and endure handling.
Fiber content matters. Cotton yarn with polyester thread provides a solid, matte finish and is easy to sew; acrylic blends can be forgiving for beginners. If you plan to wash the amigurumi, choose machine-safe yarn and thread.
Match thread strength to yarn weight
Matching thread strength to yarn weight pays off. For light yarns, use a finer thread; for medium or bulky yarns, a slightly stronger thread helps keep seams from loosening. Test a tiny seam first and adjust stitch length or tension as needed. Keep notes on the balance for future projects so every tiny part fits in just right without frustration.
Sewing tiny amigurumi parts with matching thread
Stitching in tight spaces requires a fine needle and thread that blends with the yarn color. This makes stitches less noticeable and helps you sew in a straight line. Use a magnifier or good lighting and maintain a steady rhythm to prevent sneaky pulls. Attach eyes, ears, or accents with a slightly shorter tail and a gentle pull. Do a quick test run on scrap yarn before finalizing a seam to avoid headaches later.
Tie-off and knot basics
Secure tie-offs without bulk. Use a two- or three-knot method, then weave the tail into the seam with a little filler (rice or a crochet hook) to hide the knot. Trim close to the knot but leave a tiny tail to prevent loosening. If closing a hole or joining pieces, push the tail through the inside of the stitch to hide it. Tighten gradually to avoid puckering.
Use Pins and Markers to Align Pieces
Alignment is essential when sewing tiny amigurumi parts. Pins hold pieces in place while you sew, while markers indicate stitch lines, color changes, or symmetry.
Lay pieces flat and line up shoulders, base hems, and other key points. Place lightweight pins perpendicular to the seam line to guide your needle. Use markers to show where stitches begin, eyes go, or a seam ends. Mark each piece if multiple parts are involved to keep track of paired edges. Double-check alignment before basting or whipstitching; this saves scrapped work later.
Using pins and markers for amigurumi alignment
Pin major seams first, then along curves to hold shape. Mark the center of curved edges to mirror on the opposite side. Place a marker at the stitching line and baste slowly to test fit. Use different color pins for different parts to improve visibility. Use markers sparingly—only where alignment matters, like eye placement or limb symmetry.
Mark symmetry for eyes and limbs
Mark the centerline of the face to place eyes equidistant from it. For limbs, mark midpoints and endpoints to ensure consistent angles and lengths on both sides. Use light, erasable markers to test placement. Dry-fit tests help you gauge proportion before final stitching. Symmetry gives your amigurumi character and balance.
How many pins to use per piece
Pins are anchors, not cages. Start with four pins at key corners or edges, add two to three along the seam to maintain curve and alignment. For tricky bends or long seams, add a pin every inch where fabric tends to slip. Avoid overpinning, which can crowd the area and hinder sewing.
Master Precise Stitching Techniques You Can Repeat
Aim for clean, even stitches that blend into the amigurumi. Consistency and control trump luck. Mark a baseline for stitches so rows read the same on the next piece. If a stitch pulls too tight, ease up and recheck your grip. Build muscle memory with deliberate practice; your finished pieces will reveal the rhythm behind the craft.
Repeatable results beat perfection on the first try. Flatten your work as you go to keep tension even and prevent puckers. Use a comfortable hook size to control the fabric without extra effort. After a seam, snug it gently without distorting the shape. Consistent technique yields stitches that sit neat and sturdy, ready for stuffing or detailing.
Precise stitching techniques for amigurumi
Lock in a steady rhythm for round work. Count stitches to maintain gauge and adjust when needed. Use invisible joins like the mattress seam to hide seams. Maintain uniform density on feet and ears to keep them anchored. Place facial features with intention; mark positions lightly before sewing to avoid shifting.
Control stitch spacing and tension
Spacing and tension keep amigurumi stable. Test tension on scrap first, then apply to the main project. Pull just enough to snug stitches without distorting the shape. Rotate work in the round to keep tension even. Increase or decrease gradually to maintain harmony. If a row goes off, recheck and fix small slips early to save future rework.
Practice drills to steady your hand
Dedicate time to drills: single stitches on a flat swatch, sets of ten stitches, then compare. Build muscle memory with rounds of a fixed stitch count. Use a mini project to test speed versus precision. Slow down if tension suffers; steady pace trains confident, accurate stitching.
Join Small Limbs Neatly and Securely
Joining limbs neatly creates a cohesive toy. Align the limb with the body and use a few secure slip stitches to hold position. Keep tension even so the limb sits flush and smooth. If gaps form, tighten where needed and smooth the seam with a finger. Pause to compare both sides—alignment matters. After finishing, feel for rough spots and ensure a consistent texture along the join.
Joining small amigurumi limbs neatly
Line up edges, anchor with light stitches, and work along the seam in small, even steps. Rotate pieces for curves to keep tension even. The seam should hide under the toy’s texture; check for raised threads and weave ends in from the inside to keep the surface pristine. A consistent rhythm and the same stitch type across the seam help maintain uniform density.
Test joint strength before finishing
Gently apply pressure to test joints. If there’s movement, reinforce tight spots with extra stitches. A well-tested joint survives play and posing with confidence. If a joint fails, add reinforcement or adjust tension and stitches.
Finishing raw yarn ends
Weave ends tightly back into the body and limbs. Weave from inside, lock with a tiny knot, and trim close to the knot. Switch directions with each pass to prevent fraying. If an end proves stubborn, tug gently to ensure it’s secure.
Attach Small Crochet Pieces Without Gaps
Joining tiny crochet parts should be seamless and sturdy. Use a matching yarn and a fine needle to keep stitches neat. Use a mattress or whip stitch with tiny, even stitches to keep the join flat. Line up edges carefully and sew slowly for a polished result. Consistent tension prevents gaps or puckering.
Tips for attaching small crochet pieces
Place pins along the seam to keep edges aligned while sewing. Use a sharp needle and color-matched thread to hide stitches. Start with anchor stitches at the center and work outward in a straight line. Keep stitches small and evenly spaced to avoid bulk. For tiny parts, a running stitch or ladder stitch can be especially effective. Tie off securely and weave ends into the seam.
If color shading matters, stitch with a color that matches the bulk of the piece to blend the seam. Flatten the work occasionally to check for gaps; add a tiny stitch if needed. Use flat stitches near the edge and blend into the body with a hidden back stitch for a seamless look.
Quick fixes when parts misalign
Pause and adjust before continuing. Gently nudge edges into place with a needle or crochet hook, then re-pin. If a seam is bumpy, add a few tiny stitches to smooth it. If a gap forms after sewing, slip a needle through the back and pull a short length of yarn to fill it. For larger misalignments, undo a small section and resew. Repositioning with small shifts is often faster than full ripping.
Repositioning without unpicking
Use pins to hold a new position, slide parts together, and re-stitch near the original line to preserve progress. Move in small increments to avoid distorting fabric.
Add Finishing Touches That Make Them Look Pro
Finishing touches transform a project from handmade to store-like. Plan the final pose, facial expression, and seam placement. Choose threads and buttons that complement the yarn. Bold accents can make the piece pop, while subtle shading adds depth. Keep ends tidy, knots secure, and edges clean for a professional look.
Assess symmetry as you finish. If one ear sits higher or a limb tilts, adjust now. Label parts if your pattern has multiple sections and lay them out in stitch order to avoid misplacing pieces. Hide ends securely, weave inside, and trim near knots. A neat presentation invites touch and signals quality craftsmanship.
When comparing to store-bought toys, the difference should be in construction confidence, not stray threads. Finish by hiding ends and trimming close to knots. A polished presentation elevates the whole piece.
Finishing touches for tiny crochet pieces
Secure raw ends with tight weaving and a small final knot. Use safety eyes before final seam if needed, with backing and glue for extra security. For embroidery, use fine, sharp needles and short, tidy stitches. Test color changes on scrap before applying them to your piece. Less is more—one well-placed highlight can be more charming than a crowded face.
Maintain consistency across pieces: bury ends in the same direction, keep eye distance uniform, and apply the same finishing routine to build recognizability.
Secure safety eyes and tiny embroidery
Attach safety eyes before closing the final seam. Use washers and backing for security, and double-knot or stitch to prevent loosening. If needed, add a touch of clear fabric glue on the back after sewing the backing. For embroidery, keep stitches short and even, outlining features to maintain balance from all angles.
Weave all ends securely from the back and trim close to the fabric. Bury contrasting thread ends too so they don’t peek through.
Trim and block small parts
Shape small parts carefully. Trim stray fibers evenly. If needed, dampen seams slightly and pin into final shape before drying. Blocking can transform lumpy edges into crisp lines on tiny limbs or ears. Use a gentle approach and test on scraps to avoid felting. Re-check seams after drying and adjust if necessary.
Avoid Frustration When Assembling Amigurumi
As you assemble, keep a calm rhythm, choose the right tools, and pace yourself. Start with clean, small needle eyes and a tiny tapestry needle. Hold the thread like a pencil, not a clenched fist, and take breaks to reset your shoulders and grip. A tidy workspace helps you see each part clearly and reduces the chance of dropped stitches or misplaced limbs.
Lay out parts in assembly order and label them if needed. This prevents mid-stitch re-reading and keeps your mind on the stitch. A routine helps you anticipate tricky spots and slow down when necessary. With a steady rhythm, assembling becomes a puzzle you’ve solved before, reducing mistakes.
Celebrate small wins as you progress. If a part doesn’t align, rework the join gently or switch to a more comfortable method. A calm mindset, plus clean tools and an organized space, turns frustration into quick, confident adjustments.
Tips for Sewing Tiny Amigurumi Parts Without Frustration
- Choose the right needle and a comfortable grip to keep stitches even. Practice a test seam on scrap yarn to learn tension behavior before tackling the real piece.
- Keep the thread tail short and thread through multiple times to lock the stitch without bulk. Plan your seam approach (inside vs outside) and stick with it to avoid edge mismatches.
- Use bright lighting or a headlamp to clearly see tiny stitches. A small pair of scissors should be handy for quick trims; cut yarn ends close to the stitching.
- Focus on tension control: snug stitches without distorting the shape. If puckering occurs, back up one stitch and rework with a lighter touch.
- Lighting, steady rhythm, and batching similar steps help you stay steady and reduce mistakes. Practice consistently to build muscle memory for repeatable results.
- The keyword here is Tips for Sewing Tiny Amigurumi Parts Without Frustration — apply them in every small seam to keep projects enjoyable and frustration-free.
Troubleshooting common hold-ups
- If a seam looks puckered, back up one stitch and rework with a lighter touch. Check your tension and fabric lay, then continue.
This streamlined version keeps the core guidance intact, emphasizes practical technique, and weaves in the targeted keyword multiple times to boost SEO without sacrificing readability.

Clara Fern — Crochet Artist & Amigurumi Designer
Clara Fern is a crochet artist and amigurumi designer based in Austin, Texas. With 9 years of experience working with yarn and hook, she transformed a lifelong passion for handcraft into a creative mission: making amigurumi accessible, fun, and deeply rewarding for crafters of all levels.
Clara discovered amigurumi during a trip to Japan in 2017, where she fell in love with the art of bringing tiny characters to life through crochet. Back home in Texas, she spent years studying color theory, design principles, and advanced crochet techniques — developing her own signature style that blends kawaii aesthetics with original character design.
Through maclafersa.com, Clara shares everything she has learned — from choosing the right yarn and reading your first pattern, to designing fully original amigurumi characters from scratch. Her writing is known for being clear, detailed, and genuinely helpful, with no steps skipped and no secrets kept.
When she’s not crocheting, Clara enjoys watercolor painting, visiting local yarn shops, and drinking way too much coffee while sketching new character ideas.


