Introduction
Safety eyes are a standard feature in amigurumi, providing character and expression to finished pieces. However, safety eyes occasionally need replacement—a child loses interest in a toy and wants different-colored eyes, an eye becomes loose or damaged, or a maker simply wants to refresh an older piece. Replacing safety eyes after assembly presents a challenge: the eyes are locked in place with washers that cannot be removed without disassembling the piece. Fortunately, skilled makers have developed techniques to replace eyes without completely deconstructing the amigurumi. Understanding these methods allows makers to refresh and customize finished pieces without starting over.
Understanding Safety Eye Construction
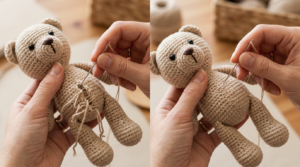
Before attempting eye replacement, it’s important to understand how safety eyes are constructed and secured. A safety eye consists of two parts: the eye itself (the colored plastic or glass dome) and a washer (a flat plastic disc). The eye is inserted through the crocheted fabric from the front, and the washer is threaded onto the eye post from the back, locking the eye in place. Once the washer is secured, the eye cannot be removed without either breaking the eye or removing the washer.
The challenge in replacing eyes after assembly is that the washer is typically on the interior of the piece, often surrounded by stuffing. Accessing the washer requires either creating an opening in the piece or working through existing openings.
Method 1: The Seam Opening Technique
The most straightforward method for replacing eyes is to open a seam near the eye, access the washer, and replace the eye.
Step 1: Locate the Seam — Identify a seam near the eye that can be carefully opened. For head eyes, this is typically the seam where the head was closed after stuffing. For body eyes, it might be a seam where a limb attaches to the body.
Step 2: Open the Seam — Use a seam ripper to carefully open the seam, removing stitches until you have an opening large enough to access the eye’s washer. Be careful not to damage the surrounding stitches or the crocheted fabric.
Step 3: Access the Washer — Reach through the opening and locate the washer on the back of the eye. Gently push the washer off the eye post. The old eye will fall out.
Step 4: Insert the New Eye — Thread the new eye through the hole from the front (if the hole is still visible) or insert it from the back if necessary. Secure the new eye with a washer, threading the washer onto the eye post and pushing it firmly into place.
Step 5: Close the Seam — Use a ladder stitch to carefully close the opening, matching the original stitching pattern. Make stitches every quarter-inch around the entire opening. Once the seam is closed, the repair should be completely invisible.
Method 2: The Stuffing Manipulation Technique
For pieces where opening a seam is not practical, the stuffing manipulation technique allows access to the eye’s washer without creating a large opening.
Step 1: Locate the Eye — Identify the eye that needs replacement and locate its position on the interior of the piece.
Step 2: Manipulate the Stuffing — Gently push and manipulate the stuffing around the eye, creating a small cavity where the washer is located. Work carefully to avoid damaging the crocheted fabric or disturbing the overall shape of the piece.
Step 3: Access the Washer — Once you’ve created a small cavity, reach in and locate the washer. Gently push the washer off the eye post. The old eye will fall out.
Step 4: Insert the New Eye — Thread the new eye through the hole from the front. Secure the new eye with a washer, threading the washer onto the eye post and pushing it firmly into place.
Step 5: Redistribute the Stuffing — Gently push the stuffing back into place, redistributing it evenly around the eye. The piece should return to its original shape.
Method 3: The Partial Disassembly Technique
For pieces where the eyes are located in areas that are difficult to access, partial disassembly may be necessary.
Step 1: Identify Disassembly Points — Determine which seams can be opened to provide access to the eyes. For a doll head, this might be the seam where the head attaches to the body. For a body, it might be a seam where a limb attaches.
Step 2: Open the Seams — Use a seam ripper to carefully open the identified seams, removing stitches until the piece can be separated. Be careful not to damage the surrounding stitches or the crocheted fabric.
Step 3: Access the Washers — With the piece separated, you now have direct access to the eyes’ washers. Gently push each washer off its eye post, removing the old eyes.
Step 4: Insert New Eyes — Thread the new eyes through the holes from the front. Secure each new eye with a washer, threading the washer onto the eye post and pushing it firmly into place.
Step 5: Reassemble the Piece — Use a ladder stitch to carefully close all opened seams, matching the original stitching pattern. Make stitches every quarter-inch around each seam. Once all seams are closed, the piece should be reassembled and the repairs should be completely invisible.
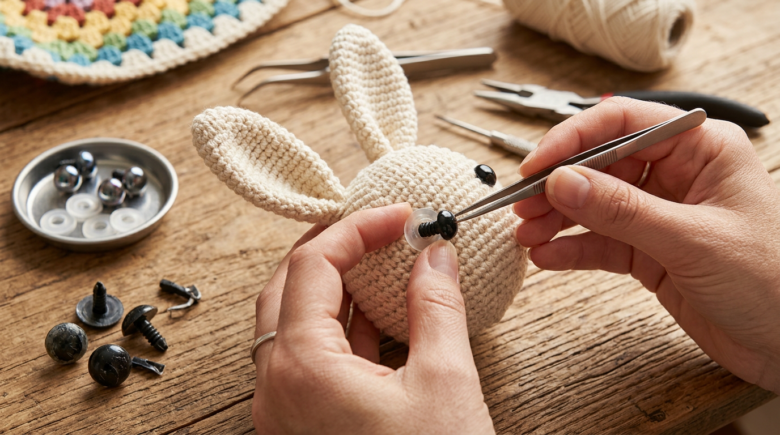
Choosing Replacement Eyes
When replacing eyes, consider the following factors:
Size — Replacement eyes should be the same size as the original eyes. Mismatched eye sizes will look unprofessional.
Color — Choose replacement eye colors that complement the piece. For a refresh, consider colors that enhance the original design or create a new aesthetic.
Style — Safety eyes come in various styles: solid colors, pupils, realistic eyes, and decorative designs. Choose a style that matches the original piece or creates the desired new look.
Quality — Invest in high-quality safety eyes that will remain secure and not discolor over time.
Preventing Future Eye Replacement
Once eyes have been replaced, take steps to ensure they remain secure:
Secure the Washer — Push the washer firmly onto the eye post, ensuring it’s fully seated. A loose washer can work free over time.
Reinforce with Thread — After securing the washer, make a few small stitches through the washer and surrounding fabric to reinforce the connection.
Avoid Stress — Handle the piece gently for 24 hours after eye replacement, allowing the new eyes to fully set.
Conclusion
Replacing safety eyes after assembly is a valuable skill that allows makers to refresh and customize finished pieces. Whether using the seam opening technique, stuffing manipulation, or partial disassembly, the process is straightforward and requires only basic tools and patience. By mastering eye replacement, makers can extend the life of their work and create customized pieces that reflect their evolving artistic vision.

Clara Fern — Crochet Artist & Amigurumi Designer
Clara Fern is a crochet artist and amigurumi designer based in Austin, Texas. With 9 years of experience working with yarn and hook, she transformed a lifelong passion for handcraft into a creative mission: making amigurumi accessible, fun, and deeply rewarding for crafters of all levels.
Clara discovered amigurumi during a trip to Japan in 2017, where she fell in love with the art of bringing tiny characters to life through crochet. Back home in Texas, she spent years studying color theory, design principles, and advanced crochet techniques — developing her own signature style that blends kawaii aesthetics with original character design.
Through maclafersa.com, Clara shares everything she has learned — from choosing the right yarn and reading your first pattern, to designing fully original amigurumi characters from scratch. Her writing is known for being clear, detailed, and genuinely helpful, with no steps skipped and no secrets kept.
When she’s not crocheting, Clara enjoys watercolor painting, visiting local yarn shops, and drinking way too much coffee while sketching new character ideas.