
Tools and Materials Checklist
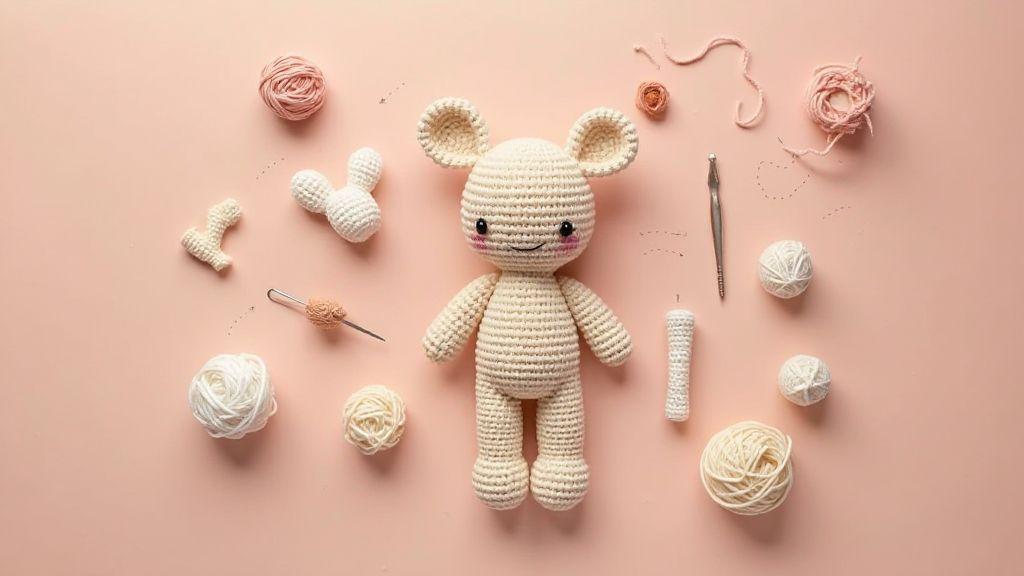
You’ll want to gather everything before you begin. This makes your Step-by-Step Assembly Guide for a Complete Amigurumi Doll smoother and faster. Start with the basics: a reliable set of crochet hooks, sturdy yarn, a yarn needle, and a pair of scissors. Keep your workspace clear and organized so you don’t fumble with pieces while you sew. When you have everything in one place, you reduce delays and stay in the flow of your project.
Next, check your yarn choices and safety parts. Choose yarn that matches your pattern’s weight and color plan so the doll looks as intended. For safety, pick hypoallergenic, non-detachable parts or safety eyes, depending on your doll’s age target. This reduces worry and keeps your project kid-friendly. Finally, stock up on stitch markers, a measuring tape, and a pin for alignment. These small tools save you from guessing and help you finish with neat seams and even stuffing.
Before you start stitching, set up a dedicated space for assembly. Light, a comfy chair, and a steady surface help you keep tension even and your work precise. Have a small container for tiny parts to avoid losing them. Keeping your materials organized means you’ll finish more calmly and with confidence, which shows in the final look of your amigurumi.
Step-by-Step Assembly Guide for a Complete Amigurumi Doll: Quick Start
- Gather the basics: crochet hooks, yarn, yarn needle, and scissors. Create a tidy workspace to prevent misplacing parts during sewing.
- Choose yarn weight and color according to your pattern, and select safe, kid-friendly parts or safety eyes as appropriate.
- Keep stitch markers, a measuring tape, and a pin handy to keep track of rounds, proportions, and alignment.
This quick start is the practical kickoff to your Step-by-Step Assembly Guide for a Complete Amigurumi Doll, helping you stay organized from the first stitch to the final seam.
Essential tools for Step-by-Step Assembly Guide for a Complete Amigurumi Doll
You’ll need a few core tools to keep the process smooth. Prepare a crochet hook set in the size that matches your yarn, plus a smaller hook for sewing parts together. A sharp pair of scissors and a yarn needle are essential for weaving in ends and attaching pieces. Use stitch markers to mark your beginning of rounds so you don’t lose track. Finally, keep a small fiberfill or stuffing tool nearby to keep the shape neat as you go.
For safety and finish, have a pair of allergy-friendly safety eyes or noses if your pattern requires them. If your doll is for a child, choose parts that snap or sew securely rather than loose pieces. You’ll also benefit from a measuring tape to verify proportions and a pin to position parts perfectly before you stitch. Keep these tools within reach so you can work steadily and avoid rework.
Yarn, hooks and safety parts list
Your Yarn choices set the tone. Pick a yarn weight that matches your pattern and desired texture. If you want a soft, plush doll, go with a heavier weight; for a delicate look, a lighter weight works. Always test a small swatch to see how stitches look before you commit. Color contrasts matter, so pick colors that highlight features like eyes and mouth. You’ll thank yourself later when the doll’s details pop.
Hooks come in sizes that fit your yarn. You’ll likely use a size that matches your yarn’s label, but keep a couple of alternatives handy. A snug but not tight stitch prevents gaps and saves you time finishing. For sewing parts, you’ll want a fine, sharp yarn needle. Safety parts should be chosen with care: safety eyes or noses that fit securely and don’t poke through if the doll is for kids. Store all safety components in a labeled container so you don’t mix them up with other pieces.
Prep tips for neat assembly
Neat assembly starts with a clean, organized setup. Lay out all parts in the order you’ll attach them. Mark the doll’s body and limbs with markers to keep proportions consistent as you sew. When you stuff, do it gradually to maintain shape and avoid lumps. Always weave in ends in multiple directions for a secure finish. Take a quick check after each major step to catch mistakes early.
Pattern Layout and Part Prep
You will plan your amigurumi project with clean, logical steps so you waste less yarn and time. Start by choosing a simple pattern layout that minimizes seams and makes shaping predictable. Map out which parts come from what color and where the stitches will land. This helps you keep tension consistent and ensures your final doll looks balanced. As you prepare, label your workspace with the part names so you can grab pieces quickly and stay organized. Remember, a tidy prep stage saves you frustration when you start stitching.
Next, you’ll decide on your hook size and yarn weight before you begin. Use a hook that matches your yarn’s recommended gauge, and test a small swatch to confirm your gauge matches the pattern. If your stitches pull in or puff, adjust by going up or down a hook size. Keeping your gauge stable means your parts will fit together cleanly during assembly, and you’ll avoid a bulky midsection or loose limbs. Label your swatch with the hook size and yarn brand so you can replicate it later.
Finally, plan the order of assembly in your head or on paper. Think about how you’ll connect the limbs to the torso and where decals or facial features should land. A solid plan reduces late-night fiddling and rework. As you map it out, think about symmetry—eye placement and limb angles should mirror each other. A little proactive planning goes a long way toward a polished finish.
Laying out pattern assembly amigurumi doll
You’ll layout the pattern with a clear view of every part before you start crocheting. Place the torso at the center and align arms, legs, and head as you intend to connect them. Mark each piece with a bold label, so you don’t mix up parts later. This upfront organization helps you see how many pieces you’ll sew and where each seam should land. Keeping parts in order also makes it easier to track which color goes where.
Next, you’ll group pieces by color and by seam location. If you’re using multiple colors, lay out the yarn portions so you don’t have to hunt for strands mid-assembly. Use color-coded bags or envelopes and note the approximate quantity you’ll need for each part. This prevents surprises and keeps your project on track. When the layout feels obvious, you’re primed to start stitching with confidence.
Finally, you’ll verify the scale against your target size. If your doll looks undersized or oversized, adjust the number of rounds in the body or limbs before you begin sewing. Matching the scale to your intended finish keeps proportions correct and makes the final doll more satisfying to hold. A quick check now saves a lot of frustration later.
Crochet doll assembly guide for part order
You’ll begin by joining the torso to the head or neck area, depending on your pattern. Start with a secure, invisible seam so the join isn’t obvious. You’ll want the connection to be sturdy but not bulky, so choose a seam technique that blends with the stitches you used for the body. If you’re new to this, practice on a small swatch first. Then you’ll replicate the same method for each limb to keep the doll’s body consistent.
Next, you’ll attach the arms and legs in the order that keeps the doll balanced. Attach limbs evenly on opposite sides to maintain symmetry. Use stitch markers or a contrasting yarn tail to ensure the placement stays true as you sew. If you need to adjust the limb alignment, do it early before the seams harden. A steady hand here pays off with a natural, toy-like pose.
Finally, you’ll add any facial features and accessories after the major joints are secure. Place eyes, nose, and mouth with even spacing. If your pattern uses safety eyes, make sure they’re securely anchored and aligned. After facial features are set, you can sew on accessories like a hat or scarf, keeping them simple to preserve the clean look of the doll.
Label parts for order
You’ll label each part with bold, clear tags so you never mix them up mid-assembly. For example, label the torso, head, arms, legs, and any accessories. This makes it easy to follow the step-by-step order and keep your project moving smoothly. Labels should stay visible during assembly but be easy to remove if you need to reposition parts. A simple, consistent labeling system saves time and reduces mistakes.
Sewing and Stuffing Basics
You approach your amigurumi with a plan, and this is where your basics pay off. You’ll learn to keep seams neat, stuff evenly, and end up with a toy that holds its shape. The goal is to make parts look smooth and sturdy, not flat or rippled. By focusing on the fundamentals, you set yourself up for a clean finish every time. Your yarn choice, hook size, and tension all play a part, but the real magic comes from careful stuffing and clean stitching.
You’ll notice that small decisions matter more than big ones here. For example, how firmly you stuff affects not only the look but the feel and durability of the piece. If you rush, you’ll see lumps or gaps. If you slow down, you’ll feel the fabric settle into place and the stitches stay tight. Your method should balance firmness with softness, so the doll can stand up to gentle play and frequent handling.
As you practice, you’ll start to recognize what a well-formed shape looks like at every stage. You can checklist your progress: even density, no visible gaps, and stitches that disappear into the fabric. This is how you build confidence. With each completed part, you reinforce muscle memory for the next project, and your Step-by-Step Assembly Guide for a Complete Amigurumi Doll will feel second nature.
Sewing and stuffing amigurumi parts with ladder stitch
You’ll use the ladder stitch to close amigurumi parts because it hides the seam well. Start by aligning edges, then insert your needle through the inner loops to hide the thread. Pull gradually to keep tension even, so the seam sits flat. If you see a little bit of gap, readjust before finishing the last few stitches. The key is keeping a regular rhythm: go, catch, pull, and repeat.
As you sew, you’ll notice how the ladder stitch disappears when you pull the thread tight. You’re knitting the edges together with tiny, evenly spaced steps. Practice on a scrap first; you’ll get a feel for how much to pull and how tight your stitches should be. A steady pace helps prevent puckering, so your final piece looks smooth from all angles. You’ll love how neat the finish looks on arms, legs, and noses when you take your time.
When the seam is nearly closed, do a quick check for alignment. If one side sits a touch higher, adjust before the last stitch. Then weave the tail through the inside to hide it completely. You’ll end with a seamless line that stands up to handling and washing, which makes your amigurumi more durable.
Even stuffing tips to keep shape
You want even stuffing to avoid lumps and maintain the sculpture you worked for. Start with small amounts and press gently into the corners, then pad broader areas. If you notice a hollow spot, add a bit more and press again, working in layers. This method keeps the shape balanced from head to toe. Remember: you’re shaping with your hands as much as with the yarn.
Think about the weight you want. Softer pieces feel cuddly, but they can look flat if under-stuffed. Firmer pieces keep a defined form but lose a touch of squish. You’ll decide based on the character you’re making and how it will be used. A stuffed limb should feel solid, not compressed, and the torso should hold its roundness without overfilling. Keep testing as you go.
If you’re stuffing a hollow area, use a narrow tool to reach inside and push the filling toward the edges. You’ll avoid a central lump and keep the silhouette clean. When you’re happy with the shape, finish with a light, even compress to settle the stuffing so the yarn covers it smoothly. You’re aiming for a balanced, cohesive feel overall.
Attaching Limbs and Head
You’ll focus on connection points first, so your amigurumi feels sturdy and safe for play. Start by laying out your pieces exactly where you want them, and keep your yarn ends organized so you don’t pull loose threads as you work. When you pick up your hook, think about how tight your stitches need to be to hold weight without distorting the shape. You want a clean look, but you also want movement without wobble, so test fit as you go. Use bold joins to visualize where limbs meet the torso, and keep your tension even so the body stays balanced.
Next, you’ll establish a solid base before finishing. Match the limb to the body with the same stitch count you used during the main rounds, then switch to a slightly tighter tension to lock everything in. This helps prevent gaps at the seam and stops limbs from wiggling loose during play. When you pull the final yarn tail through, weave it back into the body for a clean finish. Remember to keep your work flat and not twist the limb, or you’ll see a kink right at the joining point.
Finally, you’ll check alignment from all angles. Rotate your amigurumi to ensure each limb sits correctly in relation to the head and torso. If something looks off, adjust before you slip the tail ends completely away. A small, neat slip stitch at the last step can keep everything aligned while you weave in ends. Your goal is a seamless, durable finish that holds up to daily handling and gentle hugs.
Attaching limbs amigurumi with stitch markers
Begin by marking the exact joining spots on the body and the limb with stitch markers so you don’t lose track as you sew. This helps you keep symmetry, especially if you’re making a pair of arms or legs. Place markers at the same distance around the body to guide your needle path and stitch count, then switch to a slightly tighter grip as you sew to prevent gaps.
Now you’ll sew using a consistent technique that pulls the limb into the body without puckering. Go through the marked points in a circular pattern, and pull snug enough to feel the limb anchor, but not so tight that the fabric buckles. Remove markers as you complete each pass, and double-check alignment after you finish the final seam. If you notice a tiny gap, you can do a quick extra slip stitch just under the marker line to fill it in neatly.
Finally, test the limb’s hold with light tugging. If it moves easily, you may need to rework a few stitches to tighten the seam. Keep the weave tidy and hidden within the stitches, so you don’t see extra bulk at the join. Your goal is a secure, comfortable attachment that won’t come undone with playful use.
Assembling amigurumi head and body securely
Start by aligning the head with the body so the neck sits evenly. Use a few pin or stitch marker placements to hold the pieces in place while you sew, ensuring symmetry and balance. Your first stitches should be near the neck edge, then you’ll work outward in a circular pattern to create a smooth transition from head to body. Use a stronger thread tension at the seam edge so the head stays upright when the doll is standing or being hugged.
Next, you’ll work in small, even stitches to lock the head to the body. Don’t rush this—steady, repeating passes build a stronger join. If you want extra security, you can add a few supplemental stitches through the neck area, using a back-and-forth weave that fans out along the seam. Weave your yarn ends back into the interior to hide them, then inspect the seam from multiple angles to confirm there are no gaps.
Finally, you’ll finish with a tidy, invisible seam where the head meets the body. If you see a wobble, add a couple more stitches right at the base of the neck and pull gently to smooth the transition. A well-sewn head will feel solid without looking bulky, and your amigurumi will hold its expression through play.
Reinforce joins for play
You’ll reinforce the joins by adding extra passes through the same seam line, creating a braided, sturdy edge that resists pulling. Use short, tight stitches that don’t poke out the other side, and weave the ends discreetly into the surrounding stitches. This extra reinforcement is your guarantee that busy little fingers won’t pull a limb loose during a hug or a tumble.
Importantly, you’ll check each reinforced area by gently tugging on the limb or the head. If the seam stretches, go back and add a few more secure passes. The blend of extra stitches and careful weaving keeps the overall silhouette smooth while giving you confidence in durability. Your final look should stay neat and intact even after rough play.
Securing Eyes and Facial Details
You want your amigurumi to look adorable and stay safe, so focus on how you place eyes and facial features. This section guides you through precise steps to keep everything secure while preserving the character’s expression. You’ll learn where to place safety parts, how to embroider expressions, and how to finish with sturdy backings. Think about your doll’s face as the final touch that ties the whole look together.
Securing safety eyes amigurumi placement rules
When you place safety eyes, you set a strong foundation before you sew. You’ll position them on the head so they sit at the same height and angle, giving your doll a balanced look. Measure from the top of the head and use a ruler to mark the spots, then double-check in a mirror to avoid uneven eyes. Use a blunt tool to make holes that are clean and not oversized, because loose pockets will loosen over time. Keep the distance between eyes close enough for a friendly face, but far enough to prevent them from slipping if the toy is squeezed. If you’re working with kids’ toys, remember to push the washer on from the back firmly so the eye won’t wiggle or pop out with play. In the end, test by gently tugging each eye to confirm it’s secure. Your goal is a stable yet expressive gaze that won’t become a safety hazard.
Embroidering the area around the eyes can reduce the risk of loose pieces and adds personality. You’ll stitch the brows or lashes close to the eyes so they read clearly even when the toy is viewed at an angle. Use a short, dense stitch to avoid gaps that a child could snag or pull. If you prefer a softer look, you can outline the eye area with a single row of stitches, then fill in the expression with a satin or backstitch. The key is keeping the embroidery snug against the fabric so nothing strains the hole where the safety eye sits. This approach blends safety with a cute, readable expression you’ll love.
If you ever need a quick swap for safety and style, consider using alternate eye options like flat safety eyes with washers or embroidered eyes plus felt accents. You’ll weigh durability against appearance, choosing what reads best for your project. Always test the finished look by gently pressing on the eyes to simulate a child’s handling. Your face should stay intact, and your safety mechanism should remain in place. This balance gives you a doll that’s charming and dependable.
Embroider features for safety and style
Embroidering facial features lets you customize expressions while keeping everything secure. You’ll select a thread color that stands out against the fabric and stitch with short, even passes to prevent bulging. For a cheerful mouth, use a simple curved line with a few backstitches to keep the shape solid. If you want a sad or surprised look, vary the curve and add small dots for cheeks. Don’t pull threads tight; you want the face to lay flat without warping the head. If you’re unsure about a look, practice on scrap yarn first, then transfer the line to your amigurumi. You’ll feel more confident when the stitches sit neat and composed.
To protect your stitches from wear, finish each line with a small backstitch at the end and secure the thread on the inside. You’ll hide knots inside the toy and snip the tails close to the seam. If you plan to wash the doll, use colorfast thread and avoid coatings that could bleed. Embroidered features give you freedom to adjust expressions later by simply re-stitching, so don’t fear a little trial and error. Your goal is features that stay crisp, readable, and safe under play.
Use backings and washers
Backings and washers are your best friends for safety eyes. You’ll slide the washer on from the back after threading the eye into the hole, then press it firmly so the eye can’t be pulled out easily. If you’re working with a soft head, use a washer that sits flush against the fabric to prevent unwanted bulk at the stitching point. With every eye you install, run a quick tug test to ensure it won’t loosen with play. You’ll repeat the process for all safety eyes to keep your doll balanced and secure.
For embroidery-only faces, you don’t need backings, but you should still finish your threads well. You’ll end each stitch with a small knot tucked inside the head so nothing peeks through. If you’re mixing safety eyes and embroidery, place the eyes first, then embroider around them to protect the skin and keep the eye placement precise. Your outcome is a sturdy, lovable face that stands up to curious hands.
Finishing Techniques and Care
You’ll want your amigurumi to look neat and last a long time. Finishing techniques seal the deal, giving you clean joins, smooth textures, and durable seams. Start by choosing the right yarn and hook size for your project, then check tension so stitches stay consistent as you near the end. When you finish, weave in tails carefully and clip them close to the fabric, then give your piece a gentle block to even out shapes. With careful finishing, your amigurumi will hold its form after playtime and washing.
Next, pay attention to how you close up holes and gaps. Invisible joins are your friend here. Use a tapered needle to thread through the last loops, then pull snug so there’s no loose look. Slow, deliberate pulls prevent puckering and keep your surface smooth. If you see any tiny gaps, you can sneak a few single crochet stitches into the areas to reinforce the seam. This step protects your work from wear and tear as your doll gets handled.
Finally, care matters just as much as the look. Washing and storage choices keep colors bright and stitches strong. Hand wash in cool water with a mild detergent, and lay flat to dry away from direct heat. Store in a breathable bag or box to avoid snagging. If your piece has safety eyes or other embellishments, check them regularly and tighten or replace as needed. With proper finishing and care, your amigurumi stays charming and safe for kids to hug.
Hiding tails and finishing techniques amigurumi
When you hide tails, you reduce the chance of unraveling. Choose a close, matching yarn color and weave the tail into a seam line or under a set of stitches. Start by threading your tapestry needle and guiding the tail along the inside of the piece. Move slowly, catching only a few strands at a time so you don’t create bulk. This helps you vanish the tail into the fabric so it’s not noticeable from the outside.
Next, secure the end before weaving it in. Make a small knot behind the last stitches, then tuck the tail into the fabric. Use your needle to weave back and forth through several rounds so the end stays put. If you’re worried about snagging, leave a tiny tail and weave it in as you add a final layer of surface stitches. The goal is a seamless finish where the tail never shows and the fabric remains smooth.
Follow amigurumi assembly instructions and care guide
You’ll get the best results when you follow the exact steps in your assembly guide. Read the instructions twice before you start so you know where each piece fits and how the pieces connect. During assembly, work slowly, match gauge, and check alignment at each join. If something feels off, pause and recheck stitches and placement. This keeps your final figure balanced and sturdy.
After you assemble, you’ll apply the finishing touches. Weave in all tails and ends, reinforce any weak seams, and attach embellishments with the correct method (sewing or embroidering, as advised). Then you’ll run through the care guide to know how to clean and store your piece. A proper follow-through makes your amigurumi durable and keeps its character intact over time.
Watch an amigurumi assembly video tutorial
Watching a video helps you see the exact motions you need. In a good tutorial, you’ll notice how the creator threads a needle, tightens the last rounds, and hides tails with precision. Pause at tricky moments and replay the close-ups until you’re comfortable repeating the steps yourself. A clear demonstration makes it easier to reproduce the same neat finishes on your own doll, especially when you’re learning new techniques.

Clara Fern — Crochet Artist & Amigurumi Designer
Clara Fern is a crochet artist and amigurumi designer based in Austin, Texas. With 9 years of experience working with yarn and hook, she transformed a lifelong passion for handcraft into a creative mission: making amigurumi accessible, fun, and deeply rewarding for crafters of all levels.
Clara discovered amigurumi during a trip to Japan in 2017, where she fell in love with the art of bringing tiny characters to life through crochet. Back home in Texas, she spent years studying color theory, design principles, and advanced crochet techniques — developing her own signature style that blends kawaii aesthetics with original character design.
Through maclafersa.com, Clara shares everything she has learned — from choosing the right yarn and reading your first pattern, to designing fully original amigurumi characters from scratch. Her writing is known for being clear, detailed, and genuinely helpful, with no steps skipped and no secrets kept.
When she’s not crocheting, Clara enjoys watercolor painting, visiting local yarn shops, and drinking way too much coffee while sketching new character ideas.


