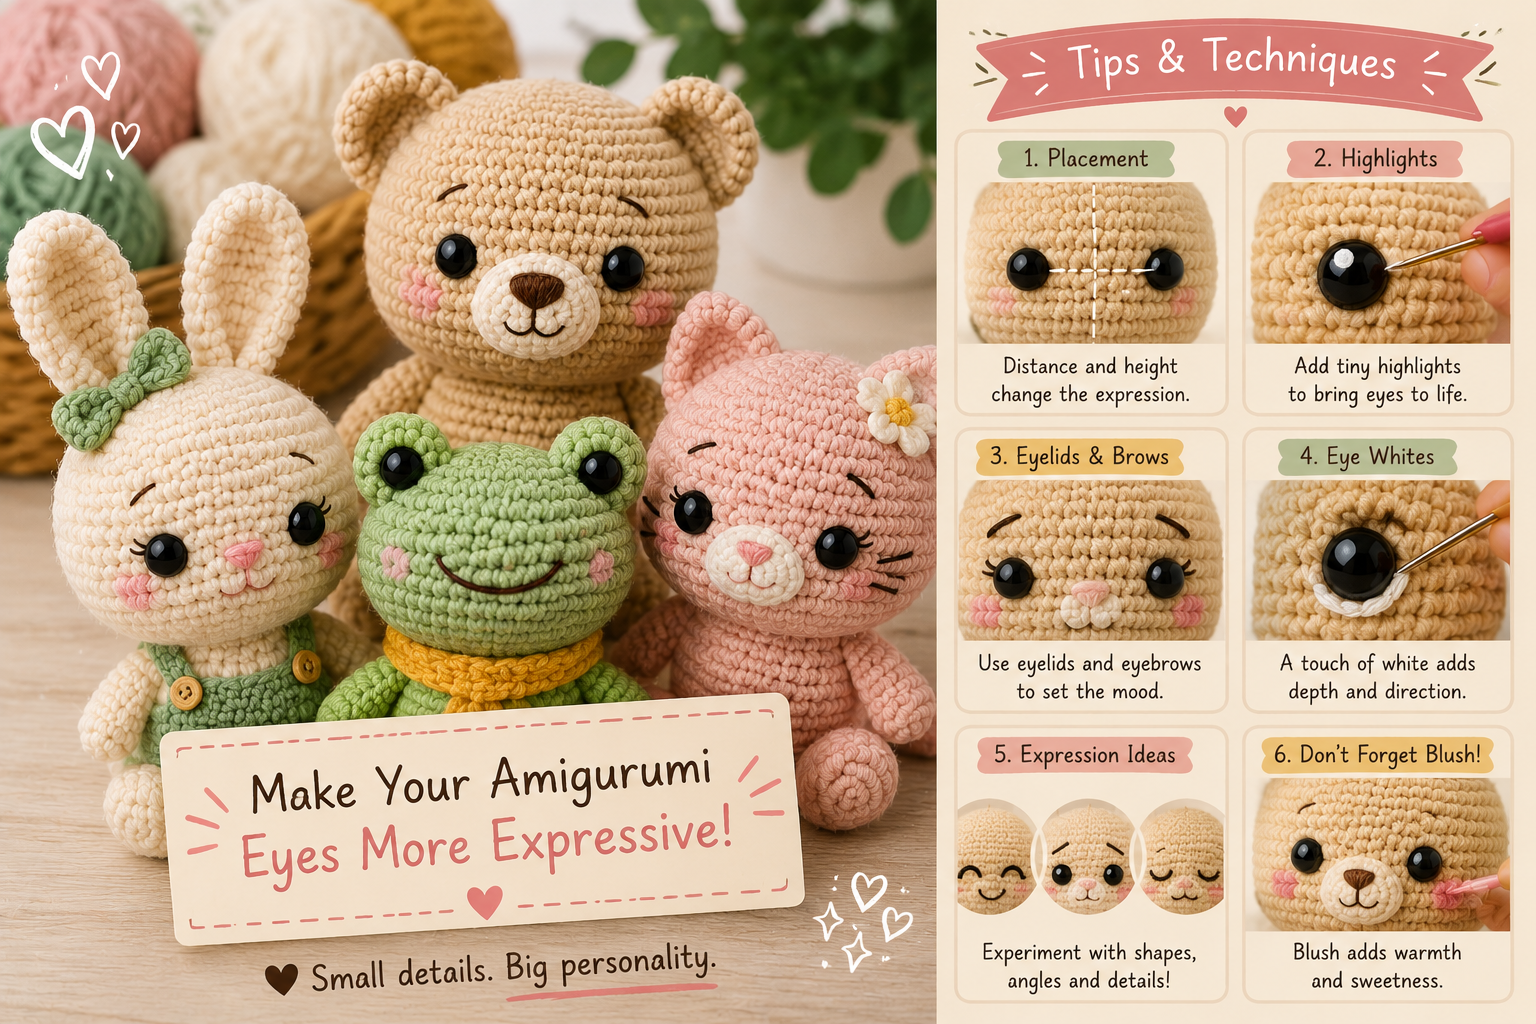
How to Make Amigurumi Eyes Look More Expressive
The eyes are often the first thing people notice when they look at an amigurumi character. You can crochet a perfectly shaped head, create beautifully proportioned limbs, and use an attractive color palette, but if the eyes feel misplaced or expressionless, the entire character can look slightly off.
The interesting part is that expressive amigurumi eyes don’t necessarily require complicated techniques.
Small changes in eye size, spacing, height, angle, highlights, eyebrows, and surrounding details can completely transform a character’s personality. The same basic amigurumi face can look happy, sleepy, curious, shy, mischievous, surprised, or even grumpy simply by changing how the eyes are designed.
Understanding these details is especially useful if you want to move beyond simply following patterns and begin creating characters with recognizable personalities of their own.
In this guide, we’ll explore practical techniques for making amigurumi eyes more expressive while keeping the finished face balanced, intentional, and polished.
Why Eye Placement Matters So Much
Humans naturally pay close attention to faces.
Even very small differences in facial proportions can change how we interpret an expression. Amigurumi characters are highly simplified, but the same principle still applies.
Moving an eye by only one or two stitches can noticeably change the face.
Eyes positioned closer together may create a more focused or mischievous expression. Moving them farther apart often produces a softer, younger, or more innocent appearance.
Their vertical position matters too.
Lower eye placement on a large round head often emphasizes the oversized forehead associated with cute, baby-like proportions.
Higher eyes can make the character appear more mature or change the overall balance of the face.
That’s why eye placement should be treated as an important design decision rather than simply the final step before closing the head.
1. Test Eye Placement Before Securing Anything
One of the easiest ways to improve amigurumi expressions is also one of the simplest: don’t permanently attach the eyes immediately.
If you’re using safety eyes, insert the posts through the crochet fabric without attaching the locking washers at first.
Then examine the character.
Move the eyes slightly closer together.
Move them farther apart.
Try positioning them one round lower.
Then try one round higher.
You may be surprised by how different the character looks after such small adjustments.
Take photos of several placements if necessary. Looking at the options side by side can make the best arrangement much easier to identify.
Only attach the washers once you’re satisfied with the expression.
2. Experiment With Eye Spacing
Eye spacing has a powerful effect on personality.
Wide-set eyes often create a gentle, innocent expression. This works particularly well for bears, bunnies, lambs, and baby-inspired characters.
Closer-set eyes can create a more alert or energetic appearance.
There isn’t one universally correct number of stitches between the eyes because the ideal spacing depends on:
- head size
- eye diameter
- yarn thickness
- character species
- muzzle size
- intended expression
Instead of relying entirely on a formula, use the pattern instructions as a starting point and then evaluate the actual face.
The proportions created by your specific yarn, hook, and tension may differ slightly from the designer’s original sample.
3. Choose the Right Eye Size
Eye size can change the entire visual style of an amigurumi.
Large eyes generally create a cute, youthful, cartoon-like appearance.
Smaller eyes often produce a more subtle or traditional handmade-toy look.
But bigger isn’t always better.
If the eyes are disproportionately large, the character may look startled rather than sweet. If they’re too small, the face may lose some of its emotional impact.
Before choosing a final size, hold several safety-eye sizes against the head.
For example, if you’re deciding between 8 mm, 10 mm, and 12 mm eyes, compare all three before installing them.
This simple test is especially helpful when you’re modifying a pattern or using a different yarn weight than originally recommended.
4. Add Eye Whites for Extra Expression
One of the easiest ways to make basic black safety eyes more expressive is to add a small amount of white around them.
A tiny embroidered white line beside or underneath the eye can imitate the visible white of an eye.
This immediately creates more visual direction.
Depending on where the white is placed, the character may appear to be looking slightly:
- upward
- downward
- sideways
- toward another character
You don’t need to create a complete white circle around the safety eye.
Often, a tiny embroidered accent is enough.
Subtle details usually work better than oversized ones when working at amigurumi scale.
5. Add Highlights to the Eyes
Highlights create the illusion that the eye is reflecting light.
This can make an otherwise plain black eye feel much more alive.
For embroidered eyes, add a tiny white stitch or dot near the upper section of the eye.
If you’re using larger crocheted or felt eyes, you can create one or two small highlights.
Try to keep highlight placement consistent between both eyes.
If one highlight appears in the upper left corner, the highlight in the other eye should generally appear in a corresponding position.
This suggests that both eyes are reflecting the same light source and helps the face feel visually coherent.
6. Use Eyelids to Change the Mood
Eyelids are one of the most powerful tools for controlling expression.
A small embroidered line above the eye can completely change the character’s mood.
Lowering the eyelid slightly over the top of the eye can create a relaxed or sleepy appearance.
Angling it downward toward the center may make the character look more serious or determined.
A curved line can produce a soft, gentle expression.
You can create eyelids with embroidery thread or a thin strand of yarn.
For larger amigurumi, crocheted eyelids may also work.
Experiment before securing the thread permanently.
A tiny change in angle can create a surprisingly different emotion.
7. Don’t Forget the Eyebrows
Eyebrows are often overlooked in amigurumi design, but they can communicate emotion extremely efficiently.
Consider how eyebrows work in cartoons.
Raised eyebrows can suggest:
- surprise
- curiosity
- innocence
Slightly angled eyebrows can suggest:
- determination
- concern
- confusion
Soft curved eyebrows can create a friendly, relaxed expression.
Because amigurumi faces are small, eyebrows don’t need to be elaborate.
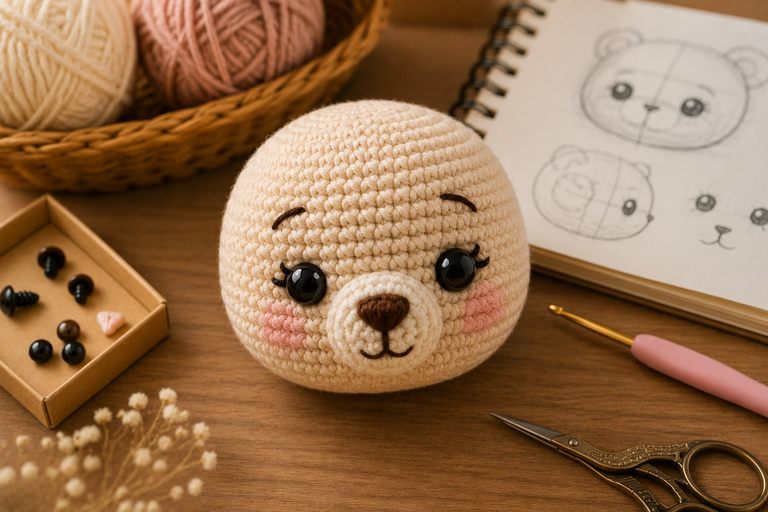
One short embroidered line above each eye may be enough.
Again, placement is critical.
Before securing the yarn, experiment with the angle by laying a short piece of dark thread across the face.
8. Use Embroidered Eyes for Greater Freedom
Safety eyes are convenient and provide a clean, consistent appearance, but embroidered eyes offer much greater creative flexibility.
With embroidery, you’re not limited to circles.
You can create:
- closed eyes
- sleepy eyes
- smiling eyes
- crescent-shaped eyes
- oval eyes
- angled eyes
- cartoon-style eyes
Closed eyes are particularly effective for creating peaceful or happy characters.
A simple curved embroidered line can suggest a smiling eye without any plastic components.
This technique is also useful when you want a softer, minimalist aesthetic.
For toys intended for very young children, embroidered facial features may also be preferable to detachable components, depending on the construction and applicable safety requirements.
9. Create Different Expressions With Closed Eyes
Closed eyes deserve special attention because they’re simple but extremely expressive.
A gently upward-curving line can suggest happiness.
A soft downward curve may create a sleeping expression.
Adding small embroidered eyelashes can make the character appear more delicate or stylized.
You can also combine one closed eye with one open eye to create a playful wink.
Because these designs use only a small amount of embroidery, they’re excellent for miniature amigurumi where safety eyes might appear too large.
10. Add Eyelashes Carefully
Eyelashes can add personality, but they’re easy to overdo.
Usually, one to three small stitches at the outer edge of the eye are enough.
Long or numerous eyelashes can overwhelm a tiny face and compete with other features.
The thickness of the thread also matters.
If the eyelashes are made with yarn that’s too thick, they may look heavy compared with the rest of the face.
Embroidery floss or separated yarn strands can provide greater control.
11. Use the Muzzle to Support the Eye Expression
Eyes don’t work independently from the rest of the face.
The position and size of the muzzle, nose, and mouth influence how the eyes are perceived.
For example, placing a small muzzle relatively close beneath widely spaced eyes can create a cute, compact face.
A larger muzzle may push the visual focus outward and make the character feel more animal-like.
Before permanently attaching a separate crocheted muzzle, pin it into position and evaluate it together with the eyes.
You may discover that changing the muzzle position by one round improves the entire expression without moving the eyes at all.
12. Add Blush Beneath the Eyes
Blush is a simple way to bring warmth and personality to an amigurumi face.
It works particularly well for characters intended to look:
- shy
- sweet
- cheerful
- youthful
- affectionate
Blush can be created using embroidery, yarn, felt, or suitable doll-making coloring materials.
Placement is usually just below and slightly outward from the eyes.
Keep the effect subtle.
Very strong blush can dominate the face, while a small amount adds warmth without distracting from the eyes.
13. Use Eye Indentation for More Depth
Eye indentation is a shaping technique used to create additional dimension around safety eyes.
After the head has been stuffed, a strong thread can be passed through carefully positioned points around the eyes and gently tightened.
This pulls the eyes slightly inward and creates subtle contours around them.
The technique can make the face look more sculpted and expressive because the eyes no longer appear to sit flat on the surface.
However, moderation is important.
Pulling too tightly can dramatically distort the head or make the eyes appear deeply sunken.
Use gradual tension and check the face after each adjustment.
14. Consider the Direction of the Eyes
Not every amigurumi needs to stare directly forward.
Characters can become much more dynamic when their gaze suggests direction.
For crocheted, embroidered, felt, or multi-part eyes, you can position the pupils slightly off-center.
A sideways glance can create curiosity or mischief.
Upward-looking eyes may create innocence or wonder.
Downward-looking eyes can produce a shy or thoughtful expression.
If you’re making two amigurumi characters as a set, positioning their eyes so they appear to look toward one another can create a charming sense of interaction.
15. Match the Eyes to the Character’s Personality
Before installing the eyes, ask yourself what personality the character should have.
Is it energetic?
Sleepy?
Shy?
Curious?
Elegant?
Mischievous?
Friendly?
Your answer can guide the entire eye design.
For a sleepy bear, you might use embroidered closed eyes.
For a curious fox, slightly closer eyes with small highlights could work beautifully.
For a sweet bunny, larger widely spaced eyes with subtle blush might emphasize softness.
Design decisions become easier when you start with personality rather than choosing eyes simply because they’re available in your craft box.
16. Consider Colored Safety Eyes
Black safety eyes are popular because they work with almost any design, but they’re not the only option.
Colored eyes can add another layer of character.
Brown can create a softer natural appearance.
Blue or green can make human-style dolls more distinctive.
Amber tones may work particularly well for cats, foxes, owls, and other animals.
There are also safety eyes with transparent, glitter, or printed iris effects.
However, highly detailed eyes can become visually overwhelming on very small amigurumi.
Match the complexity of the eye to the overall style of the character.
17. Create Crocheted Eyes for Larger Amigurumi
Large amigurumi may benefit from crocheted eyes rather than small plastic safety eyes.
You can create flat circles or ovals using several colors.
For example:
Outer area: white
Iris: colored yarn
Pupil: black yarn
Highlight: small white embroidery
These pieces can then be securely attached to the face.
Crocheted eyes allow almost unlimited control over size, color, shape, and direction.
They’re particularly useful for cartoon characters, oversized plush designs, and expressive creatures.
18. Photograph the Face Before Finalizing It
A useful design trick is to photograph your amigurumi before permanently securing all facial features.
Faces sometimes look different in photographs than they do when held close in your hands.
Take a straight-on photo.
Then look at the image on your phone.
Asymmetry often becomes easier to notice.
Check whether:
- both eyes are at the same height
- spacing looks balanced
- eyebrows match
- highlights are consistent
- the muzzle is centered
- the intended expression is clear
If something feels wrong, adjust it before making the placement permanent.
19. Evaluate the Face From Multiple Angles
A character isn’t viewed only from the front.
Rotate the head and check both profiles.
An eye that looks perfectly positioned from the front may appear too far toward the side when viewed at an angle.
Also look at the face from slightly above and below.
This is particularly important for characters with large spherical heads.
The curvature of the crochet fabric can affect how eye placement is perceived.
20. Keep the Overall Face Balanced
Expressive doesn’t necessarily mean complicated.
Sometimes the most charming amigurumi faces consist of two simple eyes, a tiny embroidered mouth, and subtle blush.
Adding eyelashes, eyebrows, eye whites, large highlights, colored irises, a detailed muzzle, and multiple decorative features all at once can make a small face visually crowded.
Choose details intentionally.
If the eyes are elaborate, consider keeping the mouth simple.
If you’re using large colorful eyes, you may not need dramatic eyebrows.
The goal is for all facial features to work together rather than compete for attention.
Common Mistakes When Designing Amigurumi Eyes
One common mistake is attaching safety-eye washers before checking the complete expression.
Once securely installed, safety eyes can be extremely difficult to reposition.
Another mistake is relying only on visual estimation when placing the eyes.
Count both rounds and stitches whenever symmetry matters.
Choosing eyes that are too large is another frequent problem. Large eyes can be adorable, but beyond a certain point they may overwhelm the face.
Finally, remember that stuffing changes facial proportions.
Whenever possible, evaluate eye placement with at least some stuffing inside the head. A completely flat, unstuffed crochet piece won’t accurately represent the final shape.
Create an Eye Placement Reference
If you design your own amigurumi patterns, keep records of successful eye placements.
Write down:
- eye size
- round placement
- number of stitches between eyes
- yarn weight
- hook size
- head circumference
- eyebrow placement
- embroidery details
Photograph the finished result.
Over time, you’ll build your own reference library showing how different eye arrangements affect expression.
This can make designing future characters significantly faster.
Final Thoughts
Making amigurumi eyes more expressive doesn’t require complicated materials or advanced artistic skills.
The biggest improvements often come from small, deliberate choices.
Experiment with eye spacing and height before committing to placement. Compare different eye sizes. Add subtle highlights, eyelids, eyebrows, blush, or eye indentation when they support the personality you’re trying to create.
Consider embroidered or crocheted eyes when you need more control over shape and direction.
Most importantly, design the eyes as part of the entire face rather than treating them as isolated components.
The muzzle, mouth, eyebrows, cheeks, head shape, and stuffing all influence how the eyes are perceived.
Once you begin experimenting with these relationships, you’ll discover that the same basic amigurumi pattern can produce dramatically different characters with only a few changes to the face.
That’s what makes expressive eye design so powerful: a difference of just a few stitches can be enough to give your amigurumi a personality all its own.
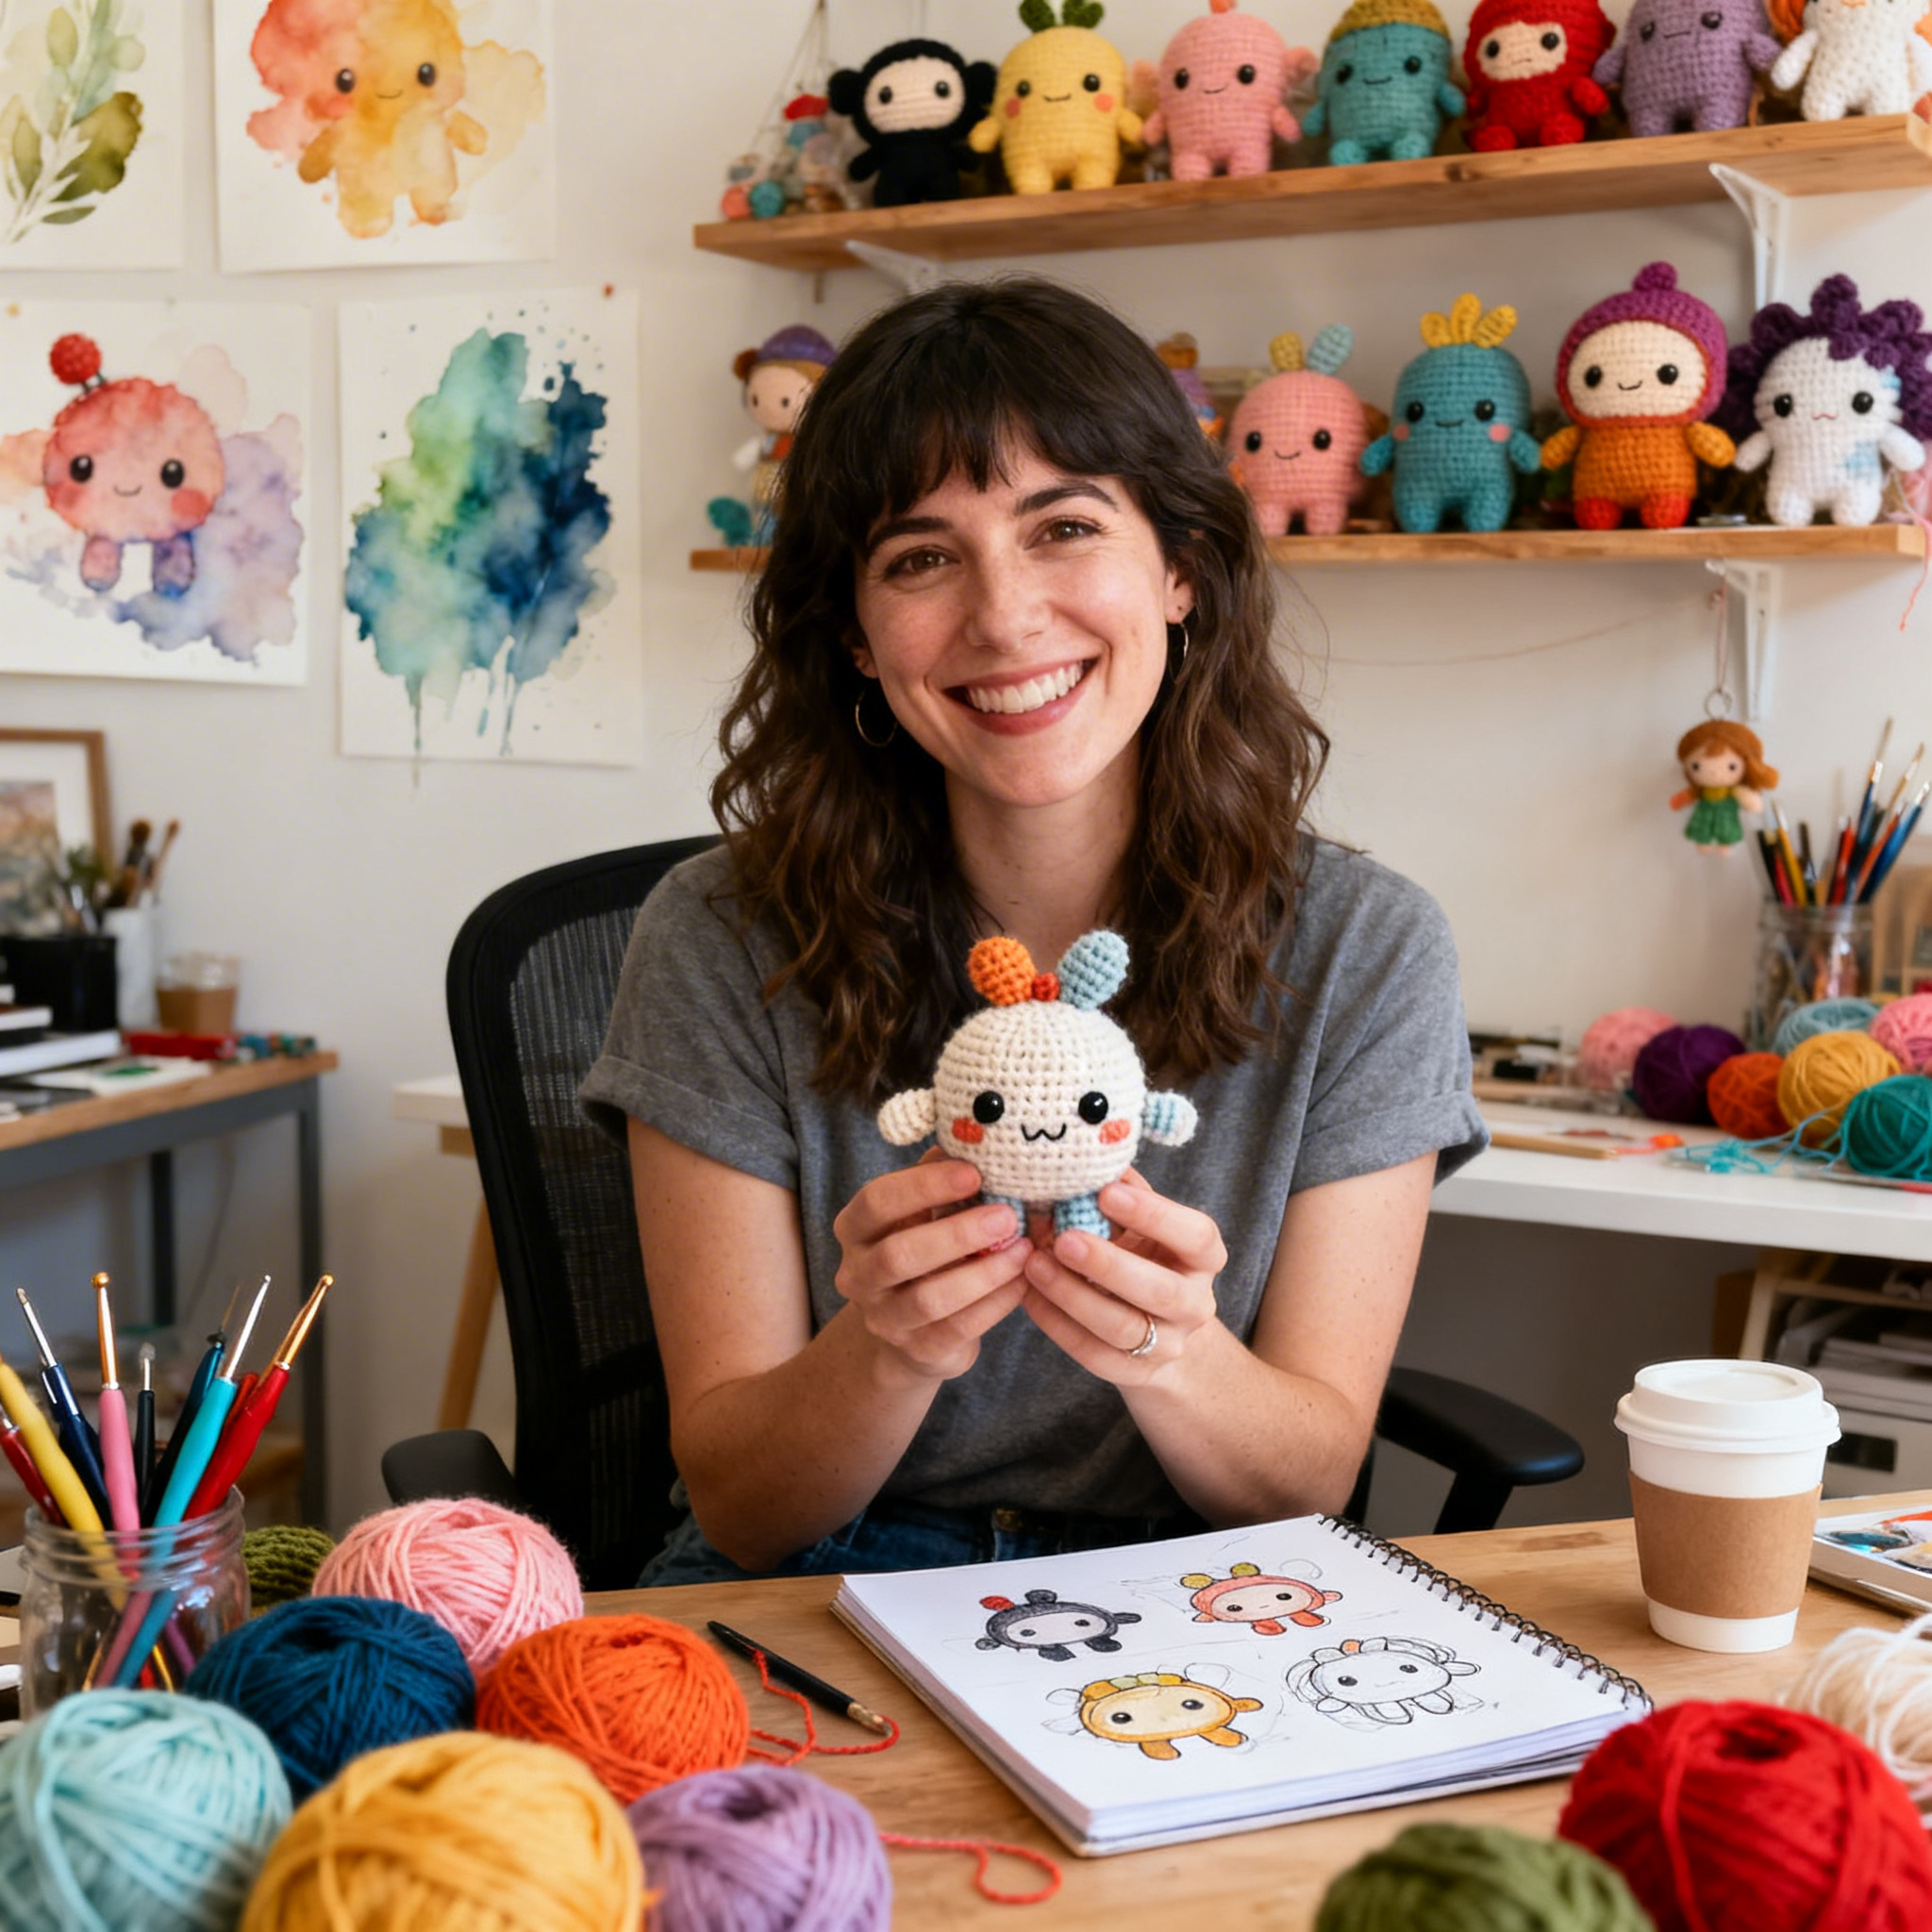
Clara Fern — Crochet Artist & Amigurumi Designer
Clara Fern is a crochet artist and amigurumi designer based in Austin, Texas. With 9 years of experience working with yarn and hook, she transformed a lifelong passion for handcraft into a creative mission: making amigurumi accessible, fun, and deeply rewarding for crafters of all levels.
Clara discovered amigurumi during a trip to Japan in 2017, where she fell in love with the art of bringing tiny characters to life through crochet. Back home in Texas, she spent years studying color theory, design principles, and advanced crochet techniques — developing her own signature style that blends kawaii aesthetics with original character design.
Through maclafersa.com, Clara shares everything she has learned — from choosing the right yarn and reading your first pattern, to designing fully original amigurumi characters from scratch. Her writing is known for being clear, detailed, and genuinely helpful, with no steps skipped and no secrets kept.
When she’s not crocheting, Clara enjoys watercolor painting, visiting local yarn shops, and drinking way too much coffee while sketching new character ideas.