
How to Sew Amigurumi Pieces on an Angle for Dynamic Poses: Choose tools
You’re aiming for clean lines and a natural tilt when you sew your amigurumi. Start by selecting tools that give you control and comfort. A sharp, small crochet hook helps you slip stitches neatly into tight spaces, smoothing the angle rather than jagged edges. A row counter or sticky notes on the pattern keeps track of where angled pieces begin and end, so you don’t lose your rhythm. Choose a soft, sturdy yarn in a color close to your main piece to keep transitions invisible and the work cohesive. Have sharp scissors handy for clean ends, and use a stitch marker to hold your place as the angle shifts. The goal is steady hands and precise control, not brute force—so pick tools that fit your grip and reduce fatigue.
A light magnifier can help with tiny stitches. When sewing at an angle, stitches can tighten in one direction and loosen in another, so a magnifier helps you place each stitch without distorting the fabric. A tape measure or ruler helps gauge the angle length and keep proportions consistent on both sides. If you plan dynamic poses, a clamp can hold the project steady while you sew, keeping the angle precise. A comfortable seam ripper is your safety net—use it to fix misaligned angles without wrecking the yarn.
Before you start, lay out the pieces at the desired angle. Practice a few quick stitches on scrap yarn to confirm the angle sits as you want. If you’re new to angled sewing, try a simple 45-degree test seam to learn tension and stitch length. Your tools are there to support you, not complicate things. With the right setup, angled joins will look intentional and polished.
Pick needle size and thread
Choosing the right needle size and thread is key to the angle. You want a needle that glides through stitches without creating loose gaps at the corners. For most amigurumi, a small crochet hook or blunt-tipped tapestry needle works best for guiding yarn into tight angled seams. If your yarn is thick, use a bigger needle; if it’s thin, a finer needle helps keep angles neat. The thread should be sturdy but not wiry—polyester-blend or cotton works well for clean edges. The goal is even tension so the angle lies flat rather than puckering along the seam.
Test your needle and thread on scrap first. Make several angled stitches and observe how the thread sits when you pull tight. If the needle leaves big holes, switch to a smaller size; if the thread frays, opt for a sturdier option. Always thread your needle with a clean tail and keep a comfortable grip so you don’t twist your wrist while placing angled stitches. A well-matched pair keeps seam lines crisp and your angle consistent.
Consider stitch type as well. Slip stitches and whip stitches hug the edge closely; a lock stitch or mattress stitch can seal the angle firmly without gaps. If colors blend at the angle, a finer thread can help control transitions more naturally. Practice a few variations on scrap to see which method yields the smoothest angle finish—the choice will affect motion readability.
Pick joints, pins, and stuffing
Joints give you stability for dynamic angled poses. Use pins to hold parts in place as you sew, so the angle stays exact. Ball joints or small snap buttons let you adjust the pose later without stressing the fabric. For flexibility, sew joints in the torso or limbs where the angle matters most. Stuffing should be snug but not overpacked; too much pressure can push the angle out of line, while too little can soften the pose. Aim for balanced density so the angle holds shape when the amigurumi is set down.
Pins guide your seams and maintain even spacing; remove them as you work, re-pin if you reposition. For joints, ensure they’re securely attached but not so tight they restrict movement later. When stuffing, distribute evenly from the center outward, then check the angle from multiple sides to confirm it sits correctly. Test various joints for the pose you envision.
Choose joints that allow a little play without loosening over time. If you expect frequent posing, pick joints that rotate slightly or hinge smoothly. For stuffing, mix fiberfill with a few weighted elements if you want gravity to help hold a pose. Always test assembled parts before final stitching to ensure the angle stays as intended when displayed.
Prep and safety checks
Do a quick safety check and prep before sewing. Inspect needles and pins for burrs or sharp edges that could snag yarn. Keep a clean, uncluttered workspace to avoid misalignment. Confirm pattern directions match the angle you want; a small misread early can throw off the look. Ensure your hands are dry and your grip comfortable, especially when positioning the piece at a long angle. Have a backup plan if the angle doesn’t hold—an extra pin, a dab of fabric glue, or a quick seam redo.
Pause to recheck the angle after every few stitches. Look from different sides to catch shifts before they become obvious. If the angle skews, backtrack a stitch or two and realign. After finishing, a light press or steam sets the shape. Inspect again to ensure the angle holds. Careful prep and safety checks protect your work and keep angled seams clean.
Mark angles and amigurumi joint placement for posing
Plan angles before stitching so your amigurumi looks alive, not stiff. Choose the pose, then mark where each joint should bend. Think of your work as a tiny sculpture—the angles dictate balance, movement, and personality. Use a light fabric pen or removable thread so you can adjust without permanent marks. Clear joints like elbows, knees, and hips guide your fabric and stuffing, making the final piece read deliberate.
Map out how each limb will move relative to the body. The joints should align to support the pose, not just look right. Check the silhouette from front and side, noting where angles should open or close. For dynamic action, place joints slightly off-center to convey motion, but keep them within natural ranges so the piece remains readable. Marks become a breadcrumb trail as you sew and stuff.
Transfer your angle plan to yarn and fabric carefully. Marks should be visible through a light layer of yarn but not bold on the outside. If you change your mind, you can rub out or remove marks before sewing. Recheck each joint to ensure it supports the intended pose, because a small shift can change balance entirely. Angles should guide your stitching, not fight you.
Measure and mark alignment points
Measuring alignment points sets a compass for the project. Start at the torso center and measure outward to locate hip and shoulder joints. Mark these with removable chalk or water-soluble pen for tweaks. Precise alignment keeps limbs proportional and the pose believable. Double-check symmetry, especially for bilateral poses.
Align the head, neck, and torso so the neck sits naturally above the shoulders. If the character tilts, adjust the neck point accordingly but keep the head centered over the spine. Measure limb lengths to match proportions, marking elbow, knee, and ankle pivots consistently. If one arm bends at 45 degrees, the other should mirror closely unless you’re aiming for asymmetry for effect. Cross-check with a reference pose to spot misalignments before sewing. A wire or pipe-cleaner skeleton can help test fit joints in real space.
As you mark, ensure markings are clear enough to see through a light layer of yarn but not so bold they show on the outside. You can remove or rub out marks if you change your mind. Your marks become a reliable map for guiding stitching, stuffing, and final assembly.
Pin and baste to test pose
Pin in small groups around each joint to adjust without losing alignment. Test the pose by gently moving limbs and watching how they sit against the body. If a joint looks stiff or hangs oddly, loosen the baste and tweak its angle. Basting threads should be light enough to pull out later but secure enough to hold the pose during stuffing.
Test balance by pretending the amigurumi stands on a tiny stage. If weight tilts, adjust torso or limb positions and re-baste. This step catches issues photos might miss. When the pose behaves under light pressure, you know you’re ready to sew.
Recheck the silhouette from multiple angles: head-on, side, and top. The pose should read clearly and coherently with joints aligned to the motion. If something looks off, remove baste and try a small alteration. Patience here saves rework later.
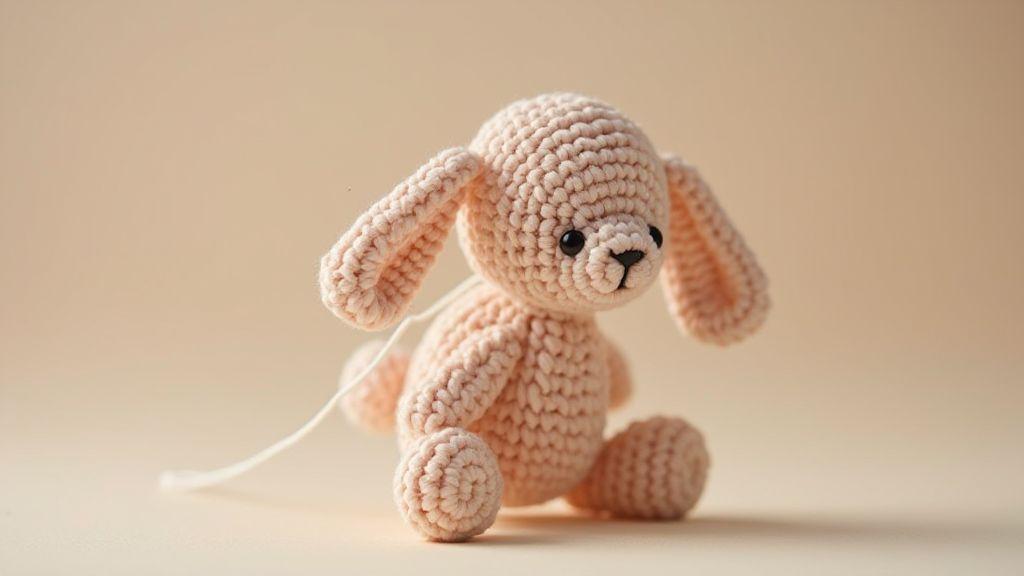
Attach limbs at an angle to create dynamic poses
Attaching limbs at a slight tilt adds life. Aim for a small heel-in or toe-out angle so the body looks curious or ready to move. Position the limbs with test pins and smooth fabric to avoid wrinkles as you sew. Align joints with the natural bend of each limb—let the shoulder sit slightly higher when tilting the arm, or let the hip sit forward when tilting a leg. This creates a dynamic line from head to toe and prevents a stiff look. Account for stuffing later; too much stuffing can push the angle out of alignment, too little can cause floppiness. Keep the angle visible without over-stretching the fabric.
Double-check overall balance; a misaligned limb can topple the figure. View from several angles and adjust as needed. When happy, proceed to sewing with confidence that the pose reads as intentional and lively.
Test limb position before final sew
Test limb position before final sewing to avoid later fixes. Pin the limb in place and press gently to see how the angle holds with light weight. If the limb shifts, adjust the anchor point or stuffing at the joint. Confirm the tilt line runs cleanly from shoulder or hip toward the extremity, and ensure the limb interacts smoothly with the body’s curve.
Balance massage between torso and limb so the pose reads naturally. If a joint clashes with body seams or the neck area, rethink the attachment point or angle. When the pose reads correctly from front and side, sew with confidence. A tiny mock-up with scrap yarn can help preview behavior.
Reinforce joints with angled amigurumi joint techniques
Angled joints are sturdier when you plan lines that lean toward stress. Stitch lines should follow the arc of movement, distributing tension along a slightly slanted path rather than straight on. This supports the pose and creates a dynamic look.
Think of angled joints like steering a bike on a curve: angled stitching helps fabric bend with less resistance. Practice on scrap first, then apply to the main piece. Angled joints reduce twists and creases and help limbs sit correctly when posed. Compare a straight joint to an angled one—the angled version holds with less effort, making pose changes easier over time.
If you’re unsure, rehearse on scrap and transfer the feel to the main piece. The goal is a joint that holds while still allowing flex when you want it.
Use safety joints or internal anchors
Safety joints give you a buffer against stress. An internal anchor inside the body distributes load and keeps exterior stitches neat. Align your anchor with the intended pose to avoid protrusion or shifting as you move limbs. Internal anchors also make posing reusable across sessions, spreading load and reducing distortion. Secure anchors inside the body cavity with careful stitches to keep them centered and balanced.
Double-thread and secure knots
Double-threading adds bite. Two threads in one pass hold better, and after tying off, weave a tail back into the work for extra security. Use figure-eight or square knots, then double back through nearby stitches to create a safety net. If you’re joining pieces at a joint, tie knots on opposite sides to balance the load. Trim tails close to the knot but not so close you risk loosening. A neat finish lasts longer, especially in play.
Check durability for play
Gently bend each joint to test its range. If a limb wobbles, reinforce with additional angled stitches and a fresh knot. Consider adding an extra thread line along the joint if the piece will hold props or extended poses. The more you test, the more you’ll fine-tune angles, anchors, and knots for durability.
Block and shape for final pose and finish
Block first to set a rough pose, then shape for even weight distribution. Use a light base layer to map the silhouette and keep lines clean. Check balance from multiple angles; a slight tilt can change the final feel. Refine the silhouette with small tweaks, adding or removing stitches to smooth curves and edges. Maintain even tension and avoid bulky spots. Lock the arms, legs, and head into place for the finish.
Test the pose under light handling. If anything wobbles, reinforce with tighter stitches or a subtle internal support.
Wet block or steam small areas
You may wet-block large surfaces or steam small zones to set shapes. Dampened areas should be shaped as they dry, avoiding soaking parts that should stay crisp. Steam works well on curves; hold the source at a distance to prevent scorching, then press lightly to guide shaping. Let the piece cool completely before proceeding.
Use these techniques selectively for dynamic poses: wet-block the torso for smooth transitions, then use steam for delicate bends in limbs. The aim is to firm the pose where it matters while preserving flexibility elsewhere.
Weave ends and tidy joins
Weave ends to create a clean finish. Thread a blunt needle and weave tails back into the path of stitching, then trim close but not flush. Keep the weave tight to prevent snagging. For tidy joins, use small, even stitches to create a seamless transition between sections. If gaps appear, tighten slightly and adjust surrounding stitches. A neat join makes the final piece read as a single sculpture rather than a quilt of parts.
Lightly press edges to ensure flat seams. A well-hidden weave helps the pose pop and hold its shape during display or play.
Final inspection and finishing touches
Do a final inspection with a critical eye: check pose stability, surface smoothness, and the readability of the intended gesture. Correct any stray fibers or missed knots. Add finishing touches—subtle color on raised edges or shading along folds can deepen the pose. Attach accessories securely so they don’t shift during handling. The piece should look polished and ready for display or gifting.
Quick recap: How to Sew Amigurumi Pieces on an Angle for Dynamic Poses
- Start with the right tools, focalizing on comfort and control to achieve clean, angled joins.
- Choose needle size and thread that balance tension and edge smoothness, testing on scrap first.
- Mark and measure angles carefully, using pins and baste tests to confirm poses before final stitching.
- Attach limbs at slight angles to create motion-readiness, testing positions before committing.
- Reinforce joints with angled techniques like whip stitches, ladder stitches, and precise tension control.
- Use safety joints or internal anchors for durability in dynamic poses.
- Block, shape, and refine to lock in pose with even weight distribution.
- Employ wet block or steam selectively to set curves while preserving flexibility.
- Weave ends and tidy joins for a professional finish, then perform a final inspection.

Clara Fern — Crochet Artist & Amigurumi Designer
Clara Fern is a crochet artist and amigurumi designer based in Austin, Texas. With 9 years of experience working with yarn and hook, she transformed a lifelong passion for handcraft into a creative mission: making amigurumi accessible, fun, and deeply rewarding for crafters of all levels.
Clara discovered amigurumi during a trip to Japan in 2017, where she fell in love with the art of bringing tiny characters to life through crochet. Back home in Texas, she spent years studying color theory, design principles, and advanced crochet techniques — developing her own signature style that blends kawaii aesthetics with original character design.
Through maclafersa.com, Clara shares everything she has learned — from choosing the right yarn and reading your first pattern, to designing fully original amigurumi characters from scratch. Her writing is known for being clear, detailed, and genuinely helpful, with no steps skipped and no secrets kept.
When she’s not crocheting, Clara enjoys watercolor painting, visiting local yarn shops, and drinking way too much coffee while sketching new character ideas.


