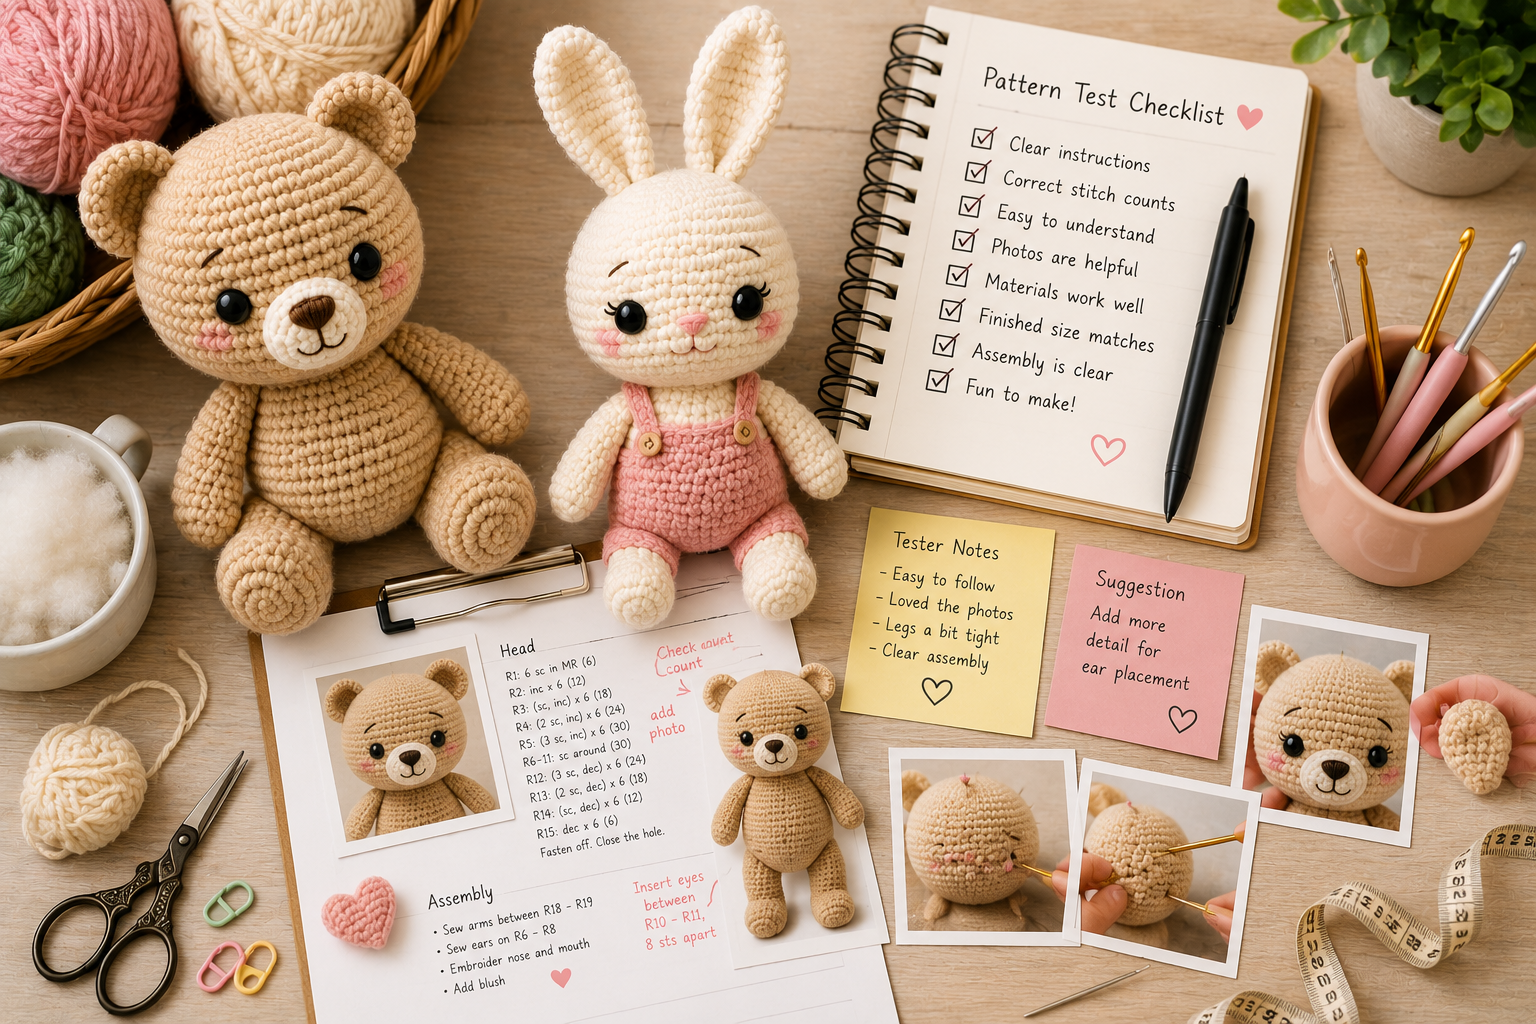
How to Test an Amigurumi Pattern Before Publishing It
Designing your own amigurumi pattern is an exciting achievement. You start with an idea, transform it into stitches, adjust proportions, choose colors, assemble the pieces, and eventually hold a finished character that once existed only in your imagination.
But finishing the first successful prototype doesn’t necessarily mean the pattern is ready to publish.
A pattern that makes perfect sense to its designer can still be confusing to another crocheter. Instructions that feel obvious while you’re writing them may contain missing steps, incorrect stitch counts, unclear assembly directions, or assumptions that readers won’t automatically understand.
That’s where pattern testing becomes essential.
Testing an amigurumi pattern before publishing helps identify errors, improve clarity, verify stitch counts, evaluate difficulty level, and determine whether other crocheters can reproduce a result similar to the original design.
Whether you plan to sell your pattern or offer it for free, proper testing can dramatically improve its quality and the experience of the people who use it.
In this guide, we’ll walk through the most important steps for testing an amigurumi pattern before publication.
Why Amigurumi Patterns Need Testing
When you design a pattern, you already know what the finished character is supposed to look like.
That knowledge can unintentionally fill gaps in your written instructions.
For example, you might write:
“Attach the ears to the head.”
To you, the correct position seems obvious because you’ve already made the character.
But another crocheter may immediately wonder:
Which rounds?
How many stitches apart?
Should the ears point upward or outward?
Should they be flattened before sewing?
Should the bottom edge curve slightly?
A tester approaches your pattern without the same background knowledge.
That makes testers extremely valuable.
They reveal where the written instructions depend too heavily on information that exists only in the designer’s mind.
1. Finish the Pattern Before Sending It to Testers
Avoid sending incomplete notes and expecting testers to reconstruct your intentions.
Before testing begins, create a complete draft.
It should contain all essential information, including:
- materials
- yarn type and weight
- hook size
- abbreviations
- finished measurements
- stitch instructions
- round numbers
- stitch totals
- color changes
- stuffing instructions
- assembly directions
- facial-feature placement
- photos when necessary
The document doesn’t need its final graphic design yet, but it should function as a complete pattern.
Your tester’s job is to evaluate the instructions, not write missing sections for you.
2. Crochet the Entire Pattern From Your Written Instructions
Before asking anyone else to test the design, test it yourself.
This time, don’t crochet from memory.
Follow exactly what you’ve written.
If Round 8 says:
R8: (5 sc, inc) × 6 (42)
actually follow those instructions and verify that you finish with 42 stitches.
Do this for every component.
It’s surprisingly easy to crochet something correctly while accidentally writing the instructions incorrectly.
You may have performed six decreases but written five, skipped a round number, or recorded the wrong final stitch count.
Self-testing catches many of these problems before another person ever sees the pattern.
3. Verify Every Stitch Count
Incorrect stitch counts are among the most frustrating pattern errors.
Check the mathematics of every increase and decrease round.
For example:
(3 sc, inc) × 6
Each repeat contains five stitches after completion: three single crochets plus two stitches created by the increase.
Five multiplied by six gives 30 stitches.
The final stitch count should therefore be 30.
Check every round this way.
Don’t assume the number is correct simply because the finished prototype looked right.
Also verify that the starting stitch count of each round matches the ending count of the previous round unless an intentional construction change occurs.
4. Check the Round Numbers
Round-number errors are easy to overlook.
You may accidentally jump from R12 to R14 or use the same number twice.
This becomes particularly confusing when later instructions reference specific rounds.
For example:
“Insert the eyes between R10 and R11.”
If your round numbering is incorrect earlier in the pattern, the entire placement instruction may become unreliable.
Review round numbers separately from the crochet instructions.
Sometimes reading only the numbers makes sequencing errors easier to spot.
5. Standardize Your Crochet Abbreviations
Choose one abbreviation system and use it consistently.
For example:
MR – magic ring
sc – single crochet
inc – increase
dec – decrease
sl st – slip stitch
ch – chain
BLO – back loop only
FLO – front loop only
If you’re using U.S. crochet terminology, state this clearly.
Crochet terms differ between U.S. and U.K. terminology, so readers need to know which system the pattern follows.
Don’t switch between abbreviations such as “SC,” “sc,” and “single crochet” randomly unless there is a reason to spell out the term.
Consistency makes the pattern easier to scan.
6. Include the Final Stitch Count
Whenever practical, include the total number of stitches at the end of each round.
For example:
R1: 6 sc in MR (6)
R2: inc × 6 (12)
R3: (1 sc, inc) × 6 (18)
R4: (2 sc, inc) × 6 (24)
These totals act as checkpoints.
If the crocheter reaches the end of Round 4 with 23 stitches instead of 24, they immediately know something went wrong.
Without stitch totals, the mistake may remain unnoticed for several rounds and become much harder to fix.
7. Test the Pattern With the Recommended Materials
At least one version of the test should use the yarn weight and hook size listed in the pattern.
This helps confirm that your finished-size estimate is accurate.
Record the completed measurements, such as:
Finished height: approximately 8 inches (20 cm).
Remember that individual tension will cause some variation.
Your testers don’t need to produce an amigurumi with exactly identical measurements, but major differences may indicate unclear material information or gauge-related issues.
8. Choose Testers With Different Skill Levels
Don’t select testers only because they’re highly experienced.
If your pattern is intended for intermediate crocheters, having at least one relatively new intermediate maker can reveal instructions that experienced crocheters automatically understand but others may find confusing.
A useful testing group might include:
- an experienced amigurumi maker
- an intermediate crocheter
- someone familiar with reading patterns
- someone who hasn’t previously made your designs
Different testers notice different problems.
An advanced maker may spot inefficient construction.
A less experienced tester may identify terminology that needs clarification.
Both perspectives are valuable.
9. Give Testers a Clear Deadline
Pattern testing works best when expectations are established in advance.
Tell testers:
- when testing begins
- when feedback is due
- whether photos are required
- how feedback should be submitted
- whether public sharing is allowed
- what materials they need
- what difficulty level you expect
Choose a realistic deadline.
A small keychain-sized amigurumi may require only a short testing period, while a detailed doll with clothing and accessories may need significantly longer.
The goal is careful testing, not rushed completion.
10. Ask Testers Not to Correct the Pattern Silently
This is extremely important.
Experienced crocheters often recognize mistakes and automatically correct them while working.
For example, a tester may see:
(2 sc, inc) × 6 (25)
They know the correct stitch total should be 24, so they simply continue with 24 stitches.
The final amigurumi turns out perfectly.
But unless they report the error, it remains in the published pattern.
Ask testers to document every inconsistency, even if they immediately understand what you intended.
A tester should think:
“I know how to fix this, but would a customer know?”
11. Ask Testers to Mark Confusing Instructions
Not every problem is technically incorrect.
Sometimes an instruction is mathematically correct but difficult to understand.
For example:
“Attach the arm while crocheting around the body.”
A tester might understand what you mean, but the instruction could still benefit from more detail:
“Flatten the arm opening and position it against the body. Crochet through both layers of the arm and the corresponding body stitches for 4 sc.”
Testing should evaluate clarity as well as accuracy.
12. Pay Special Attention to Assembly Instructions
Assembly is one of the most common sources of confusion in amigurumi patterns.
Statements such as:
“Sew the legs to the body.”
may not provide enough information.
Consider including:
- exact round placement
- approximate number of stitches between pieces
- orientation
- whether the piece should be flattened
- whether it should be stuffed
- where the seam should face
- whether pins should be used before sewing
Photos can be especially helpful during assembly.
A clear image showing ear or limb placement can sometimes communicate more effectively than an entire paragraph.
13. Test Facial Feature Placement
Facial placement can dramatically affect the finished character.
If your pattern specifies:
“Place the safety eyes between R12 and R13, 8 stitches apart,”
ask testers whether that placement produces a result similar to your sample.
Also clarify exactly what “8 stitches apart” means if ambiguity is possible.
Does it mean eight visible stitches between the eye posts?
Or eight stitches from one post to the other?
Precise wording prevents inconsistent results.
Test the placement of:
- eyes
- nose
- mouth
- eyebrows
- muzzle
- blush
- embroidered details
A difference of one round can noticeably change the expression.
14. Review Increase and Decrease Placement
Stitch totals aren’t the only thing that matters.
The location of increases and decreases affects shape.
A round may have the correct total number of stitches but still produce a different form if the shaping is distributed incorrectly.
This becomes particularly important in asymmetrical designs.
Muzzles, feet, bellies, bent legs, and sculpted heads may depend on increases occurring at specific points.
Ask testers whether their shapes resemble the reference photos before assembly.
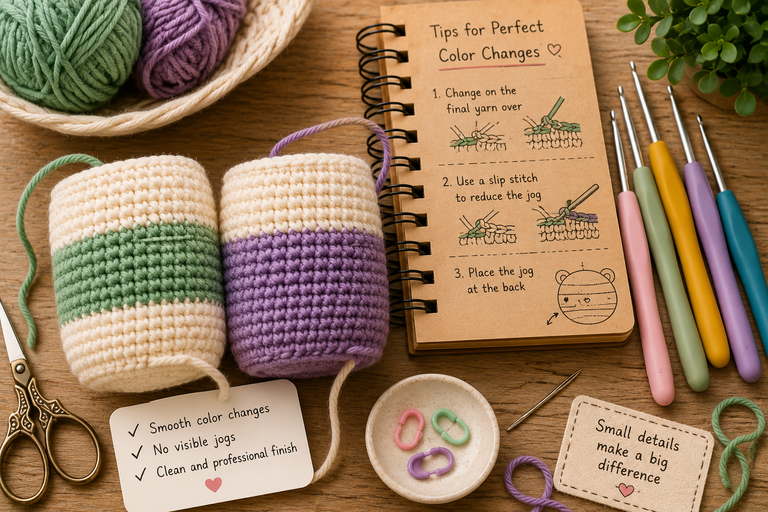
15. Check Color Changes Carefully
Color changes can be another source of confusion.
Clearly indicate:
- when to change color
- which stitch begins the new color
- whether the previous yarn should be cut
- whether the unused yarn should be carried
- where the color-change seam should sit
If the design contains complex markings, charts or progress photos may help.
Ask testers to report whether their color sections align with your sample.
16. Test No-Sew and Low-Sew Construction Carefully
No-sew patterns often look simpler because they contain fewer separate pieces, but they require precise timing.
If the arms need to be crocheted into Round 20, the arms must already be completed before the tester reaches that point.
Your pattern should therefore present components in a logical order.
For example:
- Arms
- Legs
- Join legs
- Body
- Crochet arms into body
- Continue neck and head
A pattern can contain perfectly correct instructions and still be frustrating if they’re presented in an inconvenient sequence.
17. Ask Testers to Record Yarn Usage
Yarn usage estimates are helpful, especially for larger projects or designs involving multiple colors.
Ask testers approximately how much yarn they used.
You don’t necessarily need an exact measurement for every color, but comparing several testers can help determine whether your estimate is realistic.
If your pattern says one 50-gram skein is sufficient but multiple testers need a second skein, the material list should be updated.
18. Compare the Finished Amigurumi
Once testers finish, compare their results with your original.
They don’t need to look identical.
Individual crochet tension and personal finishing style naturally create variation.
However, ask whether the important characteristics remain consistent.
Look at:
- head-to-body ratio
- limb length
- overall height
- ear placement
- facial proportions
- color placement
- silhouette
- pose
If several testers produce the same unexpected difference, the problem may be in the pattern rather than their technique.
19. Ask for Finished Photos
Photos are extremely useful during pattern testing.
Ask testers to provide:
- front view
- side view
- back view
- close-up of the face
For complicated construction, progress photos can also be valuable.
Photos may reveal issues testers don’t think to mention.
For example, every tester may successfully finish the pattern but unknowingly attach the tail lower than you intended because the placement instructions weren’t specific enough.
20. Create a Structured Feedback Form
Instead of asking, “What did you think?”, provide specific questions.
For example:
Were any stitch counts incorrect?
Were any instructions difficult to understand?
Did you encounter missing information?
Were the photos helpful?
Was assembly clearly explained?
Did the finished size match the estimate?
Did the difficulty level feel accurate?
How long did the project take?
Would you change anything about the pattern?
Structured questions tend to produce more useful feedback than general requests.
21. Track Corrections in One Master Document
If five testers send feedback through different messages, comments, and emails, revisions can quickly become confusing.
Keep one master correction document.
You might organize it like this:
| Section | Problem | Tester | Correction | Status |
|---|---|---|---|---|
| Head R8 | Wrong stitch total | Tester 1 | Change 35 to 36 | Fixed |
| Arms | Stuffing unclear | Tester 2 | Add “stuff lower half lightly” | Fixed |
| Assembly | Ear position unclear | Tester 3 | Add rounds and photo | Pending |
This makes it easier to ensure that nothing is forgotten.
22. Look for Repeated Feedback
One tester finding an instruction confusing may indicate a personal preference.
Three testers finding the same instruction confusing strongly suggests the pattern needs revision.
Pay particular attention to repeated comments.
If multiple testers ask:
“Where exactly do I attach the arms?”
don’t assume future customers will figure it out.
Improve the instructions.
Testing isn’t about proving that your pattern is already correct. It’s about finding opportunities to make it better.
23. Don’t Ignore Beginner Questions
A question that feels obvious to you may reveal an important gap.
Suppose a tester asks:
“Do I stuff the ears?”
You may think the answer is clearly no.
But if the pattern never says whether the ears should be stuffed, the tester’s question is reasonable.
Adding one sentence—
Do not stuff the ears. Flatten the opening before attaching.
—can prevent the same question from dozens of future readers.
24. Review Photos and Diagrams
Testers should also evaluate your visual instructions.
Ask:
Can they clearly see the relevant stitches?
Is the yarn color too dark to show detail?
Is the photo taken from the correct angle?
Does an arrow point to the right location?
Does the image correspond to the written step?
A beautiful photo isn’t automatically an instructional photo.
For technical steps, clarity matters more than styling.
25. Confirm the Difficulty Level
Designers sometimes underestimate the difficulty of their own patterns.
A technique that feels simple after years of crocheting may be challenging for someone with less experience.
Ask testers how they would classify the pattern:
Beginner
Advanced beginner
Intermediate
Advanced
Then compare their answers.
If you describe the pattern as beginner-friendly but every tester considers it intermediate, adjust the description rather than setting unrealistic expectations.
26. Review the Pattern After Testing
Once feedback arrives, revise the pattern carefully.
Correct:
- stitch counts
- grammar
- missing steps
- confusing terminology
- assembly placement
- measurements
- material quantities
- formatting inconsistencies
Update photos or diagrams where necessary.
Then read the entire pattern again from beginning to end.
Don’t only review the sections testers commented on.
A correction in one section can affect another instruction later in the pattern.
27. Consider a Final Test After Major Revisions
If testing reveals only minor spelling errors, another full test may not be necessary.
But if you’ve significantly changed construction, stitch counts, shaping, or assembly, test the revised version again.
This doesn’t necessarily require another large testing group.
You can crochet the corrected section yourself or ask one trusted tester to verify the revised instructions.
The important thing is to confirm that your correction actually works.
28. Proofread the Final PDF or Blog Version
A technically perfect draft can acquire new errors during formatting.
When text is transferred into a PDF, website, or design template, check everything again.
Look for:
- missing lines
- broken symbols
- incorrect page breaks
- cropped photos
- misplaced captions
- duplicated rounds
- formatting changes
- unreadable text
If the pattern is downloadable, open the actual final file rather than reviewing only the editing document.
Test it on both desktop and mobile if your audience is likely to use both.
29. Keep a Version Number
If you publish patterns regularly, version numbers can make updates much easier.
For example:
Version 1.0 – August 2026
If you later correct an error:
Version 1.1 – September 2026
This helps you identify which version a customer is using when they contact you with a question.
It also creates a simple record of revisions.
30. Save Tester Feedback for Future Patterns
Pattern testing doesn’t only improve one design.
It teaches you how to write better future patterns.
If testers repeatedly ask for exact limb placement, make that information standard in every new pattern.
If people appreciate progress photos for color changes, include them automatically next time.
If stitch totals frequently contain mistakes, create a mathematical checking step in your workflow.
Over time, your first drafts will become much stronger because you’re applying lessons learned from previous testing.
A Simple Amigurumi Pattern Testing Checklist
Before publishing, confirm that you’ve checked the following:
- Pattern has been crocheted from the written instructions.
- Every round number is correct.
- Every stitch total has been verified.
- Abbreviations are defined.
- Crochet terminology is specified.
- Yarn and hook information is included.
- Finished measurements are provided.
- Color changes are clear.
- Stuffing instructions are included.
- Eye and facial-feature placement is specific.
- Assembly instructions include positioning.
- Necessary photos or diagrams are included.
- At least one other crocheter has tested the instructions.
- Tester feedback has been reviewed.
- Repeated concerns have been corrected.
- Difficulty level has been confirmed.
- Final formatted version has been proofread.
If all of these points are complete, your pattern is much closer to being publication-ready.
How Many Pattern Testers Do You Need?
There’s no universal number.
For a simple amigurumi pattern, a small group of reliable testers may provide enough feedback.
More complex patterns can benefit from a larger group because there are more opportunities for differences in interpretation.
Quality matters more than quantity.
Three testers who carefully check stitch counts, document confusing sections, and provide detailed feedback may be more useful than ten testers who simply crochet the project and say they enjoyed it.
Choose people who understand that testing is more than receiving early access to a pattern.
What Makes a Good Pattern Tester?
A good tester doesn’t necessarily need to be an expert crocheter.
They need to be observant, reliable, and willing to communicate.
Strong testers:
- follow the written instructions closely
- report errors instead of silently correcting them
- meet agreed deadlines
- provide useful photos
- explain where they became confused
- distinguish personal preference from actual errors
- communicate respectfully and clearly
Over time, you may build a small group of trusted testers who understand your pattern-writing style.
Final Thoughts
Testing an amigurumi pattern before publishing it is one of the most important steps between creating a successful prototype and releasing a polished pattern.
As the designer, you already know what every component is supposed to become. Your readers don’t have that advantage.
A good test reveals the places where your written instructions don’t yet communicate everything you know.
Begin by crocheting directly from your own written pattern and verifying every stitch count. Then give the complete draft to testers with different experience levels and ask them to document errors, unclear wording, sizing differences, assembly questions, and anything they had to interpret on their own.
Pay particular attention to repeated feedback.
If several people misunderstand the same instruction, rewriting that section can prevent countless questions after publication.
Pattern testing isn’t about making sure every tester produces an absolutely identical amigurumi. Handmade work naturally varies.
The goal is something more important: another crocheter should be able to follow your instructions independently and create a character that accurately reflects the design you intended.
When that happens consistently, your pattern isn’t simply finished.
It’s ready to be shared.

Clara Fern — Crochet Artist & Amigurumi Designer
Clara Fern is a crochet artist and amigurumi designer based in Austin, Texas. With 9 years of experience working with yarn and hook, she transformed a lifelong passion for handcraft into a creative mission: making amigurumi accessible, fun, and deeply rewarding for crafters of all levels.
Clara discovered amigurumi during a trip to Japan in 2017, where she fell in love with the art of bringing tiny characters to life through crochet. Back home in Texas, she spent years studying color theory, design principles, and advanced crochet techniques — developing her own signature style that blends kawaii aesthetics with original character design.
Through maclafersa.com, Clara shares everything she has learned — from choosing the right yarn and reading your first pattern, to designing fully original amigurumi characters from scratch. Her writing is known for being clear, detailed, and genuinely helpful, with no steps skipped and no secrets kept.
When she’s not crocheting, Clara enjoys watercolor painting, visiting local yarn shops, and drinking way too much coffee while sketching new character ideas.