
How to Adjust Proportions When Changing Yarn Weight or Hook Size
A steady gauge helps keep Amigurumi proportions on track. Your gauge tells you how many stitches and rows fit in a given area, so ears, arms, and heads stay the right size when you switch yarns or hooks. Start by choosing your yarn and hook combo at the outset and compare it to the target size. If your swatch yields more stitches per 10 cm than the pattern expects, your piece will be smaller; if it yields fewer, it will be larger. The goal is to match the target gauge exactly so shapes stay proportional.
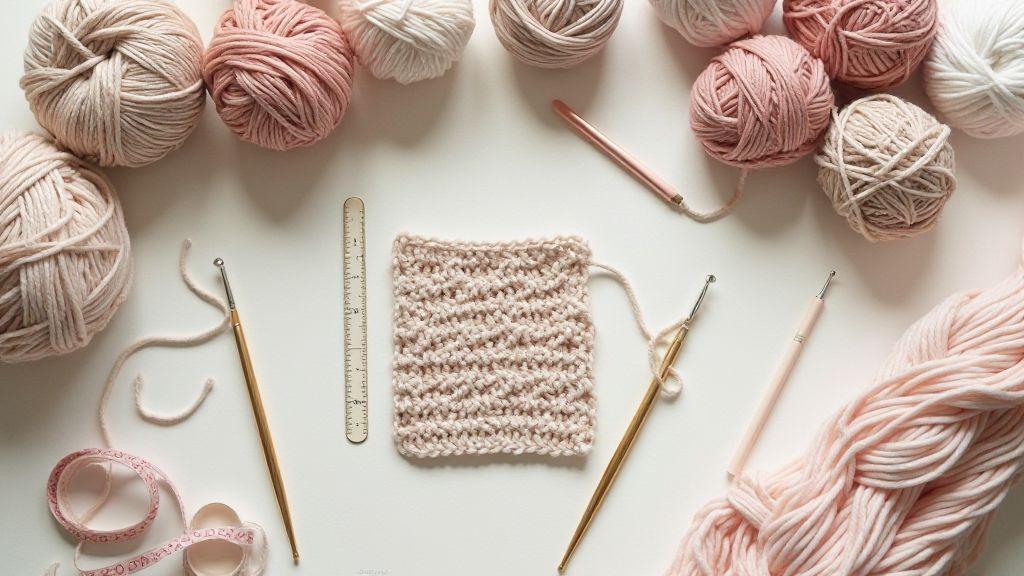
Measure gauge and swatch
Knit or crochet a square swatch at least 10 cm on each side using the same technique and tension you’ll use in the final piece. Label the swatch with the recommended hook size, yarn weight, and swatch date, then wash and block it as you would the finished amigurumi, since blocking can change gauge. If the gauge changes after blocking, re-check stitches and rows. Keep the swatch handy for frequent comparisons.
How to make a reliable gauge swatch
Use the exact yarn and hook you’ll use, plus the same technique. Crochet a square or a small pattern section, counting stitches and rows in a 10 cm area. Block the swatch as you will the final piece. Mark the edges of the 10 cm area for clean counting. If the swatch is too tight, loosen your grip; if too loose, tighten. Re-swatch until consistent. Record stitches across 10 cm and rows down 10 cm, plus hook size, yarn weight, and any tension details. If the gauge deviates by more than 2 stitches or 2 rows, swatch again with a different hook or technique.
Convert gauge when switching yarn weight
When you change yarn weights, convert the gauge to keep proportions. Swatch the new yarn with the same hook, compare the new stitches and rows in 10 cm with your original gauge, and use a simple proportion: target stitches per 10 cm × original rows per 10 cm = new rows per 10 cm, and vice versa. Use the converted gauge to decide how many pattern repeats yield the same overall size. Heavier yarns fill more space; lighter yarns create more air, so your counts may change significantly. Keep notes to verify each section remains proportional.
Count stitches and rows for a 10 cm sample
Count stitches across the top edge and rows down the side for two or three rows to confirm consistency. If there’s variation, adjust grip and tension and re-swatch. A steady count helps translate gauge into exact proportions for the head, limbs, and torso.
Calculate new stitch and row counts
Find the new target gauge by comparing old and new gauges. If the new yarn or hook makes you tighter, you’ll need more rows and stitches; if looser, fewer. Base changes on the target body measurements, not just the old stitch counts. Multiply the target inches by the new gauge to obtain updated counts, then round to wholes and apply to the pattern.
Use the stitch ratio from swatches to recalc counts
Compare stitches per inch to the target. If your swatch shows 6 stitches per inch and you want 4, your ratio is 0.67. Multiply current stitch counts by 0.67 and do the same for rows. Recheck edge details and overall dimensions. If anything looks off, revise with a new swatch test.
Adjust shaping for amigurumi anatomy
Shaping happens in layers: head, torso, arms, then legs. Increases create volume (round cheeks, brows), while decreases taper limbs. If the head seems top-heavy, add stuffing lower in the neck before finishing. If a section looks too flat, add increases in a curved line to bulge gently. If overly round, use controlled decreases. Keep notes to repeat shaping on future pieces and adjust for new characters.
Maintain head-to-body ratios
Keep head-to-body proportions in a comfortable range (a typical look is a head about one-half to one-third the body height). If the head grows too large, reduce head rounds or add torso height before closing the neck. When switching yarns or hooks, test with a small head-and-neck sample first to confirm balance.
Adapt proportions when changing hook size for limbs
A larger hook loosens stitches and can lengthen limbs; a smaller hook tightens and shortens. If you use a bigger hook, plan for longer limbs and more stuffing. If you use a smaller hook, keep rounds but reduce stuffing to avoid a pinched look. Crochet a quick limb swatch with your chosen hook and yarn to compare against the pattern’s limb. If the sketch changes significantly, adjust by adding or removing rounds before starting the project. Pairing a different yarn weight with a hook may require proportional tweaks to maintain balance.
Change hook size without altering fit
To keep fit while changing hooks, test and adjust only the hook. Larger hooks relax stitches and can make things look bigger; smaller hooks tighten stitches and can shrink the piece. Do a small swatch with each hook to compare to your original gauge. Note tension changes and decide whether to adjust stitches or counts later. Keep a notebook with hook size, tension results, and any shape changes to reproduce the result later.
When to change hook size versus yarn
Use a hook swap to fix proportions if the fabric is too tight or loose while the yarn remains the same. If the yarn’s thickness or texture is the root cause, switching yarn is often better. Try one hook size up or down to test whether it balances density, scale, and expression.
Recheck gauge and adjust counts after each hook change
After changing hooks, recheck gauge and adjust the next sections to maintain proportions. Update stitch counts and keep notes so you can reproduce the result if you redo sections later.
Resize and grade between yarn weights
Resizing and grading across yarn weights helps preserve design integrity when moving from light to bulky yarn. Note current gauge and target gauge for the new weight. If stitches loosen with heavier yarn, reduce repeats or stitches per round to maintain shape. Compare key measurements—height, width, limb length—and adjust counts accordingly. Testing a small swatch first helps you avoid surprises in the full piece.
Adjust crochet pattern for different yarn weight
Choosing a new hook size close to the target gauge is your first step. If the fabric becomes too dense, loosen slightly; if too loose, tighten or reduce rounds in critical sections. Map major sections (head, body, limbs) to the new weight, estimating how many stitches or rounds you’ll need per section to preserve proportions. Keep notes to reproduce the look on future projects.
Grading crochet pattern between yarn weights step-by-step
1) Select a target weight and an initial hook size near the target gauge. Make a small swatch and measure gauge; adjust hook size if needed.
2) Calculate gauge percentage: (target gauge − current gauge) ÷ current gauge × 100.
3) Apply this percentage to each section’s repeats or rounds to preserve proportions. Check total height and limb proportions with a quick mock-up. If needed, re-calculate with the gauge percentage and adjust again.
4) Update sections one by one, keeping stitch type consistent. Recheck overall balance and repeat as necessary.
Increase or decrease repeats by the gauge percentage
Use the gauge percentage directly in each section’s repeats: new repeats = original repeats × (1 ± gauge percentage). Round to whole numbers and verify the overall dimensions against the original design. This keeps the character’s look consistent across yarn weights.
Maintain drape, stuffing, and final fit
Drape and stuffing balance the final feel. Start with a yarn and tension that match the project goals. If stitches are too tight, softness and drape suffer; if too loose, the piece may sag. Use correct stuffing density—enough to hold shape but soft enough to fold naturally. Constantly compare sections as you sew to ensure joints bend smoothly and the figure remains balanced. Small tweaks here yield a friendlier silhouette.
Tips for maintaining drape and fit with yarn changes
- Match yarn weight to the original plan and keep tension consistent; swatch to compare drape before committing.
- Check hook size against the new yarn; adjust if the fabric becomes too stiff or too loose.
- Do a quick blocking test after any yarn swap to restore drape and edge definition.
How yarn weight affects finished measurements
Fibre thickness changes final size predictably. Heavier yarns add bulk, potentially increasing measurements and stiffening drape. To compensate, reduce stitches per round or use a smaller hook to maintain the same gauge. Lighter yarns can shrink or stretch differently; recalculate gauge and adjust with swatches before crocheting the full piece.
Test stuffing and blocking to confirm final shape
After stuffing, gently mold the figure into its intended pose. If sections flatten or bulge, adjust stuffing density accordingly. A light block after finishing can verify dimensions; if the blocked result differs from your plan, tweak stuffing or tension and retest. The goal is a steady, predictable shape that holds up to handling.
How to Adjust Proportions When Changing Yarn Weight or Hook Size is about keeping your design faithful across yarns and tools. With careful gauge work, reliable swatches, and systematic shaping adjustments, you can preserve proportions and character whether you switch yarn weight or try a different hook.

Clara Fern — Crochet Artist & Amigurumi Designer
Clara Fern is a crochet artist and amigurumi designer based in Austin, Texas. With 9 years of experience working with yarn and hook, she transformed a lifelong passion for handcraft into a creative mission: making amigurumi accessible, fun, and deeply rewarding for crafters of all levels.
Clara discovered amigurumi during a trip to Japan in 2017, where she fell in love with the art of bringing tiny characters to life through crochet. Back home in Texas, she spent years studying color theory, design principles, and advanced crochet techniques — developing her own signature style that blends kawaii aesthetics with original character design.
Through maclafersa.com, Clara shares everything she has learned — from choosing the right yarn and reading your first pattern, to designing fully original amigurumi characters from scratch. Her writing is known for being clear, detailed, and genuinely helpful, with no steps skipped and no secrets kept.
When she’s not crocheting, Clara enjoys watercolor painting, visiting local yarn shops, and drinking way too much coffee while sketching new character ideas.


