
Choose tools and thread for your amigurumi hair
You’re about to give your amigurumi character real personality, and the right tools make all the difference. Start with a comfortable set of crochet hooks and embroidery needles that fit your hand size and tension. For hair, you’ll want needles that glide smoothly, not snaggy ones that fight you. Pick a few options: a small embroidery needle for precision and a micro-syringe needle if you’re pulling finer threads through tight spots. Your goal is clean, even stitches without bruising the fabric yarn you’re threading through. Think of it like choosing the right paintbrush for eyebrows—precision matters, and you’ll notice the difference in every strand.
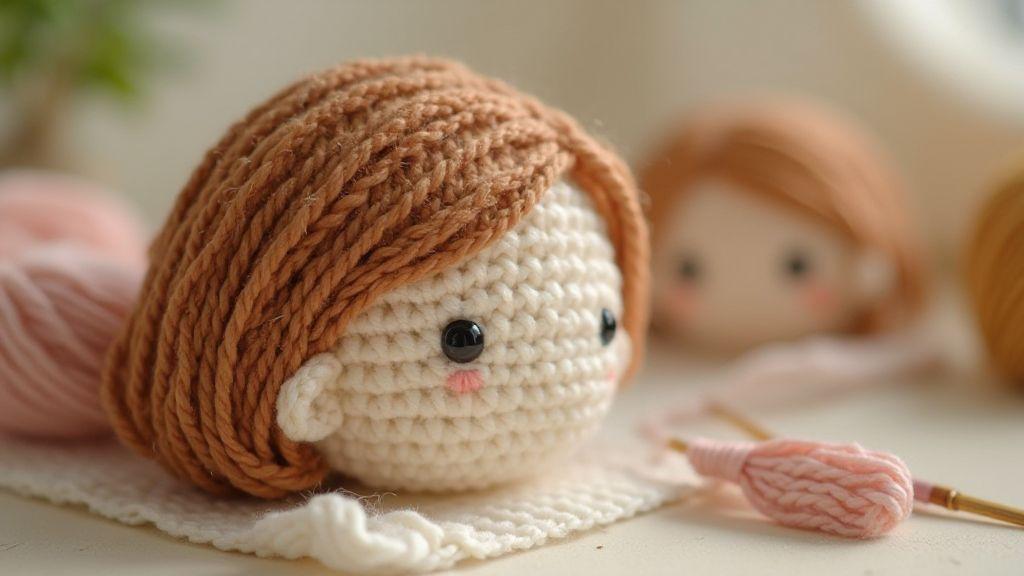
Next, choose thread and yarn that give natural movement. For hair, you don’t want stiff yarn that holds a curl like a broom. You want softness with enough strength to hold style. If your project is for a child, opt for hypoallergenic options and avoid shiny plastics that snag. Quality matters, but you don’t have to break the bank. A slightly cheaper yarn with a good twist can look just as real as a premium one. Keep a few textures on hand: smooth cotton for sleek styles and a lightly fuzzy blend for waves. Your aim is hair that behaves and looks natural.
Finally, pick color tones that blend well. Hair isn’t a single shade; it has highlights and depth. Start with a base color and add one or two lighter or darker shades for dimension. Contrast helps strands stand out and look full. For embroidery, test on scrap yarn first and pull tight enough to see how it sits. Your toolkit should feel like a small, organized studio—easy to grab, easy to store, and ready for your next hair-whipping idea.
Needle sizes and types for embroidery
Three kinds cover most amigurumi hair tasks: tapestry needles for precise threading, crewel needles for fine work, and beading needles for ultra-tight gaps. Start with a medium tapestry needle; it’s forgiving and hides thread ends well. If you’re adding detail or starting a hairline, switch to a crewel needle to keep stitches neat without tearing the yarn. For ultra-fine strands or tight areas, a beading needle helps you thread through small holes without bulky knots.
Try different needle lengths to match your grip and project scale. Short needles give control on small dolls; longer needles reach through thicker limbs with less tugging. If thread snags, opt for a sharper tip or smoother enamel finish to reduce friction. Keep a small scissors handy to trim frayed ends as you go. Your aim is consistent stitches that lie flat and hide well inside the crochet structure.
For ultra-thin strands or layered colors, a beading needle can be helpful. Practice tension on a scrap to avoid distortion—too tight and the shape shifts, too loose and it sags.
Choosing thread for amigurumi hair and yarn blends
You want thread that blends with your yarn and holds up to styling. Start with embroidery floss for fine strands that you can split into multiple filaments. Use several shades in the same color family to create multi-dimensional hair. If you’re stitching a longer fringe, floss’s thin, flexible feel moves with the pose.
Yarn blends are your next tool. A soft cotton or cotton-acrylic blend adds body without stiffness. For a sun-kissed look, add a hint of mohair or alpaca—just enough to shape without losing form. Always test color and texture on scrap fabric before committing to the doll. Slight shade differences can read as depth, not error. Your goal is hair that invites touch and photographs well.
Be mindful of shedding. Some fibers shed more than others, which can look messy over time. For toys for children, avoid ultra-fuzzy blends that shed easily. Choose threads with good colorfastness and a tighter twist. You’ll thank yourself later when you wipe dust away and your amigurumi still looks fresh. When you search for guidance on How to Embroider Hair Texture on Amigurumi Dolls, hues and textures that photograph well matter.
Tool and thread checklist
- Embroidery needles (tapestry, crewel, and beading) in yarn-compatible sizes, plus a sharp set for tight gaps.
- Scissors to trim ends and a needle threader if needed.
- Embroidery floss or fine yarn blends in base color plus 1–2 lighter/darker shades per color family.
- A small scrap of yarn to test tension and strand behavior.
- A color palette with complementary hues.
Prep the doll and map your hair layout
You’ll start by readying the doll so every stitch sits where you want. Think of this as laying out a tiny stage—the hair is the star, and you want every cue perfect. Begin with a clean, smooth surface. If the fabric is rough, press on a low heat to reduce bulk that could snag threads. Then gently map where the hair will go. Light pencil marks or chalk lines guide stitches without showing through later. You want a natural flow, not a rigid grid. Visualize the final look and sketch a loose guide that mirrors that shape. This early step saves you from second-guessing as you embroider.
Plan texture: decide where curls, waves, or straight strands live and how thick each strand should feel. Your goal is depth, not uniformity. Vary stitch lengths and directions to mimic real hair. Test small samples on scrap first to compare thickness and motion before touching the main doll. Leave tiny gaps for future shading if you want lighter or darker tones. Mapping now means faster, cleaner embroidery later.
Secure your workspace. Tuck the doll between a stiff board and soft cloth so it won’t shift. Place a small hoop or frame under the area you’ll work on to keep fabric taut. A taut surface guarantees neat stitches and less puckering around the hairline. Keep your tools close—eraser for chalk, water-soluble pen, and a fine needle—so you stay relaxed and steady. When your layout feels right, mark the parting and hairline with confidence.
Marking parting, hairline, and section guides
Your first marking should be the parting line. Draw a gentle curve that fits the head shape and stays close to the scalp. This line is the backbone; everything orbits around it. Use a light touch so you can erase or adjust as needed. After the parting, mark the hairline. A soft arc around the forehead and temples helps stitches land where you expect them. These lines are guides, not final strokes.
Next, segment the hair into workable sections. Break the head into lines that meet at natural angles. Think of each section as a tiny field you’ll fill with stitches. Mark guides with short, subtle dashes so you can still see through to the fabric. If you change your mind, these marks erase easily with warm water. The goal is clean separation between sections so embroidery reads as layered hair rather than a single block.
Finish with final touch marks. Place tiny indicators at the crown and around the ears to keep everything balanced. Check marks from several angles—front, side, and slight tilt—so the hair looks right in real life. Confidence grows when guides feel right in your hands. With these ready, you can stitch with purpose and keep hair natural as it grows from the scalp.
Securing stuffing and fabric before embroidery
Before stitching, stabilize the interior and surface. Lightly stuff or reinforce the head area if the fabric tends to sag. Use soft stuffing that won’t bulge under the needle. Even a thin layer adds stability and makes hair lines sit correctly.
Secure all layers with a few gentle pins along the marks. Pins hold fabric flat to prevent shifting when you sew. If the doll is soft, consider a frame or stand to keep it upright. A firm, flat surface helps stitches travel cleanly without catching on uneven folds. When you’re confident the layers won’t move, you’re ready to embroidery.
After pinning, give the area a light press with a clean cloth to reduce puckers. This small step improves stitch evenness. If you notice lumps after a test stitch, reposition a pin or smooth the fabric. Tiny adjustments now save bigger fixes later.
Simple prep steps
- Clear your workspace and gather needles, thread, and a soft fabric brush.
- Mark the parting and hairline with a light, eraseable guide.
- Lightly stuff and pin the head area to prevent shifting.
- Test stitch a tiny strand on scrap fabric to check tension and texture.
- Gently press the fabric to flatten the surface before you begin.
Prep the doll and map your hair layout (continued)
Your hair layout should balance realism and manageability. Think in layers: root shadow near the scalp, mid-length strands for volume, and tips for texture. Start with a base color that matches the skin tone, then plan darker or lighter strands for depth. Check the map from different angles to ensure the hair sits correctly from the front and sides.
For the actual hairline, keep a soft curvature that hugs the forehead. You want a gentle transition from skin to hair, not a harsh edge. When you’re happy with the map, you’re ready to move into marking parting, hairline, and section guides. The clarity of your plan will help stitches flow and the final look feel alive.
How to Embroider Hair Texture on Amigurumi Dolls is a guiding phrase as you plan. It reminds you to study density, strand direction, and shading. With your layout mapped and guides in place, you’ll stitch hair that reads natural, not stiff. Your technique will improve with each doll, and your finished piece will show careful planning and patient handwork.
Master common stitch types for amigurumi hair
You want hair that looks natural and stays in place. With the right stitches, you can shape lines, waves, volume, and curls so your amigurumi dolls feel alive. Start with the basics and build to the details that make hair look real. The right stitch choices give you control over texture, direction, and density, so your doll’s hairstyle reads clearly at any size.
First, the behavior of stitches varies with yarns and hook sizes. A tight fabric highlights tiny lines; a looser stitch creates soft strands. Keep tension consistent and test on scrap before committing. Mix stitches to craft straight strands for bangs, gentle waves along the sides, or big curls at the ends. Your finished hair should read as intentional, not random.
Remember to secure hair as you go. A little planning saves you from extra stitching later. If you’re unsure, sketch a quick pattern on paper, labeling where each stitch will go. This saves time and keeps you focused on your goal: hair that enhances your doll’s character, not distracts from it.
Stem stitch hair amigurumi for lines and waves
Stem stitch gives you clean, continuous lines for straight strands and controlled waves. It sits flat and creates a subtle ridge along each line. Use short, steady motions to keep lines uniform and let the thread ride the surface for a touch of texture without bulk. For a simple, disciplined hairstyle, stem stitch is your go-to.
Build depth with multiple passes along the same line, slightly overlapping. This thickens the strand without stiffness. For sleek hair, keep stitches close and consistent. For more movement, add tiny back-and-forth shifts at the ends to hint at soft waves.
Place stem stitches to follow the head’s curve for natural fall. They’re ideal for straight bangs or slim strands framing the face. The payoff is polished lines that can be shaded or highlighted with color changes for added dimension.
Loop stitch amigurumi hair for volume and curls
Loop stitch creates fluffy texture and built-in volume, perfect for curls and lots of hair. Use larger loops for big curls and tighter loops for ringlets. Loop stitch is forgiving when you want more bounce and hides minor tension differences.
Work in small sections to control density. Start with a base row, then pull loops to the desired height before closing them. For loose curls, space loops a bit and let them relax. For tighter curls, pack loops closer and add a few rows for body. If you want volume at the crown, add an extra row of loops and taper toward the ends.
Combine loop stitches with other textures as focal points. Place bigger loops where you want the eye land—around the cheeks for softness or at the top of the head for volume. Looser loops read as wind-tossed hair; compact loops look more styled. Practice on a sample head to dial in volume and shape.
When to use each stitch
- Stem stitch: precise lines and controlled waves; ideal for straight bangs, sleek side-swept hair, and deliberate waves.
- Loop stitch: volume, curls, and soft silhouettes; great for children’s dolls or lively characters.
Use surface embroidery for amigurumi hair texture
Surface embroidery sits on the fabric surface, letting you build strands, hints of shine, and movement without pulling on crochet stitches. Start with floss that matches your yarn color and has a subtle sheen. With short, confident needle thrusts, create tiny hair-like stitches. Texture pops after a few deliberate passes, especially where you want light to catch.
Practice on scrap first, then apply to your doll. Keep stitches light and spaced so you don’t overpower the crochet fabric. Experiment with stitch density to control density. Add longer stitches for natural fall, then fill with shorter stitches to imply fullness. Use clusters to imitate small locks, then connect ends with tiny backstitches to avoid puckering.
Seal your work lightly if possible. For shine, add ultra-fine, translucent threads on top to mimic light catching hair. Trim loose ends and secure them inside the seam. You’ll end up with texture that looks intentional and lively, not flat or stiff.
Surface embroidery techniques for hair
Surface embroidery lets you add texture without altering the crochet stitches. Start with simple lines to map hair and fade. Use split stitch or satin stitch to form thin strands, then layer longer stitches for curls or waves. Rotate the doll to place stitches readably from multiple angles. Build a soft underlayer with lighter, shorter stitches, then layer darker threads at roots or edges for depth. Vary stitch direction for a more natural look—hair doesn’t grow in neat rows. Small clusters grouped together read as individual curls.
To create movement, alternate stitch lengths along a strand. Longer stitches followed by shorter ones mimic a curl being swept by a breeze. For a smoother look, use fewer colors and consistent tension. Layer more stitches for thicker hair, allowing some strands to trail beyond the main shape. Finish with a gentle brush to lift threads and highlight top surfaces.
Layering stitches to create realistic hair embroidery amigurumi
Layering builds depth without bulk. Start with a light underlayer near the scalp, then add mid-tones with slightly longer stitches for main locks. Finish with a darker color at roots and shadows to anchor hair to the scalp. Secure threads at the back with tiny knots or weave them into existing stitches to hide knots. Think about where light would hit: brighter stitches on upper surfaces, darker tones near roots. If you’re working with a gradient, transition colors gradually across layers.
Finish with a gentle brush through embroidery to lift fibers and highlight top surfaces. A warm iron over a cloth can add subtle shine if your yarn allows. You’ll have a polished finish that remains soft and cuddly.
Depth-building tips
- Start with a light base, then progressively add darker shades to deepen roots and shadows.
- Use varied stitch lengths to mimic natural hair irregularity.
- Place highlights where light would naturally catch, not on every strand.
- Keep a small test swatch to gauge color transitions and stitch densities.
- Secure ends neatly to avoid loose threads snagging on little fingers.
Step-by-step guide to embroider hair texture on amigurumi
Follow a practical method to anchor, layer, and finish without loose threads or stiffness. Choose a thread color that matches the character’s hair and a sharp needle for clean penetration. Keep stitches small and spaced so texture sits naturally on the head. Test a tiny stitch on scrap first to dial in tension and thread weight before working on the actual project.
Alternate between short and long stitches to mimic natural hair flow. Use satin stitch for smooth sections and backstitch to define edges, but avoid blocks of color. If you see a knot or snag, re-thread to avoid a lump on the scalp. Practice on a test piece until you’re happy with density and spacing, then transfer rhythm to the amigurumi head. With steady hands and patience, you’ll craft a believable hair texture that survives play and hugs.
Finish by brushing the surface to blend stitches. If tension feels uncertain, work in short bursts and rest your hands. Snip tails close to knots and secure with a tiny dab of fabric glue or a light tug. You’ll notice the calm, deliberate approach improves the overall finish.
Anchoring and starting rows safely
Thread a comfortable length, anchor at the base of the scalp with a discrete knot. Anchors should hold without pulling free, so place them near the natural hairline with stitches tight but not puckering. A single anchor ball can start your first row cleanly.
Begin rows with short, consistent stitches following the curve of the head. Keep stitches parallel to the scalp as you build outward. If a stray loop appears, weave it into adjacent stitches rather than cutting it off. When finishing the first row, tie off the tail securely and start the next section with fresh thread if needed.
Building layers and finishing secure knots
Layering starts with short stitches near the scalp, then add longer strokes for crown depth. Use lighter stitch lengths for lower layers and slightly longer for upper layers to create multi-dimensional texture. If stitches bunch, pause and adjust tension.
Finish a section by securing the thread with a knot and burying the end under existing stitches. Add a few light, contoured stitches along the hairline to anchor texture to the scalp. If you need to remove a stitch, rework the area rather than leaving a visible gap. Ensure a natural, integrated look where each layer blends into the next. With practice, your head texture gains depth and life without sacrificing the overall shape.
Clear workflow to follow
- Start with anchor and row setup: choose thread, anchor securely, and create a clean start.
- Build the base layer: place short, discreet stitches around the scalp in a curve that mirrors the head shape.
- Add layers progressively: mix stitch lengths to simulate natural hair fullness and texture.
- Finish with secure knots and bury tails: lock threads, trim close, and blend edges with gentle brushing.
- Inspect and adjust: check for stray loops, even tension, and smooth transitions between layers.
Color and shading to create hair texture on crochet dolls
Color and shading bring hair texture to life. Use short, deliberate strokes with varying pressure to mimic natural strands. Start with a base shade that matches the scalp, then add darker tones for shadows and lighter tones for highlights. Balance is key—don’t create a flat block of color. Step back often to see the overall balance. If a strand reads too bold, blend it with a hook or light pass.
Think in layers: base color first, mid tones second, highlights last. Use a slightly lighter yarn for top layers and a slightly darker one for underlayers to simulate light catching each strand. Hair looks natural when it isn’t perfectly even—add a few stray strands to break patterns. Write color plans down or keep a swatch card to track shades.
When you finish, the hair should have depth you can feel. If unsure, compare with real hair in similar lighting. Small adjustments—like adding lighter flicks or deepening a shadow—can make a big difference. Practice improves shading accuracy and helps you master How to Embroider Hair Texture on Amigurumi Dolls.
Picking base, mid, and highlight colors
Your base color should blend into the scalp without stealing attention. Mid tones add depth, and highlights catch the light. Use a cohesive palette and keep base, mid, and highlight shades in a predictable order to avoid mixing them up.
Test colors on scrap before applying to the main piece. If unsure, start with one dominant base color and build mid and highlights around it. The goal is believable texture, not flashy color blocks. When in doubt, ask yourself if the result would look right in a photograph.
Blending threads and yarns for natural gradation
Blending two or three yarns in the same stitch creates seamless gradation. Alternate strands slowly to avoid chunky transitions. If you see a harsh line, add lighter stitches or pull in more of the darker shade to smooth it out. Another method is to dye or tease a single yarn slightly before crocheting and mix the dyed yarn with a complementary shade.
Practice on a simple head and test subtle, medium, and bold gradations. You’ll learn how much contrast conveys depth without overwhelming the face.
Easy color pairing guide
For a simple pairing, use one warm and one cool shade plus a neutral base. Keep hues close on the color wheel to blend smoothly. Pair a base with a slightly darker mid-tone and a lighter highlight. A single highlight with a deeper mid-tone across the same area gives a natural sun-kissed look. Save favorite pairings for quick reference.
Professional finishing: trimming, brushing, and securing hair
Trimming sharpens shape, brushing blends strands, and securing hair locks the texture in place. Start on a clean surface and trim in small, controlled cuts. Brush in small sections to avoid snags, dampen flyaways slightly if needed, and guide them back into place. After brushing, check balance: front frames the face, sides taper naturally, and back lies smoothly. If colors or textures vary, brush each section separately to prevent color bleed.
Secure any loose hairs with a tiny knot or invisible thread. Reinforce high-tension areas near ears, temples, and neckline. Finish with a light wipe to remove dust and fingerprints. Your finished piece should feel durable yet soft and inviting to touch.
Trimming and shaping embroidered hair safely
Trim in small increments and compare shapes frequently. For bangs, cut from the center outward for symmetry. Layer longer strands first, then snip shorter layers for depth. Protect the embroidery backing with a thin fabric shield or finger guard to control cuts. Trim sections along the natural grain to maintain believable flow, then brush again to reveal misalignments. Avoid big cuts that could distort the silhouette.
Securing loose ends and reinforcing stitches
Tie off ends securely with a knot or backstitch. For embroidery floss, knots under the fabric prevent unraveling. If your hair is synthetic, a touch of clear glue at the base can lock stitches without stiffness. Reinforce high-stress areas near the scalp, ears, and neckline to withstand handling. Test by gently tugging the strands. If there’s give, add a stitch or two. Trim any excess backing threads and brush to blend. Your finished hair should be durable for play or display and still soft.
Pro finishing checklist
- Inspect symmetry and balance from multiple angles.
- Confirm trims are conservative and even.
- Check for stray threads; secure or tuck them away.
- Brush in small sections to blend and align fibers.
- Apply minimal securement at the base to prevent stiffness.
- Test handling by gently tugging at various points.
- Wipe away dust and fingerprints; finalize with a light brush pass.
Troubleshoot common issues when you embroider hair on amigurumi dolls
Common issues include bald spots, uneven rows, and shedding fibers. Fix tension, choose the right stitches, and adjust placement. Practice improves speed and precision, and you’ll start recognizing patterns in what went wrong before.
First, evaluate how stitches sit on the surface. If strands poke out or look jagged, tension may be too tight or too loose. If you’re using split or satin stitches, ensure they lie flat and blend with the base. If long floats or gaps behind stitches appear, secure them with a tiny backstitch.
Next, check color and direction. Hair flows in soft, consistent directions. If you see abrupt changes, reset stitch lines and redraw the hair path. Practice on a scrap swatch to lock in curves or waves. If correcting, start with a small stitch close to the last one to avoid large holes. Small, steady steps beat rushing.
Fixing puckering, tension, and uneven stitches
Puckering occurs when fabric tightens around stitches. Loosen your grip and ease the thread. If the base looks puckered after finishing, flatten and recheck tension on the next row. Keep stitches evenly spaced; adjust as needed. If a line tightens, add a tiny backstitch behind the puckered area to even the surface.
Uneven stitches indicate mismatched needle size or stitch length. Switch to a finer needle or adjust stitch length. For wider gaps, shorten stitches in that area. Work along the edge in a basting-like motion to flatten, then continue. Consistency is key for natural texture.
Tension issues show as stiff or loose hair. Start with a test strand; adjust tension by a notch. A relaxed wrist helps—think guiding a ribbon, not pulling a rope. With practice, lines become even and smooth.
Repairing pulled or missing hair stitches
If you pull a stitch, backtrack to its start and reinsert the needle along the same path with gentler tension. If a stitch is lost, insert a new stitch beside the old spot and weave the thread into nearby stitches. For a missing line, lightly mark the spot and insert a new stitch matching the surrounding direction and density. Blend, don’t scream spot repair.
If a whole line is missing, rebuild with several short stitches in the same direction, then resume normal stitches with a shade that’s slightly darker or lighter to add depth. Once done, comb the hair with a thin needle to align strands. The repair should be invisible if the strand sits evenly along the curve.
To prevent further pulls, secure the end with a tiny knot behind the surface or weave into adjacent stitches. Check the last stitches for tightness before closing to avoid loose ends.
Fast fixes and prevention tips
If you notice a snag mid-stitch, pause, loosen grip, and ease the thread along the line until it sits flat. Use short, deliberate bursts rather than long drags. Prevention: plan hair direction with light pencil marks on the surface first. Keep tools ready, test tension on a swatch, and practice to minimize puckering and uneven stitches. This helps you approach How to Embroider Hair Texture on Amigurumi Dolls with confidence.
Care and durability for embroidered amigurumi hair
Protect your stitches from day one. Choose sturdy embroidery threads and strong backing; reinforce hairlines where tugging might happen. Handle gently and imagine guiding a delicate pet—careful touches prevent fraying and loosening. Test tension as you embroider and brush hair after finishing to blend seams. Use color-safe fabrics and threads; avoid rough textures near hair. If possible, seal ends with a light clear coat to preserve texture and prevent fraying during long-term display or frequent handling.
Safe washing and drying methods for sewn hair
- Gentle hand washing is best. Submerge the amigurumi up to the hair area or fully if the body is sturdy. Gently swish and soak briefly, then rinse until no soap remains. Press out water with a towel; avoid wringing.
- Air dry flat, reshaping the hair as it dries. Lightly pin to set a style if desired. Do not use a dryer or direct heat; heat can distort stitches. If curls loosen, tidy with a small comb while damp.
- Spot-clean as needed with a soft cloth dipped in soapy water, rinse carefully, pat dry, and air-dry. Keep the rest of the amigurumi dry to prevent seepage.
Long-term reinforcement for play and display
- Reinforce high-tension areas early with extra backstitch or satin stitch along the hairline.
- Consider a protective seam underneath the hair near the base to shield wear.
- Rotate display positions to reduce stress on one spot and keep hair smooth.
Maintenance schedule
- Weekly: check for loose threads, trim frayed ends, and brush gently.
- Monthly: wash if handling is frequent; rinse, air dry, reshape, and reinforce as needed.
- Quarterly: inspect seams and hair attachments; re-tighten knots and add backing if needed.
How to Embroider Hair Texture on Amigurumi Dolls: Quick recap and tips
- Start with a clean, mapped surface and test stitches on scrap.
- Use the right combination of stitches (stem for lines, loop for volume) and layer gradually to build depth.
- Choose base, mid, and highlight colors thoughtfully and blend gradually.
- Secure threads carefully and reinforce high-tension areas for durability.
- Finish with gentle brushing and optional light sealing to preserve texture.
- Practice on scraps and small heads to build confidence before tackling a beloved amigurumi.
- Remember: How to Embroider Hair Texture on Amigurumi Dolls is a journey of texture, shading, and character.

Clara Fern — Crochet Artist & Amigurumi Designer
Clara Fern is a crochet artist and amigurumi designer based in Austin, Texas. With 9 years of experience working with yarn and hook, she transformed a lifelong passion for handcraft into a creative mission: making amigurumi accessible, fun, and deeply rewarding for crafters of all levels.
Clara discovered amigurumi during a trip to Japan in 2017, where she fell in love with the art of bringing tiny characters to life through crochet. Back home in Texas, she spent years studying color theory, design principles, and advanced crochet techniques — developing her own signature style that blends kawaii aesthetics with original character design.
Through maclafersa.com, Clara shares everything she has learned — from choosing the right yarn and reading your first pattern, to designing fully original amigurumi characters from scratch. Her writing is known for being clear, detailed, and genuinely helpful, with no steps skipped and no secrets kept.
When she’s not crocheting, Clara enjoys watercolor painting, visiting local yarn shops, and drinking way too much coffee while sketching new character ideas.


