
Why visual charts help amigurumi
You’ll see your projects come to life faster when you switch from pages of written instructions to a visual chart. A chart shows you where to place each stitch at a glance, so you don’t have to pause and count in your head. Your hands move naturally, and your mind stays in the flow of your project. Visual charts reduce confusion and keep you moving forward, even when you’re tired.
Charts give you a steady rhythm to follow. You can track increases, decreases, and color changes with simple symbols, not long paragraphs. When you stitch a few rounds, the picture on the chart becomes a tiny map you can trust. You’ll feel more confident because you can see progress in real time, not just in your notes.
If you work with a messy pattern or vague instructions, a chart is your anchor. It lays out every stitch in order and shows you where you are in a clear, repeatable format. You’ll waste less time rereading steps and more time making your amigurumi come alive.
Convert written pattern to visual chart faster
Turning a written pattern into a chart can feel slow, but you can speed this up with a plan. Start by identifying repeat sections and the stitch types you use most. Mark them so you know where to place symbols on the chart. This helps you map the pattern quickly without getting tangled in words.
Use a simple key for your chart. A clean, consistent symbol system saves you from guessing what each symbol means. When you keep the same symbols across projects, you’ll switch patterns faster next time because your brain recognizes the layout immediately.
As you translate more patterns, you’ll notice common shapes pop up—round heads, flat bodies, tiny paws. Turn those shapes into reusable chart chunks. That way, you’re not starting from scratch every time; you’re building a library you can copy and tweak.
Reduce counting and shaping mistakes
A chart acts like a checklist you can read. When you’re counting stitches row by row on the chart, you’ll catch mistakes early before they pile up. It’s much harder to miss a missing stitch when you can see the line of symbols at a glance.
Shaping becomes predictable with a chart. Increases and decreases are placed exactly where the chart tells you, which keeps your shapes smooth. You won’t end up with a lopsided head or a neck that’s too long because the chart makes the math obvious.
Charts also help with color changes. You can see where each color starts and ends, so you don’t accidentally carry a color across too many stitches. Fewer color-slip errors means neater edges and more professional finishes.
Clear benefits to charting
When you chart, you gain a clear, shared reference for you and anyone who might help you. Your notes stay simple, and your pattern stays universal. You can hand someone a chart and they know exactly what to do, which makes collaboration easier.
Charts keep your projects organized. You’ll finish more pieces on time because you can follow a clean path from start to finish. The confidence boost is real: you’ll trust your eyes more than your memory, and your amigurumi will thank you with even stitches and crisp shapes.
Tools to convert patterns
You’ll discover practical ways to turn your Amigurumi patterns into clear, visual guides you can follow stitch by stitch. This is about making your process easier, not harder, so you can focus on the yarn and the smile when your creation comes to life. By converting patterns to visuals, you gain a quick reference that helps you spot mistakes early and keep your gauge consistent.
First, you’ll see how using simple tools can make a big difference. When you can see the flow of increases, decreases, and color changes laid out in front of you, your count accuracy improves. This isn’t about fancy gear; it’s about choosing the right tools to match how you think, so your hands can work smoothly and confidently. Think of it like turning a recipe into a cooking chart—you know exactly what to do next.
As you experiment with these methods, you’ll build a small, reliable toolkit that travels with you to projects. The goal is to save time on pattern-reading and let you enjoy crocheting more. When your patterns become charts you can glance at quickly, you’ll feel the difference in your finished pieces.
Use graph paper and pencils
Graph paper is your best friend for mapping out patterns. You can block out each crochet row or round, then shade or mark stitches to match the pattern. A pencil lets you erase and adjust as you go, which is perfect when you’re testing a new technique or changing colors. You’ll notice you make fewer mistakes because you can see the stitch flow before you start hooking.
Starting with a simple grid, plot the basic stitches row by row. Use bold lines for the main segments and lighter lines for details like color changes or special stitches. This method helps you visualize increases and decreases in the exact places they appear in the pattern. It also creates a reusable reference you can keep with your project bag.
If you’re new to this, keep it simple. Draw a few rows first, then add notes in the margins: yarn type, hook size, and tension tips. As you fill in the chart, you’ll feel your confidence grow because you’re seeing your work in a clear, organized way.
Try software to create visual chart from written pattern
Software can turn written patterns into tidy, shareable visuals. You’ll appreciate how quickly you can convert plain text into a chart you can print or save to your device. This saves you time and gives you a clean reference that reduces mistakes during the actual crochet.
Pick software that fits your needs: some are simple grid editors, others offer stitch libraries and color blocks. Start by inputting the basic stitches and rows, then layer in color changes and special stitches. You’ll end up with a visual map that mirrors the pattern step by step.
As you get comfortable, you can reuse templates for different projects. Save your charts and tag them by pattern type or creature. Soon you’ll have a personal library of ready-to-use visuals that you can pull up when you start a new Amigurumi.
Basic tool list
- Graph paper or a digital grid tool
- Pencils, erasers, and colored markers
- A ruler for straight lines and neat boxes
- A simple crochet pattern or note sheet to translate
- Optional: software or apps that convert text to charts
How to Adapt a Written Pattern Into a Visual Chart
You’ll want a steady process so you can rely on your chart every project. Start by listing the stitches in order, then map where each one happens on the grid. Color blocks help you show color changes, while arrows or notes mark special stitches. This approach makes it fast to check your work as you crochet.
Keep your chart close while you work. When you reach a tricky part, glance at the chart instead of rereading the entire pattern. This cuts down on back-and-forth and keeps your flow steady. Remember to label sections clearly so you can jump to the right row or round without hunting through pages.
A good tip is to practice with a small pattern first. As you get comfortable, you’ll see you can adapt any written pattern into a visual chart. This method helps you stay consistent, catch mistakes early, and enjoy the process more.
Draft a grid from your pattern
You’re turning a written Amigurumi pattern into a visual map you can follow at a glance. A clear grid helps you see where each stitch lives and how rounds form your tiny friend. Start by laying out the pattern’s stitch counts, then translate each line into a row on the grid. This step saves you from guesswork and keeps you in your yarn-light.
Next, decide how you’ll mark increases, decreases, and color changes. Boldly label where you’ll swap yarns or switch stitch types, so you don’t miss a beat halfway through a row. Your grid should visually show where rounds start and end, especially around armholes or the head curve. When you can see the whole shape on paper, you’ll know exactly where to place your hook and what to expect next.
Finally, test a small sample on the grid. It’s like a dry run before a big show. If something looks off, adjust the grid before you commit yarn to hook. A well-drafted grid reduces frogging and keeps your project moving smoothly toward a cute finish.
Set grid size for your yarn and hook
Your grid size should match your yarn weight and hook size, so your stitches sit evenly. If you use a chunky yarn with a large hook, your grid will be bolder and easier to read. For fingering weight, make the grid tighter so each stitch is clear. When you set the grid correctly, your amigurumi’s texture stays consistent from ear to toe.
Label the grid with your gauge goals. Note how many stitches fit in a 2-inch square and how many rounds fill a section. If you change yarn later, revisit the grid and adjust your dimensions. Your grid should stay a living map you can tweak as needed.
Keep your grid readable. Use a simple, high-contrast color scheme and big enough symbols or marks to be seen at a glance. The goal is speed and accuracy, not decoration. A clean, legible grid keeps you confident when you’re in the zone, stitching away.
Plot each stitch and round on the grid
Plot every stitch type and round so your grid mirrors the pattern exactly. Mark where chains, single crochets, increases, and decreases live, and note color changes clearly. This is your on-paper rehearsal for the real thing, and it pays off when you hit the hook.
As you plot, keep the rhythm of the pattern in mind. If a round starts with a magic ring or a chain-5 start, place that clearly on the grid. Use color-coded marks for different stitch types and for color changes. When you can see each stitch in place, you’ll avoid miscounts and misfits that derail your project.
Review your grid for symmetry. Amigurumi loves mirrored shapes, so double-check sides and rounds. If you spot a mismatch, adjust now. A precise plot means fewer surprises when you’re stitching with yarn in hand.
Step-by-step drafting
Begin by drafting the head shape, then the body, and finally the limbs. Draft in order to keep proportions correct, and mark where each section begins and ends. This step isn’t a rush job; it’s your blueprint for consistent size and balance.
As you draft, annotate tricky transitions—like the neck joining the head to the body or the curve of a leg. Clear notes here save you time later and help you stay on track. Keep your steps short and actionable so you can translate them into quick on-the-spot checks while you crochet.
Finish with a quick read-through of the whole grid. Look for flow issues, like a long tail of color change next to a short stretch of plain stitches. If anything looks odd, tweak the draft until the entire chart feels natural to you. Your grid should invite you to stitch, not scare you.
Show shaping with increases and decreases
You’re learning to shape amigurumi by carefully adding and removing stitches. When you add stitches, you build up the body, head, or limbs to the right size. When you remove stitches, you taper and form curves like a cute cat ear or a rounded belly. Think of shaping as guiding a clay sculpture: the more you press in or out, the more the figure takes its final form. Keep your tension steady and count your stitches between increases and decreases so your shape stays even.
As you work, you’ll notice that increases push the fabric outward, while decreases pull it in. You’ll combine these moves to create smooth curves rather than abrupt angles. If you’re shaping a head, you might place increases to widen the top and then employ decreases to narrow at the chin. Your goal is a recognizable silhouette with soft, balanced curves, not chunky edges. Practice on a small swatch to feel how the fabric behaves as you add or take away stitches, and you’ll translate that confidence to your amigurumi projects.
Remember to pause and check your work often. If a section looks too pointy, you can adjust by adding a few more increases or shifting where you start decreasing. Your hands will learn the rhythm: insert, count, finish, and compare with the pattern’s final shape. The right amount of shaping makes your creature look friendly and proportioned, not flat or strange.
Mark increases clearly on the chart
When you mark increases on the chart, you’re giving yourself a map you can trust. Boldly highlight each increase so you can see where the fabric will widen. A simple method is to circle the stitch where you add one or more stitches in the same stitch. If you’re using color notation, you can mark increases with a bright color that stands out from the rest of the chart. Your eye will grab those spots quickly, and you’ll avoid missing an increase that could throw off the whole shape.
On the chart, record exactly how many stitches you add and where. If you always start increases at the same stitch in each row, note that pattern in the legend. This consistency keeps your amigurumi symmetrical and helps you reproduce the look you want. Don’t skip this step; clear marks save time later when you’re assembling the limbs or adding facial features. You’ll feel confident seeing that line of increases clearly, guiding your hands as you work.
Use a quick glance to confirm the increases are where the pattern expects them. If your chart shows an increase at stitch 6, and you’re at stitch 6 but don’t see the extra stitch, stop and recheck. A tiny mismatch now becomes a big variance later. Your goal is a clean, predictable growth that matches the design, not a guesswork montage.
Mark decreases and joins for amigurumi
Decreases and joins shape the silhouette and give your amigurumi its character. Mark each decrease with a bold symbol or color so you know where the fabric narrows. When you join pieces, such as attaching a head to a body, make a clear note on the chart where the joins happen. This keeps your assembly smooth and your final figure sturdy.
As you mark, think about the flow of the curve. You want gradual decreases rather than sudden drops, which can cause holes or an uneven surface. If you’re shaping a snout or a paw, place the decreases along the outer edge to create a gentle taper that looks natural. Clear markings help you maintain even tension and consistent shape across all parts of your project.
When you’re close to finishing a section, double-check that the joins line up with the pattern’s proportions. A mismatch here can throw off the entire look of your amigurumi. By marking joins clearly, you’ll prevent misalignment and finish with a polished, professional appearance.
Shaping notation rules
Shaping notation is your quick-reference guide. Always follow the pattern’s symbols and abbreviations exactly as written. Define increases with a clear symbol and specify how many stitches to add and in which stitch. Do the same for decreases: state how many to remove and where the decreases occur. This precise language is what keeps your results repeatable.
Keep a legend handy. Write down what each symbol means in your own words so you can read it at a glance. If you’re translating a pattern into a chart, note the start row and direction (forward or round). Consistency in notation prevents misreads and wasted yarn. Your future projects will thank you for the clarity you created today.
If you’re adapting a written pattern into a visual chart, remember the keyword: How to Adapt a Written Pattern Into a Visual Chart. Use this as your guiding principle and make sure every increase, decrease, and join has a clear mark on the chart. With solid notation, you’ll turn words into visuals you can follow with ease.
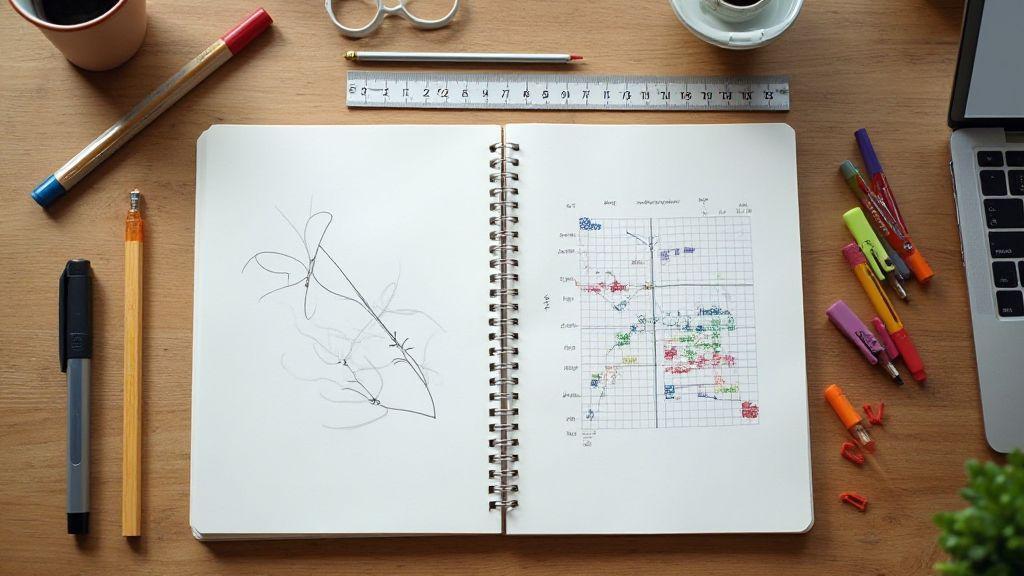
Chart color and texture changes
When you study Amigurumi, you’re often juggling colors and textures in one tiny chart. You’ll see color blocks that tell you where to switch yarn, and texture notes that hint at stitches like increases, decreases, or special techniques. You want your project to look smooth, so paying attention to chart color and texture changes helps you avoid surprises later. Think of it as a map you can trust, not guesswork you hope works out. Your goal is to read the chart once, then stitch with confidence.
Color changes guide your yarn pickups and holds. You’ll mark where to switch from yarn A to yarn B, and you’ll notice where a color repeats after a few rows. Texture changes signal a step beyond plain color work, telling you when to switch to a different stitch or add a detail like a raised bump. You’ll keep your tension even by treating color changes like a brief pause in your rhythm, a moment to set up the next section. Remember, consistent tension makes your final amigurumi look clean and professional.
If you align your hands with the chart, you get smooth progress and fewer frogged moments. You’ll clap your hands in the moments where a color twist is required, and you’ll plan ahead for carried yarns so there are no long tails behind your work. The payoff is a neat finish where the colors sit exactly where they should, with textures that pop just enough to give your piece personality.
Block in color changes on the graph
When you block in color changes on the graph, you create clean, easy-to-follow sections. You’ll mark each color transition in the chart with a bold square or a distinct symbol so you can spot it at a glance. Your mind shifts from counting stitches to tracking color flow, which saves you from backtracking. This approach also helps you keep your yarn neat and prevents loose ends from showing on the outside.
Block changes help you plan for carry-overs and yarn management. You’ll see where a color ends and a new one begins, and you can decide if you’ll float or carry the yarn. You’ll keep track of where long floats could cause tension problems, and you’ll make adjustments before you start the row. By visualizing the color path, you reduce guesswork and keep your fabric even.
As you practice, you’ll notice the graph becomes intuitive. You’ll recognize common color-change patterns and plan ahead for repeats. Your project stays tidy, and your stitches stay even, because you’ve oriented yourself to color changes first, then stitch.
Use texture symbols for special stitches
Texture symbols on the graph act as tiny signposts for your next moves. When you see a special symbol, you know right away you’ll insert a unique stitch, like a bobble, popcorn, or an increase. You don’t need to chase a mystery in your yarn pile—your chart tells you exactly what to do. The clearer the symbol, the quicker you translate it into a real stitch, which saves you time and frustration.
You’ll assign texture symbols to the stitches you use most in your Amigurumi, so you can recognize them at a quick glance. This makes it easier to stay consistent with tension and depth across the project. You’ll also reduce the risk of accidentally skipping a texture, which can ruin the look of your final piece. Treat the symbols as tiny instructions you can follow without second thoughts.
As you gain confidence, you’ll start predicting where textures appear, not just when. You’ll plan your color blocks around those texture spots so your design stays balanced. Texture symbols serve as your shortcut to a polished, professional finish.
Create a color legend
A color legend is your go-to cheat sheet. You’ll write down what each color block on the chart means, plus any notes about carries, floats, or tension. This keeps you from guessing if you pause mid-project, which can happen when you’re tired. A simple legend helps you stay consistent from start to finish.
Your legend should be short and practical. Include the color name, approximate yarn, and any special instructions like carry under or avoid long floats. You’ll update it as you go if you change yarn thickness or switch brands. A good legend makes your chart readable at a quick glance, so you can keep knitting without pausing to decode.
If you want to remember a tricky transition, add a tiny reminder in your legend. For example, note where you switch from color A to color B every few rows, or mark where a texture symbol means a particular stitch. Your legend is your safety net, helping you maintain consistency and speed.
Use apps to adapt written pattern into chart
You can turn a written Amigurumi pattern into a visual chart with the right apps. First, pick a tool that handles crochet, stitches, and color changes clearly. You’ll want an interface that lets you map rows or rounds, keep track of increases and decreases, and show you where to place colors. When you start, import the written pattern or copy-paste the stitch instructions so the app can translate them into a chart. As you work, you’ll see whether your pattern reads cleanly in chart form or if you need to tweak stitch counts. This step saves you from guessing and helps you spot errors early. Remember, the goal is clarity: a chart you can follow at a glance without rereading every line of text.
Next, look for features that fit Amigurumi needs. A good app will let you lock stitch types to specific symbols, show you color changes per round, and allow you to annotate tricky parts. You’ll appreciate a live preview so you don’t waste time on a chart that doesn’t match your written pattern. If you knit or crochet with friends, choose an app that supports sharing charts or exporting them as images. That way, your team can follow along on their own devices. The better the app handles your pattern, the faster you’ll see your Amigurumi take shape.
Finally, test with a small sample project. Create a quick chart from a simple written instruction, then compare how it reads against the original text. If something feels off, adjust symbol choices or row labeling in the app. This trial teaches you how to adapt future patterns more quickly. By the end, you’ll have a reliable workflow: a written pattern becomes a clear chart you can trust as you crochet.
Look for crochet pattern charting apps
Choose an app that focuses on crochet charting and supports Amigurumi needs. You want adjustable grid sizes, intuitive symbol keys, and easy color management. A good option will let you import, edit, and save multiple patterns, so your growing library stays organized. Look for apps that offer built-in stitch libraries and customizable symbols, because not every chart uses the same icons. You’ll save time by not creating symbols from scratch for every project. Also, consider whether the app allows you to annotate rounds and track increases, decreases, or magic rings without clutter. A clean, user-friendly interface matters when you’re juggling colors and multiple parts of a toy.
Another important feature is export options. You’ll want to save charts as high-quality images or PDFs for printing, plus shareable formats for collaborators. Some apps even let you sync across devices, so you can pick up right where you left off on a different phone or tablet. If you’re new to charting, look for guided tutorials or starter templates. They’ll help you learn how to map a written pattern into a visual chart without getting overwhelmed. Finally, verify compatibility with your device’s operating system to avoid last-minute tech headaches in the middle of a project.
Export, print, and edit your charts
After you finish a chart, you’ll likely want to export it for easy viewing. Export options should include high-resolution images and print-ready PDFs, so you can keep a physical copy beside your hook. You’ll also want clean margins and a legible symbol legend on the page. When you print, a clear legend lets you stay confident about each stitch as you crochet. If you’re sharing with a friend or a crochet group, a shareable link or a file you can import into another app is a big plus. Editing should be quick: you might correct a miscount, adjust color blocks, or tweak the grid after a trial row.
Keep your edits organized. Save new versions with descriptive names like Pattern X V2 so you don’t lose the original pattern. If something doesn’t align after printing, revisit the app’s zoom and print settings to ensure the chart prints at the right size. You’ll be glad you did, because a flawless printout helps you follow every stitch in real life. Remember, exporting is your bridge between digital planning and hands-on crochet.
App selection tips
- Prioritize apps with a robust crochet library and customizable symbols so you can map any written pattern.
- Choose one with color management tools and a live preview to catch mistakes early.
- Ensure exports are high quality (PDF and image formats) and that printing looks faithful to the screen.
- Look for cross-device syncing and easy sharing for collaboration.
- Pick an option with beginner-friendly tutorials or templates to help you start quickly.
Test your chart and fix errors
You’ll want to test your chart before you start stitching. Start by checking that every row and color block matches the written pattern. If you spot a mismatch, fix it now so you don’t waste time later. When you test, focus on the big picture first: does the overall shape look right? Then dive into the details, like a missing symbol or an extra stitch. You’ll feel confident as you confirm that each line aligns with the instructions. Keep notes as you go; a quick list of corrections will save you trouble if you re-check later.
Next, you’ll verify that your chart is readable at the actual size you’ll work with. Print or display a sample at the same scale as your project and turn it upside down or sideways to catch misreads you missed. If a symbol isn’t clear, adjust the chart’s contrast or re-draw that section. Your goal is to reduce confusion so your hands can follow the chart smoothly, not guesswork. This step makes the whole process feel like second nature, not guesswork in the middle of a row.
Finally, you’ll run through a dry run of a few rows with a light stitch, just to hear the rhythm. You can even mark a test swatch with gentle guides so you don’t lose your place. By the end, your chart should feel like a map you can trust. If you find an error, fix it in the chart, re-check, and celebrate the small victory of progress. Your confidence grows with every corrected line.
Work a swatch from the chart
You deserve to see the real result before you commit. Take a small swatch directly from your chart to confirm the look and texture match your plan. This is where you feel the pattern come alive, not just on paper. Use a lighter greet stitch to keep it simple, then compare your swatch to the chart’s symbols and colors. If the swatch looks off, you know you need to adjust the chart or your technique before moving forward.
A swatch helps you catch issues early. If a symbol reads differently in your yarn, you’ll spot it now instead of in a big project. You can test tension, color changes, and stitch height all at once. When you finish the swatch, ask yourself: does the stitch count align with the chart’s row count? If yes, you’re ready to scale up your effort with confidence.
Compare stitch counts to the written pattern
Matching stitch counts is the backbone of a clean final piece. After your swatch, count every stitch in several rows and compare with the written pattern. If your counts don’t align, your chart might have a misprint or a symbol error. Fixing this early saves you from a domino effect in the main project. You’ll feel in control as you correct the counts and recheck.
Keep your notes handy as you compare. If you notice a consistent drift, it might be your gauge or a symbol misread. Re-tally the affected area, then re-validate against the pattern. With each correction, your chart becomes more trustworthy, and your project flows smoother.
Common fixes and tips
When you hit a snag, start with the simplest fixes. Re-check that color codes match the yarn in your kit, and confirm that the symbol is placed on the correct row and column. If a line looks off, redraw that portion of the chart with clear, bold symbols so future rows read correctly. Don’t fear a small rewrite—it’s faster than unraveling.
If you’re stuck, test a single row again with your swatch. Sometimes a tiny shift in tension or a missing slip stitch is the culprit. Adjust the chart or the stitch guide as needed. The trick is to treat any mismatch as a clue, not a failure. Your ability to adapt will grow, and your stitches will look neater every time.
Note: How to Adapt a Written Pattern Into a Visual Chart is a recurring theme throughout this guide, underscoring the central process of turning text into a visual roadmap for your amigurumi projects. If you’re new to charting, revisit this idea as you work through each section to reinforce a steady, repeatable method.

Clara Fern — Crochet Artist & Amigurumi Designer
Clara Fern is a crochet artist and amigurumi designer based in Austin, Texas. With 9 years of experience working with yarn and hook, she transformed a lifelong passion for handcraft into a creative mission: making amigurumi accessible, fun, and deeply rewarding for crafters of all levels.
Clara discovered amigurumi during a trip to Japan in 2017, where she fell in love with the art of bringing tiny characters to life through crochet. Back home in Texas, she spent years studying color theory, design principles, and advanced crochet techniques — developing her own signature style that blends kawaii aesthetics with original character design.
Through maclafersa.com, Clara shares everything she has learned — from choosing the right yarn and reading your first pattern, to designing fully original amigurumi characters from scratch. Her writing is known for being clear, detailed, and genuinely helpful, with no steps skipped and no secrets kept.
When she’s not crocheting, Clara enjoys watercolor painting, visiting local yarn shops, and drinking way too much coffee while sketching new character ideas.


