
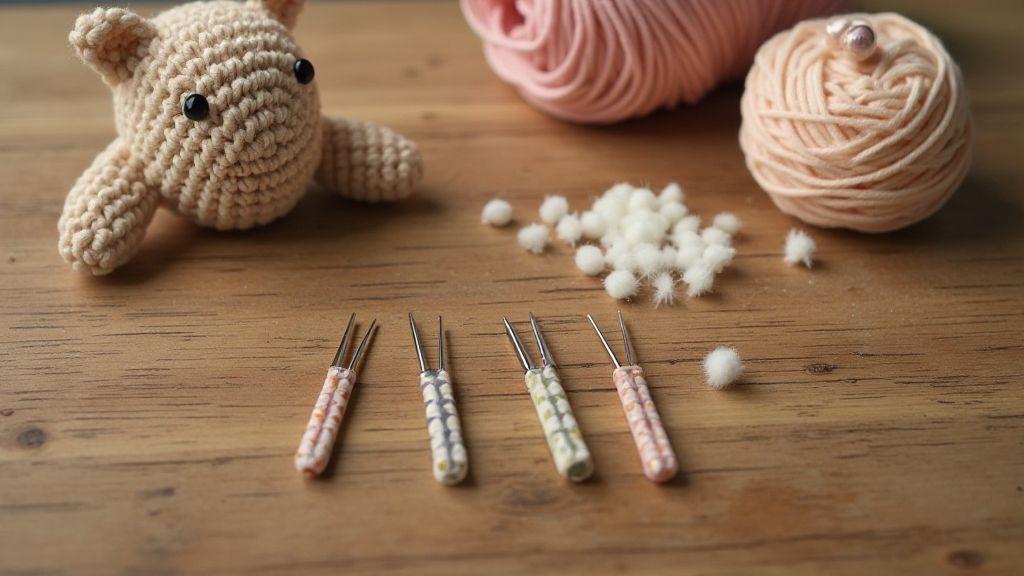
Best Needle Types for Sewing Crochet Toys
You want your crochet toys to look neat and hold their shape. The right needles make that happen. Tapestry needles and blunt options are your go-to for weaving in ends and joining pieces because they glide through yarn without splitting fibers. Choose a needle with a large, smooth eye to thread a thick strand or multiple threads when color changes are involved. A long, tapered point helps you pick up stitches from inside tight spots, while a blunt tip protects delicate stitches from snagging. A slightly sturdy shaft helps you pull yarn through without bending.
For sculpted parts, a good embroidery needle can be handy. Embroidery needles have sharper tips, slip through stitches more easily, and are great for attaching small features like eyes or noses and stitching facial details after stuffing. Look for a fine but sturdy needle with a sharp point and a decent eye to thread a single strand or thin braided yarn.
Overall, you’re balancing ease of use with precision. For joining rounds and weaving in tails, blunt-tipped tapestry needles are dependable. If you need to slip through dense crochet fabric or sew a tiny seam near the face, an embroidery needle offers a cleaner finish. Match needle size to yarn weight and stitch tightness to achieve invisible seams and secure stuffing.
When to Use Embroidery Needles
Embroidery needles shine where precision and a clean finish are needed in tight spots. Their sharper points slip through stitches without snagging yarn, making them ideal for attaching small details or seams near features. A fine eye helps you thread a single strand, reducing bulk. They’re especially good with delicate yarns or fine fabrics, though not ideal for broad, heavy seams.
For small, discreet seams, embroidery needles let you tread lightly. You can weave a few stitches along a curve and pull just enough to hide the thread. Keep a few sizes on hand to choose the exact entry point your project needs and notice the difference in how clean the final piece looks.
Best Needles for Amigurumi
For amigurumi, choose needles that balance length, point, and sturdiness. Tapestry needles with blunt tips are workhorses for joining parts and weaving tails, gliding inside pieces and reducing stitch splitting. Pick a size that fits your yarn—too thick and you’ll leave gaps; too thin and you’ll have trouble pulling through. A longer shaft helps reach without snagging, and a smooth tip reduces friction.
For tiny features or tight joins, consider an embroidery needle. Its sharper point helps you pass through several layers of stuffing without creating lumps. Use it for attaching eyes or nose details or sewing up a closure seam near a curve. The goal is control: easy threading, clean piercing, and pulls without distorting the shape. With the right mix of tapestry and embroidery needles, your amigurumi will look polished and last longer.
Needle Size for Sewing Amigurumi
Polished seams matter. The needle size you choose affects seam strength, fabric weave, and how clean joins sit against stuffing. Often, a slightly smaller needle than your yarn weight helps you pull tight, compact seams without bulk. If stitches look soft or gaps show, step up to a larger needle, but stay mindful of gauge. Test a few options on scrap to find a size that yields tight, tidy seams without snagging.
Choosing needle height and point matters too. A sharp short-point slides through tight stitches; a blunt needle helps avoid fiber splitting. Practice with a scrap to see how your yarn behaves with each needle. The best approach is to test several options and pick the size that gives you neat seams that stay put after stuffing.
Match Needle Size to Yarn Weight
Your yarn weight guides needle choice. For lighter weights like fingering or sport, use a smaller needle to avoid stretching and keep a tight fabric edge. For DK or worsted, a medium needle provides the right density without puckering. Heavier yarns (chunky) require a larger needle to prevent bulky seams or holes. Keep stitch tension consistent as you guide with the needle.
If your yarn splits, you’re likely using too fine a needle for the fiber. Switch to a slightly larger size. Conversely, if seams look stretched, downsize a notch and recheck. Test threading a scrap seam to see which needle weight makes stitches disappear into the yarn.
Sizes That Stop Yarn Split
Yarn split is the enemy of neat seams. If you see fibers fraying, your needle may be splitting the yarn. A smoother, rounder tip pushes fibers aside rather than cutting them. For common amigurumi yarns, nickel or stainless steel needles with rounded tips work well; a slightly longer shaft helps with textured or twisty yarns.
Use a sharp point only when necessary (tight yarns or dense fabric); otherwise switch to a softer tip to avoid tearing. If you see frequent splits, ease back, switch to a smoother tip, and you’ll notice fewer splits.
Needle Size for Sewing Amigurumi (Baseline)
For most amigurumi sewing, start with a medium round needle and adjust as needed. A size around 2.0–2.5 mm works well for sport to DK yarns; 3.0–4.0 mm for worsted to bulky yarns. When testing, ensure threads don’t snag or split and seams lie flat against the shape.
Tapestry Needles for Amigurumi
Tapestry needles are easy on yarn and hand. A good tapestry needle slides through stitches without splitting fibers, keeping seams smooth and stuffing tidy. Blunt tips protect stitches when weaving in ends or joining pieces. For thin cotton or DK yarns, pick a small-eye needle; for chunkier yarns, a larger eye helps thread thicker strands. Store needles with a magnet or in a fabric roll, keep a couple of sizes on hand, and have the right needle ready for each project. The cusp of a polished finish starts with the needle you choose.
Blunt Tip Keeps Stitches Intact
Blunt tapestry needles protect stitches from snagging or splitting, helping seams stay smooth. Short, controlled passes keep holes to a minimum and ensure a clean finish around delicate areas.
Choosing the Right Eye for Yarn
Eye size and backing affect both safety and look. For soft, fuzzy yarns, smaller eyes can look cute but are harder to insert. For safety and durability, use eyes and backings that sit flush with the surface and won’t pull fibers. Safety-rated eyes are a good option for toys.
Tapestry Needles for Amigurumi (Tips)
A tapestry needle set for amigurumi should include a couple of sizes. Look for a short, blunt needle with a sturdy shaft that won’t bend when threading tight seams. The eye should be large enough for your yarn but not so large that the thread slips out. Keep needles clean and dry, and store them in a small case.
Blunt Darning Needles for Amigurumi
Blunt darning needles are great for neat, secure joins without ripping yarn. Their blunt tip helps you thread through fabric with control, keeping seams smooth and invisible. They’re versatile for finishing touches, stuffing pockets securely, and attaching small accessories with precision.
Why Blunt Darning Needles Help
Blunt needles glide through fabrics without piercing them, reducing fraying and snagging. They offer control for small spaces and minimize finger fatigue, helping you finish pieces consistently.
Metal vs Coated Blunt Needles
Metal blunt needles endure heavy use and stay sharp longer. Coated blunt needles reduce friction, which can be gentler on delicate fibers. Choose based on yarn type and how often you finish pieces. A mix of both works well for many crafters.
Blunt Darning Needles for Amigurumi
Choose blunt needles with comfortable handles and sturdy shafts. A blunt tip helps you sew joints discreetly. Weave stuffing into limbs to stabilize pose and tuck ends under the surface for a neat finish.
Curved Needles for Sewing Plush Toys
Curved needles shine for plush toys, letting you reach tight spaces without distorting fur or pile. They offer better control for curves and facial features, reducing bulk at seams and ensuring a smooth, professional edge.
Use Curved Needles in Tight Seams
Curved needles are ideal where straight ones would snag. They help thread small beads or floss with less struggle, keeping tension even and seams flat.
How Curved Shapes Ease Finishing
The curved design reduces needle entry points in tight spots, minimizing visible holes and touching up less. They also help tuck under edges more cleanly, keeping surface even.
Yarn Needles for Assembling Amigurumi
Choosing the right yarn needle makes assembly smoother. Look for a sharp, blunt-tipped needle with a medium-to-large eye to thread bulky yarn easily. Consider your most-used yarn weight and pick a comfortable size. Test different needles to find what feels best in your hand.
For comfort, try lightweight aluminum or plastic needles; steel needles offer precise control on tight stitches. Keep spare threaded needles handy for color or weight changes mid-project. Label needles by yarn weight to speed your workflow.
Threading Bulky Yarn Made Simple
Use a needle with a slightly oversized eye. If the yarn has a loose ply, twist the end to prevent fraying, then guide into the eye calmly. Trim tails at an angle and consider a tiny dab of fabric glue to secure ends on very bulky yarns if tested safe on scraps.
If you encounter knots, rethread with a fresh end and tug gently. Smooth pushing beats brute force.
Techniques for Invisible Joins
For invisible joins, thread a yarn-length longer than the tail. Push through back loops of adjacent stitches and anchor with a gentle pull. Mattress stitch keeps edges aligned with minimal texture on the back. When color changes are needed, switch threads at the back and weave ends into nearby stitches without pulling too tight.
Embroidery Needles vs Tapestry Needles for Amigurumi
Embroidery needles vs tapestry needles each serve different roles. Embroidery needles have sharp points and thin eyes for precision in tight stitches, while tapestry needles have blunt tips and larger eyes for threading thicker threads and moving through fabric without snagging. Use embroidery needles for tiny parts and delicate joins; use tapestry needles for larger seams and faster work. The Best Needles for Sewing Amigurumi Pieces is not one-size-fits-all—test what feels smoother for your hand and yarn.
Sharp Point Uses and Risks
A sharp point is useful for piercing tight stitches or dense fabric but can create small holes on the opposite side. Start with a slightly blunt option if you’re newer to amigurumi and build confidence.
Best Tasks for Each Needle Type
- Embroidery needles: fine detail work, tiny seams, and tight spots.
- Tapestry needles: larger seams, thicker yarns, and ends weaving.
Best Needle Set for Amigurumi Projects
A good needle set supports tight stitches and clean finishes. Look for a range of hook sizes, flexible cables, and multiple tapestry needles. A compact case helps you stay organized and ready to switch tools as patterns demand.
What to Look for in a Set
- Balanced range of hook sizes for common yarn weights
- Smooth grips and durable construction
- Replaceable cables and multiple tapestry needles
- Compact, labeled storage for quick access
Starter Sets vs Pro Kits
Starter sets help you learn rhythm and tension with basics. Pro kits expand with more hook sizes, sturdier cables, and extra needles for advanced stitches, speeding tool swaps and durability. A practical approach is to start with a solid starter set and gradually add tools as projects demand.
Best Needle Set for Amigurumi Projects
Choose a versatile collection that offers comfort, durability, and variety. A mid-range set with several hook sizes, a reliable cable system, and a handful of tapestry needles often hits the sweet spot. The right set keeps you productive and confident.
Care, Storage, and Safety with Needles
Keep workspace tidy with a pin cushion or magnetic tray. Thread needles gently and use a thimble or fingertip guards when pushing through thick yarns. Store by size in labeled containers to avoid confusion and protect fingers.
Clean, Dry, and Store by Size
After finishing, wipe lint and fibers; wash if needed but dry thoroughly to prevent rust. Sort by size in compartments and use a magnetic tray or foam insert for easy access. A labeled pouch helps you grab the right needle on the go.
Replace Bent or Blunt Needles
Bent or blunt needles risk skipped stitches and damaged fabric. Inspect regularly and replace as needed. Keep spare needles on hand to avoid working with compromised tools.
Needle Length for Amigurumi Assembly
Choose a length that balances threading through multiple layers with ease. Shorter needles offer control for tiny stitches; longer needles help when joining pieces or weaving tails. Match length to hand size and project needs, and test on scrap to ensure clean joins and nearly invisible seams.
Care, storage, and safety with The Best Needles for Sewing Amigurumi Pieces
Careful handling and organized storage keep your tools performing at their best. After each project, wipe clean, dry thoroughly, and store by size in labeled compartments. Consider a dedicated pouch for specialty needles and always replace bent or dull tips before your next project. With proper care, The Best Needles for Sewing Amigurumi Pieces will stay sharp and ready to help you create polished, durable amigurumi pieces.

Clara Fern — Crochet Artist & Amigurumi Designer
Clara Fern is a crochet artist and amigurumi designer based in Austin, Texas. With 9 years of experience working with yarn and hook, she transformed a lifelong passion for handcraft into a creative mission: making amigurumi accessible, fun, and deeply rewarding for crafters of all levels.
Clara discovered amigurumi during a trip to Japan in 2017, where she fell in love with the art of bringing tiny characters to life through crochet. Back home in Texas, she spent years studying color theory, design principles, and advanced crochet techniques — developing her own signature style that blends kawaii aesthetics with original character design.
Through maclafersa.com, Clara shares everything she has learned — from choosing the right yarn and reading your first pattern, to designing fully original amigurumi characters from scratch. Her writing is known for being clear, detailed, and genuinely helpful, with no steps skipped and no secrets kept.
When she’s not crocheting, Clara enjoys watercolor painting, visiting local yarn shops, and drinking way too much coffee while sketching new character ideas.


