
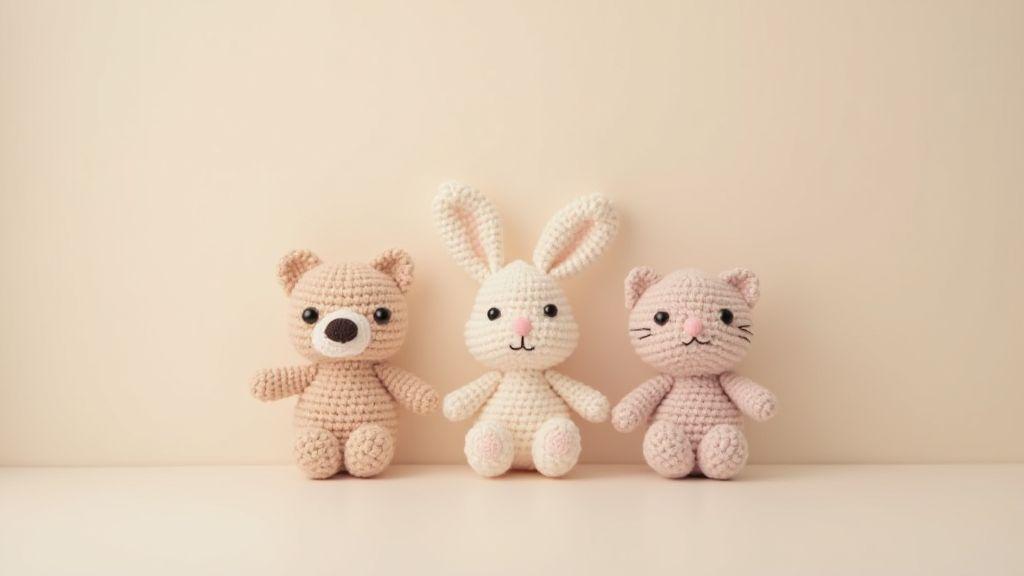
Negative space in amigurumi design basics
You’ll learn how to use empty spaces on purpose, not by luck. Negative space in amigurumi helps your creation look balanced and alive. When you plan where to leave gaps or voids, you control how your toy sits, feels, and reads as a character. Think of negative space as the breathing room around your stitches. It’s where your design stops shouting and starts showing form.
Understanding Negative Space in Amigurumi Design is the core idea. Voids aren’t mistakes; they’re tools you mold with your hook and yarn. By paying attention to where your stitches end, you can shape ears, snouts, or paws without crowding the piece. Small gaps can make a big difference in how cute or sturdy your amigurumi looks. Plan space to separate features, so the final figure isn’t chunky in the wrong places.
When you practice this, you’ll find your own style. Negative space helps your character look like a story, not a lump of yarn. You’ll create better balance between the head and body, and you’ll reduce tired hands from over-stuffing. The more you use space on purpose, the more your finished toy reads as deliberate craft, not a happy accident.
What negative space means
Negative space is the empty areas around and between the parts you crochet. It’s not wasted yarn; it’s the shape your stitches frame. Use it to push features forward or back in the silhouette. When you leave a small gap between ears and head, for example, the face reads as friendly rather than flat.
Map where to leave spaces before you finish a piece. Negative space helps the eye travel smoothly across the shape, making your toy feel more alive. A simple curve, a tiny hollow under the chin, or a notch between limbs can change the whole look. It’s about choosing where not to fill so your figure keeps its personality.
Safety and care benefit too. Proper spacing prevents overstress on seams and reduces bulky areas that snag yarn or rub skin. Clear spaces let the amigurumi breathe and stay comfortable to hold. With practice, you’ll spot opportunities for negative space in every project.
Why voids improve form
Voids give your amigurumi depth. Deliberate gaps create light and shadow that the eye reads as dimension, making the piece feel lighter than a fully stuffed form. Voids also help with articulation; a small hollow near a joint can improve movement and reduce stiffness.
Voids help separate features visually so each part keeps its identity. A gentle hollow under a hat edge, or a notch between arms, balances the silhouette—head, body, limbs—so nothing looks oversized or lumpy. You’ll get cleaner lines and a more polished finish.
Remember: voids aren’t holes to fix later. They’re design choices woven into your pattern. Plan them to guide how your amigurumi sits in your hands and on a shelf. Practice spotting where a tiny space will make a big impact, and your results will steadily improve.
Quick checklist
- Identify where you want emphasis and plan a space around it.
- Leave small gaps between major parts to prevent crowding.
- Use voids to create natural curves and easier seam placement.
- Check balance from multiple angles and adjust spacing as needed.
- Ensure spaces don’t weaken joints or stuffing areas.
Shaping amigurumi with negative space
You’ll shape your amigurumi by using negative space to define form without adding more yarn. Think of the space around your stitches as part of the sculpture—it creates curves and character. Deliberate increases and decreases let the negative space form cheeks, elbows, and knees, giving your piece life without bulky seams. Subtle color changes or tiny stitches can carve out features so the silhouette reads clearly from a distance and up close. This keeps your design light, playful, and easy to photograph.
Balance negative space with solid mass. If a head looks too round or a torso too flat, adjust where you place increases or decreases to carve in or smooth out space. You want enough negative space to suggest shape, but not so much that the toy becomes floppy. Sketch a quick outline on paper for your character, then translate that flow into stitch placement. The goal is a harmonious blend where space and solid form support each other.
Test your piece in real life. Look from different angles and ask: Does the space around the eyes feel friendly? Is the torso’s outline clear from the side? If something looks off, tighten or loosen stitches to reshape the negative space. This hands-on feedback loop makes your amigurumi glow with personality and structure.
Proportions: head, body, limbs
Your first step is to set proportions so the character feels balanced. Start with the head as the anchor; a larger head reads as cute and cartoonish, a smaller head reads more realistic. Decide how much of the total height the head will take, then scale the body and limbs to match. If the head dominates, keep the body and limbs simpler and shorter to maintain a readable silhouette. Use consistent stitch counts for each section so you can compare quickly.
When shaping limbs, relate them to movement and pose. Shorter limbs create a chibi vibe; longer limbs suggest elegance or action. Alter arm and leg lengths by a few stitches and test the pose with a dry fit. Joints should look natural, not telegraphed. A gentle taper toward the ends helps convey weight and mobility without bulk.
For the torso, a subtle curve works wonders. A straight cylinder can look stiff, but a slight waist or shoulder slope adds character. Use increases to widen the chest and decreases to narrow the waist gradually, so the body reads as a cohesive unit. Keep transitions smooth so your character feels alive rather than assembled.
Amigurumi anatomy points
Map key anatomy points to guide shaping. Define the eyes, nose, and mouth area early, because placement affects the whole face’s expression. Use a few stitches of different colors or a contrasting weave to mark the eye lines without overpowering the yarn. For ears, cheeks, and muzzle, plan the location before you finish the head; small shifts here swing the expression dramatically.
The spine and shoulder area set the silhouette’s mood. A gentle forward tilt of the shoulders can imply curiosity or sweetness, while a straight line reads calm and sturdy. Think about how the limbs attach: a snug armpit or hip seam creates a natural resting pose. Gaps and curves should suggest movement without losing the plush feel. Check tendons and joints in a dried mock pose to ensure they hold shape when stuffed.
Hands and feet deserve equal care. Simple paws or tiny feet should be proportional to the limbs, with a slight taper to show form. If you add fingers or toes, keep them minimal to preserve softness. Remember, what you don’t stitch often defines the character as clearly as what you do stitch.
Anatomy checklist
- Head size relative to body: ensure the head reads as the focal point and balances the silhouette.
- Proportional limbs: match arm and leg lengths to the character’s style, keeping joints stable.
- Negative space cues: carve out features using space around stitches to enhance shape.
- Face placement: align eyes, nose, and mouth so expression reads correctly from different angles.
- Torso silhouette: add gentle curves or slopes to avoid a blocky look.
- Joint connections: secure attachment points so limbs hold pose when stuffed.
- Pose feasibility: test the figure in a few positions to confirm it keeps its shape.
- Finish quality: tidy color changes and clean transitions to keep the plush feel.
Pattern drafting for negative space amigurumi
You design with space in mind, not just shape. Drafts map where holes and gaps live so the final toy reads clearly as a character, not a stuffed blob. Start by listing parts that will hold air or light, like eyes or a mouth, and plan their sizes to balance with surrounding fabric. Ask: where does negative space enhance the form, and where will it weaken the structure? The silhouette should remain recognizable while the space adds personality. Sketch with a simple ruler in mind for how deep you can pull stitches and still keep the piece sturdy enough to pose.
Think about how stitches travel around negative space. You want clean edges, not ragged holes. Decide if you’ll use surface stitches to imply details or cutouts to create actual voids. Starting with a full, solid shape and carving space later often reduces misalignment. Make notes on your pattern about which rounds or rows form the boundary of the negative space to stay consistent as you translate the draft into stitches.
Test the balance between negative space and fabric coverage. If a space dominates, the amigurumi might feel hollow; if space is too small, the effect is lost. Your testing should confirm softness and expressiveness. Mark the intended final size and compare it to a swatch or sample, adjusting stitch counts and shaping turns as needed. You want a design that breathes, with negative space as a feature, not a flaw.
Crochet negative space patterns layout
Begin with a clean layout that maps every negative space area to its companion stitch count. Place openings and cutouts to read correctly from the front, back, and sides. Position major spaces where stuffing won’t distort them. If you plan for a mouth or eye hole, place it along a central line to keep symmetry obvious. Your layout should be easy to read at a glance, so you can quickly translate it into a chart or pattern.
Choose your stitch type to shape the negative space. Slip stitches or single crochets around the edge create crisp boundaries, while increases or decreases near the opening curve the edge gently. Decide where you’ll switch from stuffed fabric to a deliberate void, and note the transitions in your layout. Clear edges help you maintain neat boundaries as you work.
Map the safe limits for negative space so you don’t compromise sturdiness. Note acceptable depths for holes and how far the fabric can pull away before it looks stretched. If you’re designing a small head with a large cutout, you may need extra reinforcement around the edges. Your layout should reflect both aesthetics and durability, ensuring your amigurumi holds its shape after play.
Convert sketches to stitch counts
Turn a rough sketch into stitch counts by outlining the overall size and then assigning counts to each area around the space. Use consistent increments so edges align. If your sketch shows a circular eye hole, translate that into a ring of stitches and determine how many rounds will frame it. Note where increases or decreases occur to preserve symmetry.
Test how the space affects the surrounding fabric. If the opening pulls the fabric too tight, reduce the border or add stitches before the cut. If the space looks too loose, add stitches to the edge or adjust carrier stitches around the boundary. Write final stitch counts for each segment, including the negative space boundary, to reproduce the result exactly in the final pattern.
Verify consistency across repeats. If you’re making multiple openings, ensure every count around each edge mirrors the others. Consistency keeps the toy looking intentional, not accidental. Your goal is to make the negative space feel deliberate and harmonious with the rest of the design.
Draft test swatch
Draft a small swatch to preview how the negative space translates to real fabric. Crochet a tiny version of the area with the planned openings, using the exact stitches and counts. Check edge sharpness and how the space behaves when stuffed. If edges blur or the space widens unexpectedly, tweak the counts or boundary stitches in your notes. The swatch is your reality check—fix issues before they become hard-to-change in the full piece. This step keeps your design reliable and your pattern accurate.
Amigurumi negative space techniques
Negative space in amigurumi is not just about cutting yarn and making holes. It defines shape, balance, and how your toy reads to the eye. Use negative space to carve out eyes, mouths, ears, and tiny details that bring characters to life. When you plan the space, you’re planning the character’s personality too. Let it suggest light and shadow, or give a soft, friendly face instead of a sharp one. Visualize the final form and where the empty areas should sit. That mental map helps you choose stitches, densities, and placements that create the exact gaps you want.
You’ll notice that how you place decreases and create gaps changes the silhouette. Understanding Negative Space in Amigurumi Design means you know where fabric pulls in and where it stays flat. If a space feels too small, add a row or two of stitches to widen it. If a space looks too big, tighten by using smaller hook sizes or decreasing stitches closer to the edge. Practice with small swatches first, then apply what you learn to your toys. Let the space tell part of the story, not just fill it.
Negative space also helps with color changes and facial features. Plan where color breaks sit to keep faces friendly and proportional. By thinking about space first, you prevent overstuffing, which can flatten shapes, or under-stuffing, which makes gaps look uneven. Clean lines and a polished finish come from respecting the spaces between shapes as much as the shapes themselves. Practice, then trust your eye to balance texture and space.
Use decreases and gaps
Decreases pull in fabric to form clean, tight shapes. Use them to shape a cheek, a tiny nose, or the edge of an ear. When you place a decrease, you pull the space inward, creating a subtle negative space that reads as contour. Start simple—an accent hollow under the chin—and build from there. Keep tension steady so the space remains even across the row.
Gaps define features you want to sit out from the face. A deliberate gap can give a surprised look or a sleepy eye. If gaps feel uneven, check your last stitches and adjust tension or stitch count. Consistency is the quiet hero here. You’ll notice your amigurumi looks more alive when gaps align with facial planes.
Cutouts, slits, and joins
Cutouts and slits carve larger negative spaces, like a mouth opening or a hat notch. They add bold personality and can shift the mood of your piece. Map their effect on surrounding stitches to avoid unraveling. Leave enough support on both sides so the space stays defined but sturdy. Slits act as small windows into the surface you’re shaping, giving character without bulk.
Join lines are where space meets strength. Use neat joins to connect pieces without bulky seams that steal negative space. If joining multiple parts, mark intended negative spaces first, then sew with snug but not tight stitches. This keeps shapes cohesive and spaces intentional.
Technique practice steps
- Start with a simple face: build a head, add a tiny slit for a mouth, and a couple of small gaps for cheeks. Notice how spaces change expressions.
- Move to ears or a hat brim with cutouts. Count stitches around the cut so it stays balanced on both sides.
- Finish with a tiny nose and eyes using minimal negative space. Play with distance between features to shift mood.
Silhouette and form in amigurumi
Shape your amigurumi by first thinking about its silhouette. A strong silhouette makes your creature instantly recognizable, even from afar. Start with a simple, bold outline: round head, short torso, clear limb positions. Keep proportions steady so the toy reads as a single figure rather than a jumble of parts. Compare your work to a flat front photo to see where the outline feels busy or where it breathes cleanly. If the silhouette is too busy, you’ll lose charm; if it’s too flat, it won’t feel alive. Use easy, recognizable shapes as your base and add character with proportional tweaks.
Form comes from how you place stitches, increases, and decreases. You want smooth curves on cheeks, a gentle belly, and ears that tuck nicely into the body. Think larger forms first, then add small details. This keeps your amigurumi sturdy and huggable. If a limb feels wobbly, adjust your stitch count early rather than patching later. Your form should stay consistent across the toy so it sits nicely on a shelf or in a child’s arms. Proportion guides form, and you can move features around to balance the silhouette as you go. Test-fit by holding your work up to a rough outline or sketch to ensure the read from distance and up close is right.
Read shape from a distance
From across the room, your amigurumi should tell its story. Stand back and look for a clear, identifiable shape. If you can’t recognize the figure without inspecting details, adjust bigger parts first. Check head-to-body ratio; a head that’s too large or too small shifts the whole read. Look for symmetry—uneven shapes pull attention away from the silhouette. If your figure is cute and chubby, widen the torso and keep limbs compact. If sleek, lengthen the limbs or neck slightly to stretch the outline.
Distance testing also helps with color blocks. Bold, simple color areas read better from afar than many tiny changes. If you see a floaty edge where a seam breaks the outline, reposition the seam or rework the color change to keep the silhouette clean. You want someone to recognize your toy at a glance, not after a second look.
Using voids to enhance crochet toys
Voids inside your amigurumi matter as much as the filled areas. Proper voids carve gentle curves and prevent a lumpy look. They help the toy breathe and feel more alive. Plan gaps under the chin for a softer neck, between limbs for natural joints, or around a tail to suggest movement. Voids also prevent overstuffing, which can make your toy stiff and hard to pose. Use minimal stuffing where you want softness and let the yarn shape the rest.
Think of voids as negative space your brain reads as form. Leave small air pockets to highlight curves and angles that would vanish with too much stuffing. If a head reads square, carve a tiny void around the jaw to soften it. If the tummy feels flat, a shallow void near the belly can create a rounder impression when viewed from an angle. Balance voids with solid areas so the overall shape remains readable and cuddly.
Silhouette review checklist
- Confirm the overall shape reads from a distance.
- Check head-to-body proportions for your character.
- Ensure limbs and ears contribute to a clear silhouette.
- Observe color blocks against the silhouette.
- Review negative space to avoid stiff, overstuffed areas.
- Test the toy’s stand or sit pose to verify balance.
Read shape from a distance (revisited)
(Integrated as part of the silhouette and form section above; see the Read shape from a distance subsection.)
Using voids to enhance crochet toys (revisited)
(Integrated as part of the silhouette and form section above; see the Using voids to enhance crochet toys subsection.)
Color contrast and negative space in amigurumi
You want your amigurumi to pop without shouting. Color contrast is your ally. Start with a light base and a dark edge or feature color. Bold contrasts help eyes and noses read clearly, while subtle tones keep the toy gentle. You don’t need a rainbow—two or three well-chosen colors can carry the character. Test your palette in natural light to avoid hue shifts at dusk.
Negative space isn’t just empty air—it shapes how your creature looks. Leave small gaps or gaps created by color changes to define ears, paws, or a smile without overdoing details. The trick is balance: too much negative space can flatten your design, too little can blend features away. Use color blocks to create intentional voids, like a white tummy against a pastel body, so features stand out crisply. The space around a feature should be deliberate so the design reads as intentional rather than accidental.
Practical tip: sketch or photo-cut your color plan before you hook. Mark where dark accents hit the eyes, mouth, and paws, and where the light space will go. This helps you see contrast and negative space at a glance. If unsure, swap a color in a quick swatch to preview the effect. Understanding Negative Space in Amigurumi Design becomes easier when you test ideas in small, reversible steps rather than committing to a full project early.
Understanding Negative Space in Amigurumi Design
Understanding Negative Space in Amigurumi Design isn’t just a buzz phrase—it’s a practical approach. Negative space is where your brain reads the form. Use it to soften edges, create natural joints, and give your toy a friendly overall look. By balancing voids with filled parts, you keep your amigurumi cuddly and expressive. The best shapes are the ones you recognize without inspecting every stitch.
Visual balance in amigurumi design
Visual balance means your toy doesn’t feel off-kilter. Start with a central anchor, like a head or torso, and weight around it with proportionate limbs or accessories. If the head reads large, keep the body simple and limbs shorter to maintain harmony. Align features along a common axis—eyes on one line, ears mirrored, mouth centered—to keep balance.
Scale matters, too. A prominent feature may require simpler surrounding parts. For example, a big button nose can pair with simpler arms. When you mix busy and calm areas, the eye lands where you intend. Use consistent stitch density and tension so the whole reads as a cohesive design.
Test balance by a quick stand-up check. Set the piece on a flat surface and nudge it gently. If it tilts, adjust limb length or head placement by a stitch or two. Look at it in different lighting to ensure the silhouette holds. Tiny adjustments add up to a well-balanced feel.
Spatial composition for amigurumi
Think of your amigurumi as a tiny sculpture. How the ears, limbs, and tail occupy space changes its personality. Create rhythm by repeating shapes—round head, two round ears, two round paws—then vary positions a little for life: tilt an ear, bend a leg, or angle a tail. Subtle variations keep it lively without losing coherence.
Negative space also plays a role in composition. Leave small gaps between head and body to imply a neck or floaty fur. Position limbs so they don’t crowd the torso, leaving room for the design to breathe. Align parts along a central line for intentionality. Use visual anchors—like a color stripe or bold eye—as reference points.
Build in layers: start with the core body, attach the head, then add limbs and accessories. After each layer, step back to check balance and space usage. If something feels crowded, remove a row or shift an attachment by a few stitches. Spatial composition is a dialogue between space and shape; small edits often improve the whole piece.
Final balance test
Do a quick final balance check by standing the amigurumi upright and giving it a gentle nudge. It should stand steady with a natural three-point contact: two feet and the base, or a flat bottom if shaped that way. Look at the silhouette from the side and front; lines should feel evenly weighted. If something looks off, retrace weight placement and adjust limb length or stitch tension a bit.
Compare lighting scenarios. In bright light, contrasts should read clearly; in dim light, larger shapes should still hold their form. If you’re happy with how it looks in both, you’ve achieved final balance. This test isn’t about perfection—it’s about coherence, intention, and play-ready design.

Clara Fern — Crochet Artist & Amigurumi Designer
Clara Fern is a crochet artist and amigurumi designer based in Austin, Texas. With 9 years of experience working with yarn and hook, she transformed a lifelong passion for handcraft into a creative mission: making amigurumi accessible, fun, and deeply rewarding for crafters of all levels.
Clara discovered amigurumi during a trip to Japan in 2017, where she fell in love with the art of bringing tiny characters to life through crochet. Back home in Texas, she spent years studying color theory, design principles, and advanced crochet techniques — developing her own signature style that blends kawaii aesthetics with original character design.
Through maclafersa.com, Clara shares everything she has learned — from choosing the right yarn and reading your first pattern, to designing fully original amigurumi characters from scratch. Her writing is known for being clear, detailed, and genuinely helpful, with no steps skipped and no secrets kept.
When she’s not crocheting, Clara enjoys watercolor painting, visiting local yarn shops, and drinking way too much coffee while sketching new character ideas.


