
Beginners
Gather your tools and yarn
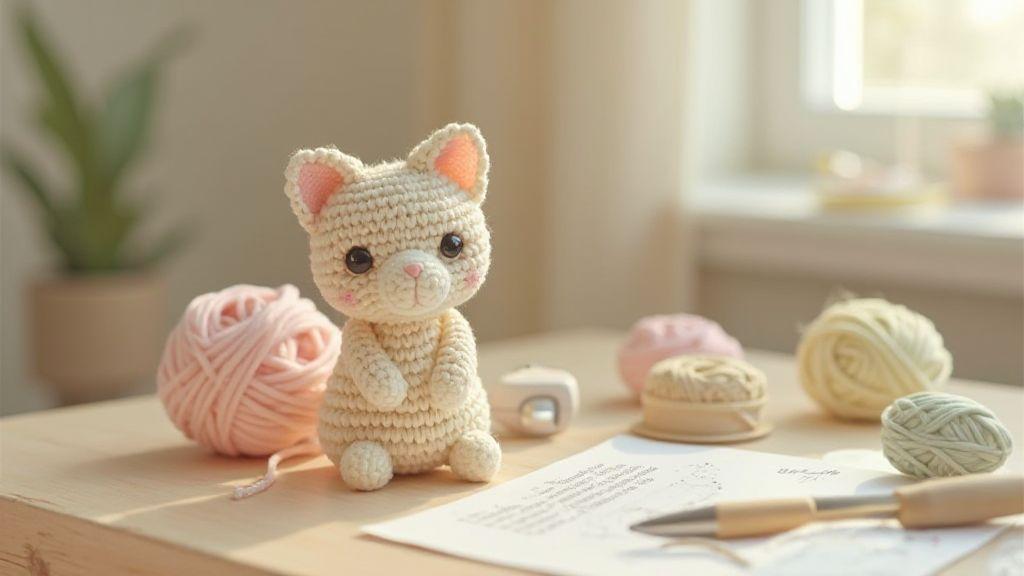
Gearing up for a cozy project starts with gathering your tools and yarn. Keep your workspace organized with a soft mat, good light, and a small basket for scraps. Choose a soft, washable yarn so your cuddly kitten stays comfy and easy to clean. The right tools lead to smooth stitches and fewer tangles.
Have a trusty pair of scissors, a yarn needle, stitch markers, and a measuring tape. Mark rows as you go and keep a quick progress log. A washable marker for gauging helps avoid surprises later. If a yarn end is loose, trim it and tuck it away so it won’t snag. A quiet, comfy space and a warm drink nearby can make tricky rows feel lighter.
Set up a simple storage method so you don’t lose your place. A labeled bag or small project tote keeps hooks, needles, and scraps tidy. When you’re organized, your flow stays steady and you’ll finish faster with fewer oops moments.
Free Amigurumi Cat Pattern for Absolute Beginners: Why this approach works
This Free Amigurumi Cat Pattern for Absolute Beginners is designed for first-time crocheters. It uses simple stitches, minimal color changes, and clear step-by-step photos. By following a beginner-friendly Free Amigurumi Cat Pattern for Absolute Beginners, you’ll gain confidence and see progress quickly. Look for patterns labeled beginner or easy with a materials list and gauge information, preferably in a printable PDF. A straightforward Free Amigurumi Cat Pattern for Absolute Beginners helps you finish a cute cat in a single weekend and builds momentum for the next project.
What hook sizes and needles you need
Start with a basic setup that works for most beginner amigurumi, especially a cuddly kitten. For a tight enough stitch to hold stuffing, choose a crochet hook in the range of 2.25 mm to 3.5 mm, depending on yarn weight. Lighter or sport-weight yarns suit the smaller end; medium weights lean toward 3.0–3.5 mm. You’ll notice firmer, neater stitches that keep stuffing neat and shapes clean. Practice makes the magic happen—perfection isn’t required at first.
You’ll also want a set of thin, sturdy steel hooks for tight inner curves, plus a soft, blunt-ended tapestry needle for weaving ends. A few color-coded stitch markers help you see where rounds begin and end. If you plan to wash your kitten, consider a gauge swatch to confirm it stays snug after washing. With the right sizes, your work will feel smoother and your kitten will look just right.
Best yarn types for a cuddly kitten
Choose yarn that’s skin-friendly and washable. Soft, medium-weight acrylic or a cotton-blend works well for beginners and is easy to clean. It helps the stitches pop for a cute, plump stuffed piece. Pick two or three coordinated colors—one main body color plus a contrasting nose or ear color—to bring the character to life. If you prefer natural fibers, a soft bamboo blend is lovely, but test a small swatch to ensure you’re comfortable with the texture. Either option yields a cuddly kitten that stands up to hugs and gentle machine washing.
Printable materials checklist
A printable checklist keeps nothing slipping through the cracks. Mark off: yarn colors, hook size, needles, stitch markers, stuffing, and a tapestry needle. Print two copies: one for your craft space and one for your bag, so you’re always prepared. This simple tool helps you see at a glance that you have everything, especially before starting the first round. It saves time and keeps your mood steady so you can focus on making your kitten perfect.
Learn the basic stitches you need
Confidence comes from knowing the backbone stitches—simple moves you’ll repeat until they’re second nature. Practice with a light yarn and a comfortable hook, making swatches to compare gauges. Consistency beats speed. If stitches look rounded or uneven, slow down, count the loops, and adjust. You’ll thank your past self for calm practice today.
Ripping out a few rows is normal. Treat mistakes as feedback, not failure. Pause, re-check counts, and retry. You’ll grow more precise with every attempt, and the moment a pattern clicks will feel amazing.
Magic ring and single crochet made easy
Starting with a Magic Ring gives you a neat center for amigurumi. Wrap the yarn, tighten the loop, and anchor with a chain. Then work rounds of single crochet, filling the ring until it’s snug. A tiny hole at the center is normal at first; with practice, you’ll get a tidy center. If you prefer, you can substitute a chain-1 slip knot, but the magic ring helps keep things tidy.
As you continue, add single crochets around the ring in rounds, counting to stay even. Keep tension steady—neither too tight nor too loose. If the circle curls, ease your grip and maintain uniform pull. Think of the circle as a tiny pizza, with each slice evenly around the center. You’re building a solid base, stitch by stitch.
How increases and decreases shape pieces
Increases widen and decreases narrow. Insert, wrap, and pull through, then decide where to add or skip stitches to shape. Increases are typically worked by placing more stitches in the same stitch or space to fan outward. Decreases pull stitches together for a smooth taper. Practice both on a simple circle first to see how the fabric grows or shrinks.
Keep increases even and decreases gradual. Mark the first stitch in each round to track your start and maintain symmetry. Soon shaping will feel like a predictable rhythm.
Quick stitch cheat sheet
- Magic ring: start tight, center grows from it.
- Single crochet: insert, yarn over, pull through, yarn over, pull through both.
- Increases: crochet two or more stitches in one space to widen.
- Decreases: skip or join stitches to narrow.
- Tension: aim for an even, moderate pull.
Follow a step-by-step pattern you can trust
A clear step-by-step pattern keeps you steady and confident. Treat pattern rounds like a recipe: measure, mark, and fit pieces together. A dependable pattern helps you learn new stitches later and finish projects with pride. Read rounds and abbreviations with care, using markers to denote the start of each round. Recognize repeats and use a removable marker to track progress.
Read rounds and pattern abbreviations
Know what abbreviations mean and how rounds are counted. Don’t rush—rhythm matters more than speed. If unsure, check the pattern legend and read it aloud in your own words. Recognize repeats by brackets or parentheses, repeated around the circle. Mark your place with a stitch marker or yarn so you don’t lose track as you switch lines or stitches. A quick cheat sheet of common abbreviations helps you glide through patterns with less hesitation.
How to count stitches and mark rounds
Counting stitches keeps projects tidy. If a round ends unexpectedly, pause and recount. Use a marker to denote the start of each round. Markers help you see the big picture and guide shaping, decreases, and increases. With practice, you’ll catch mistakes early and adjust without ripping large sections.
Simple step-by-step plan
- Gather materials and pick a pattern you love. Check hook size, yarn weight, and gauge before you begin. Read the rounds once to understand the flow. Set up markers and plan your counts to avoid stalling at a tricky section.
- Work through rounds one by one. Maintain a steady pace and count carefully on increases or decreases. Mark rounds to know where you are in the pattern.
- Finish with a quick check. Compare stitches to the pattern and ensure markers sit correctly. If you’re making a Free Amigurumi Cat Pattern for Absolute Beginners, this is where practice shines—your shapes will align and edges stay clean.
Find a free amigurumi cat pattern for beginners
Starting out with a Free Amigurumi Cat Pattern for Absolute Beginners can feel overwhelming. Look for patterns labeled beginner or easy with simple rounds and brief color changes. Choose patterns with clear photos and step-by-step instructions, using single crochet and basic increases/decreases. With practice, stitches tighten and the cat looks friendly rather than lumpy. Keep it simple: a small head, body, ears, and whiskers.
Choosing a beginner-friendly pattern increases enjoyment and speeds up learning. Look for materials lists and gauge information so you know yarn and hook match the designer’s guidance. A printable version is a big bonus for hands-on crochet. Start with something doable in a weekend to build momentum for the next project. When you finish, you’ll have a charming cat you’re proud of.
If unsure, pick patterns with one or two colors and clear photo guidance. Favor beginner-friendly yarns (like light worsted) and a comfortable small hook. The goal is progress, not perfection, and a friendly pattern will remind you of that with every stitch.
Where to get a beginner amigurumi cat pattern free
Begin with well-known craft sites that tag beginner patterns. Free options with detailed photos and a straightforward materials list are ideal. Printable PDFs help when your hands are busy and a screen isn’t handy. Community forums and crochet groups often share beginner-tested patterns with notes—skip patterns with too many extra tips that confuse beginners. Check comments or reviews for quick tips. Save patterns with clear steps and patient explanations. A few favorite roundups highlight beginner projects, including amigurumi cats, so you have ready options to start.
What a free crochet amigurumi cat pattern with instructions includes
A solid beginner pattern should include a Materials List, a simple Abbreviations section, and step-by-step Instructions with photos or diagrams. A basic color-change guide should be minimal. A Gauge section helps estimate size, and Finishing Tips guide assembly. Extras like safety eyes or alternatives, and a Troubleshooting section for common mistakes, help you stay confident. Finishing tips keep parts secure and the toy safe for kids.
Verify free PDF patterns before you start
Before downloading, ensure the pattern is truly free and beginner-friendly. Look for a clear license and notes that it’s for personal use. The PDF should include full instructions and the ability to print without watermarks. Many good patterns show measurements and include a gauge swatch example. Read comments to see if real users found it beginner-friendly. Patterns with clear steps and photos are reliable; if a pattern is unclear, keep looking.
Stuff and shape your pieces like a pro
Focusing on stuffing and shaping elevates your amigurumi. Pack in small, even amounts to avoid hard patches, then step back to check symmetry. If a piece twists or sinks, re-fluff and reseat. Let each stitch guide your stuffing, using a light touch for balanced results. The goal is a living, cuddly feel—not stiff.
Map the feel you want: a firm core with a springy surface. This helps transitions from torso to limbs feel natural. Keep a small scoop or fingers handy to reach tight corners and distribute stuffing evenly. Practice will teach you how much stuffing is needed for different sizes, producing pieces that hold shape and move with character.
How to stuff for a smooth head and body
Start with a small amount of stuffing in the core and fill outward with a smooth surface. If you see lumps, flatten them and continue. Aim for a rounded head and body that don’t sag but stay soft to touch. Use gentle pressure to check symmetry, especially between left and right sides. For round shapes, add stuffing gradually and keep surfaces even.
Use careful tucks at transitions (head to neck) and check symmetry as you go. For larger torsos, fill in layers and pause to balance both sides. A mirror test helps you spot asymmetry and adjust as needed.
Tips for shaping paws, tail, and ears
Shape paws with small amounts of stuffing, pressing from pads toward toes for a rounded look. If gaps appear, add a pinch of stuffing and smooth. Make the tail a little weighted at the base; if it droops, add a touch more stuffing there. Ears should have a firmer base tapering to a soft tip. If you want extra poseability, you can insert a small wire or pipe cleaner inside the base if the pattern allows it and it’s safe.
Safe stuffing and join methods
Use clean stuffing and avoid overpacking to protect seams. When joining pieces, align edges and sew with small, tight stitches. Test joints by gently flexing the piece; if something pops or loosens, re-stitch. A dab of fabric glue along the seam can help if the pattern allows. Keep joins smooth to avoid blemishes.
Add eyes, nose, and embroidery safely
Plan small parts carefully so they stay secure during play. Use beads or buttons only if securely fastened, or opt for embroidery for facial details. Pull thread snugly but avoid puckering fabric. If in doubt, choose embroidery or felt eyes for a safer option. When using safety eyes, follow depth and backing instructions; for babies, embroidery is often best.
Place facial features before stuffing to avoid tricky attachment later. Keep features flat and simple for babies. If you add safety eyes, test them by gentle tugging and reinforce if needed.
Simple face placement for a cute look
Mark the centerline and eye level lightly so both sides match. A symmetric face with eyes spaced evenly and a centered nose reads friendly. You can add a small mouth or blush with subtle stitches. Keep features below the top third of the head to hide seams. A photo can help you mirror both sides.
Secure facial features for toys
Stitch features through multiple layers and backing for strength. Use narrow, flat stitches and avoid knots that poke through. Reinforce with additional stitches and, if tolerable, a dab of fabric glue on the back. For yarn, a careful whip stitch that won’t unravel works well. Always test by gently pulling; reinforce if anything seems loose.
Fix common beginner mistakes you’ll face
Mistakes happen, but spotting them early helps. If you see a wobble, loose end, or skipped stitch, pause, breathe, and retrace your steps. Slow down for the first rounds, count stitches, and compare to the pattern. With consistent checks, you’ll catch issues before they grow.
Celebrate small wins. When your stitches look more even, edges stay smooth, or tension improves, acknowledge the progress. If you’re stuck, take a break, reread the pattern, and return with fresh eyes.
How to correct uneven stitch counts
Lay your work flat and count stitches around edges to find where the imbalance starts. If a stitch is dropped or a chain skipped, fix it now. You can rip back to the last correct row and rework. Use markers to keep track of repeats and maintain even height.
If counts don’t align, check turning chains and row height. Adjust grip and tension to achieve uniform height. Practicing with a swatch helps you dial in the right feel without risking your main project. A quick fix is to identify the repeat that’s off and recheck the counts.
What to do if your gauge size is wrong
If gauge is off, make a gauge swatch and compare to the pattern. If your gauge is larger, reduce stitches or rows per inch in the next try; if smaller, add. Changing hook size or needle size can help dial in the right gauge. Re-check gauge after adjustments to ensure the final size matches the pattern.
Blocking can help minor gauge differences, but it isn’t a cure for major errors. Use blocking as a final polish after you’ve corrected gauge.
Quick fixes and troubleshooting
When snagged, recheck pattern size, gauge, and row counts. If a seam feels off, undo a little to resew neatly. Secure loose ends with a tapestry needle. If a yarn knot appears, cut and restart from a secure point. If something seems truly off, take a break and reread the pattern. Check abbreviations and stitch names, and if needed, search for a quick tutorial video or tip post.
Customize your kitten with easy swaps
Swap colors, patterns, or tiny details to change mood without remaking the whole project. Keep extra yarn in a few colors and a small stash of safe embellishments for quick changes. Simple color swaps can shift mood—from cozy and shy to playful and bold. Use removable methods like temporary stitches or pins for trying outfits without committing.
Think in layers: a collar or small scarf can define character. Attachments should be lightweight and removable if needed. A few accessories can transform your kitten’s personality and keep the project fresh and fun.
Simple color changes and stripes
Color changes are fast wins. Try two or three colors for fur and features. Lighter shades brighten the face; darker shades add depth. Stripes bring rhythm—start with a single back stripe and build from there. Don’t overthink placement; a simple plan with a main body color, an accent stripe, and a small detail color works well. If a stripe isn’t right, unravel a short section and try again. Choose colors you enjoy daily to stay motivated.
Add small clothes or accessories for flair
Tiny outfits are like fashion choices for your kitten. A scarf, hat, or bow instantly changes personality. Start small to keep scale manageable. Texture matters: soft yarns for cozy clothing, shiny accents for contrast. Accessories can be simple—yet effective—like a tiny pendant or button.
Layer pieces to define character: a collar or scarf can convey adventure or shyness when paired with color changes. If you’re unsure how to attach, use safe, removable methods. You’ll gain confidence with finishing touches and enjoy showcasing your kitten’s new look. Your creativity grows as you explore colors and textures.
Easy customization notes
Keep a running note of swaps you try and how they feel. Record color pairs, stripe widths, and favorite accessories. Quick sketches or bullets near your pattern page are great references for fast changes. Build a personal style guide for future projects. Share tips with friends or online readers with examples of what worked for you.
Use free tutorials and PDFs to guide you
Free tutorials help you learn steadily without breaking the bank. Start with short guides that cover one concept at a time. As you practice, your hands learn the motion even while you skim. Combine tutorials with printable PDFs to create a tactile reference you can flip through during a session.
Keep a small library of trusted PDFs. Look for beginner-labeled patterns with printable formats and clear sections. Pattern notes and the ability to print a cheat sheet save time and keep you focused. Treat PDFs like training wheels: use them to test ideas, then rely on them less as you grow.
Video vs photo tutorials: which helps you more
Video tutorials give a live sense of motion, pace, and tension. If you’re a visual learner, videos map the steps well. Photos are quick to scan and easy to jump between steps. A mix often works best: a short video to learn a motion, then photo guides for precise counts and hand positions. A balanced approach helps you remember steps longer and speed up your pace.
Download a beginner-friendly amigurumi cat PDF free
Look for a beginner-friendly amigurumi cat PDF that breaks the shape into tiny, easy steps. A good PDF includes simple yarn colors, basic stitches, and a color-spot plan. Clear diagrams and a concise supplies list help you start right away. When you print the download, you’ll enjoy a layout designed for beginners: big headings, clean spacing, and step-by-step guidance.
Keep a small notebook for notes: where you struggled, what you changed, and what you’d like to improve. This habit turns a simple project into a learning map for future patterns. If you get stuck, reference the cat’s body shape and stitch counts to backtrack exactly where you went off course.
Save and print reliable pattern files
Saving and printing reliable pattern files creates a personal library you can trust. Download patterns from reputable sources to minimize confusion over abbreviations and stitch names. A reliable file should include a materials list, gauge instructions, and a clearly labeled sequence of steps. Print a single-page cheat sheet and store the rest in a folder for later reference. This habit makes it easy to pick up where you left off and reduces wasted yarn or time.
Keep files organized by project and date. Use a simple naming system like pattern-name-date-v1, and note any tweaks you make. If you switch devices, you’ll still have access to your setup. Printing a compact version of the pattern helps you stay on track while you crochet.

Clara Fern — Crochet Artist & Amigurumi Designer
Clara Fern is a crochet artist and amigurumi designer based in Austin, Texas. With 9 years of experience working with yarn and hook, she transformed a lifelong passion for handcraft into a creative mission: making amigurumi accessible, fun, and deeply rewarding for crafters of all levels.
Clara discovered amigurumi during a trip to Japan in 2017, where she fell in love with the art of bringing tiny characters to life through crochet. Back home in Texas, she spent years studying color theory, design principles, and advanced crochet techniques — developing her own signature style that blends kawaii aesthetics with original character design.
Through maclafersa.com, Clara shares everything she has learned — from choosing the right yarn and reading your first pattern, to designing fully original amigurumi characters from scratch. Her writing is known for being clear, detailed, and genuinely helpful, with no steps skipped and no secrets kept.
When she’s not crocheting, Clara enjoys watercolor painting, visiting local yarn shops, and drinking way too much coffee while sketching new character ideas.


