
Choose wire and tools
You’ll start by picking the right wire and tools to keep your amigurumi poseable and safe. Aim for a balance between stiffness and flexibility so the figure can hold shapes without the wire poking through. Plan how much poseability you need, then choose wire that fits that goal. The final choice should feel sturdy but not heavy and work with your stuffing so the figure sits nicely. Keep the wire diameter appropriate for the size of your amigurumi.
Gather the basics you’ll use every time: needle-nose pliers for bending, flush cutters to trim ends, and a spool of bendable, rustproof wire. Use masking tape or heat-shrink tubing to cover sharp ends and protect the stuffing. Jewelry pliers help you make clean bends, and a yarn needle threads the wire through tight areas. Keep your workspace tidy to prevent poking through stitches and ruining the pose.
Plan where the joints will go. Decide if you want arms that rotate or legs that bend at the knee. Map this out before you start stitching in the wire. If a joint needs extra strength, double or triple the wire in that section. Always test-fit by gently bending before you sew the pieces closed to avoid surprises after stuffing and finishing.
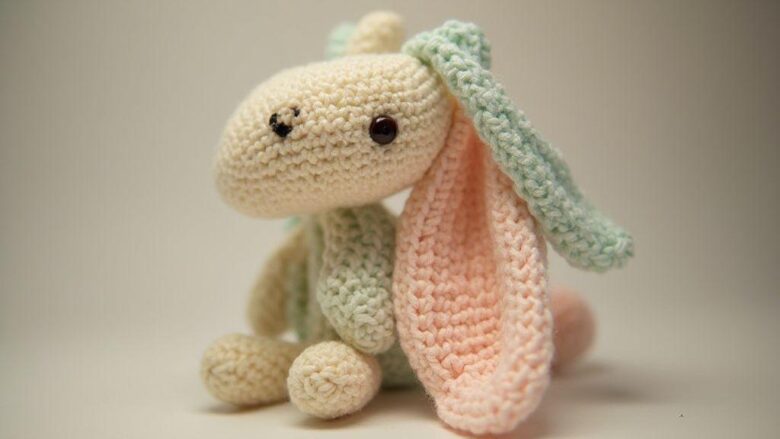
How to Add Wire Armatures Inside Amigurumi for Poseable Figures: this guide shows planning, wiring, routing, and securing the armature to turn a static stuffed figure into a poseable friend.
Best wire armature for crochet toys
Sturdy but flexible steel wire works well for most crochet toys because it holds shape without snapping. For small to medium figures, aim for a diameter of about 0.8–1.2 mm; tiny amigurumi may only need 0.6–0.8 mm. Choose wires that resist kinking and keep their bend after many pose attempts.
For larger characters, use multiple strands or a thicker core, but avoid excess thickness that complicates stuffing or shows through stitches. A hidden wire sleeve can protect the stuffing for long limbs. Start with a mid-range wire and test its behavior with your yarn and stitch tension to learn what works best.
Tools to add wire armature amigurumi
Your toolbox should include needle-nose pliers for precise bends, flush cutters to trim ends, and a wire cutter for longer pieces. Lightweight tape can wrap ends, and a bit of heat-shrink tubing protects sharp tips. A crochet hook and yarn needle help weave the wire into position without tearing stitches. A small ruler or measuring tape helps ensure joints align with your intended pose.
Bend the wire gradually; quick, sharp bends can kink or break it. Trim ends to prevent poking through stuffing, then cover exposed ends with masking tape or heat-shrink tubing for safety.
Pick bendable, rustproof wire
Choose bendable, rustproof wire so your amigurumi stays safe in play and storage. Bend slowly with multiple small adjustments to preserve the shape and avoid stressing joints. Test a small piece with stuffing to confirm no staining or rough edges.
Wrap wire ends before tucking them into stuffing. A quick wrap with masking tape or heat-shrink tubing keeps sharp tips from poking through stitches. After finishing, test every joint by gently moving the limbs; if something feels loose, add a tiny bend or a dab of glue along the inner seam to reinforce without making it rigid.
Plan a simple skeleton pattern
Start small with a basic backbone that runs through the body. Use a straight wire for the center and bendable segments for the neck, arms, and legs. Sketch a quick map of where each joint sits—shoulder, elbow, hip, knee—to stay organized as you thread the armature.
Choose flexible wire like craft wire or piano wire with a soft coating. Cut pieces a bit longer than the space you plan to fill; you’ll trim and shape once you see how stuffing sits around them. If you’re new, practice on a small creature or doll shape to learn bending without bulk. Plan sections in your sketch—head, neck, torso, arms, legs—to help with later placement.
Measure limbs and joints
Measure each limb before you cut. Let the wire extend just past the stuffing space so you can anchor it without the tip poking through. Add extra length at each end for joints, since you’ll bend and tuck ends inside the body. Use measurements from a similar figure as a baseline.
Match wire thickness to the stuffing capacity. A bit thicker wire can add steadiness with ample stuffing, but not so thick it’s hard to bend or shows through. If unsure, test with a stub piece inside a scrap amigurumi.
Plan joints by marking where elbows and knees will be. Leave enough length to bend without stressing the yarn around the joint. You may pre-bend gentle angles to slide ends into place when you sew the body shut.
Match wire length to stuffing space
Ensure wire ends sit just inside the body so you can cover them with stuffing and a seam. If ends are too long, they’ll press against fabric. Trim gradually to keep a clean finish.
Keep joints flexible by using shorter, well-bent segments rather than one long bend. Practice bending on a scrap piece first.
Test your pose before sewing the body closed. If something binds, adjust by backing off the bend or re-routing the wire slightly.
Route wire through stitches
Plan your wire route before stuffing. Treat the wire as a support beam and your stitches as walls that hold it in place. Keep bends gentle to avoid poking through yarn later. Thread the wire along inside the seam rather than across gaps to keep the surface smooth.
Test flexibility as you route by gently moving the limb. If the wire resists, back up a stitch or two and adjust. Keep the wire centered in the limb and torso so it doesn’t shift when you stuff. If it nears an edge, tuck it further inside and cover it.
Routing wire through crochet stitches safely
Follow the natural V-stitches of the fabric. Slide the wire along the inside of the loop, not the outer edge. Bend gradually within the stitched channel to avoid sharp points. Use tiny tunnels inside the fabric to shield the wire for arms, legs, and torsos. If crossing sides, do so through inner stitches to preserve look and safety.
When you’re done routing, test range of motion gently. If something catches on a seam or tight bend, re-route a bit and re-sew to lock the wire in place for a smooth surface.
Hide wire inside limbs and torso
bury the wire inside the limbs and torso cavities. Thread along the centerline and fill around it with stuffing to keep the wire hidden and the shape stable. If you see shiny spots, add more yarn or padding to conceal the armature. Wrap the wire with extra yarn after positioning it to create a soft barrier and prevent the arc of the bend from being felt through the fabric. If the wire creeps toward a seam, adjust the stuffing to push it back toward the center. Use color-matched yarn to keep the armature hidden and finish with stitches that secure the outer shell.
Secure and anchor the armature
Start with a flexible wire and thread it into the limbs first, then wrap a light layer of stuffing around it so the wire isn’t visible. This initial packing helps prevent shifting as you pose. After positioning, move joints a little to test stability. If a limb droops, add more stuffing to tighten the fit. Aim for even support along the wire without overpacking, which would reduce flexibility.
Lock the position with a light seal of stuffing near the joints to reduce movement. When happy with the pose, proceed to wiring the amigurumi for posing with confidence.
How to wire amigurumi for posing
Plan the pose you want and map each joint. Thread a thin, strong wire through the limbs, leaving extra length at joints. Twist the wire at joints to create a backbone you can control. After securing the pieces, test different poses by gently moving each joint. If a joint resists or wobbles, adjust the wire or add stuffing around that area. For subtle poses, keep wire ends short; for dramatic poses, extend ends a bit more but cushion inside the fabric.
Secure wire inside amigurumi using wraps
Wrap the wire inside the amigurumi with several layers of yarn to hide it and add strength. Start with tight wraps around each joint, then wrap along the length of each limb. Tuck the ends into stuffing and add more yarn over the area to smooth the surface. If you notice stiffness, loosen the wrap and re-tuck the wire. A well-wrapped wire stays hidden and lets you bend with control.
Anchor ends with knots or tape
Anchor the wire ends with a couple of tight knots or a small piece of tape to prevent movement. Tie a snug knot twice, then trim the excess wire. If using tape, cover the knot with a small piece and press firmly. Test the joint by bending gently; if there’s any give, re-tie or add another wrap of tape.
Create poseable joints
Plan where joints will live—elbows, knees, shoulders, and hips. Use lightweight armature wire that’s sturdy but flexible so you can shape it without breaking the yarn. Make joints slightly thicker than surrounding stuffing to prevent shifting. Bend sections into gentle curves for natural movement and test-fit with the yarn first; tweak the wire length if you need more range.
Cover the inside-within-body sections with stuffing or batting before sewing to protect the wire. Wrap wire ends with a little masking tape or heat-shrink tubing to prevent pokes through the fabric. For a head that tilts, add a slight curve to the neck wire for nodding without tipping. You can create a hinge by twisting two short segments if your wire gauge is thick enough.
Test poses after placing the wire in each limb. If you hear creaking or feel resistance, trim the wire or adjust the stuffing to allow movement. Use stitch markers to note joint recesses so you don’t sew over them. The goal is a balanced figure that can stand or sit in multiple poses.
Poseable amigurumi tutorial steps
Start with a simple limb: thread a wire through the arm tube, bend the elbow, cushion with stuffing, and sew into the shoulder with a small gap for adjustments. Check range of motion after each step. Repeat for legs and knees, adjusting for a sitting pose with extra stuffing behind the thigh. For the torso, weave a longer spine to tilt the head and twist the upper body, adding twists only if the wire can handle it. Always test each step with the intended pose.
As you assemble hands and feet, add smaller wire pieces for finger or toe movement. Wrap ends to prevent poking, then stitch the limbs to the trunk without covering the joints you want to move. Place the figure in natural poses and adjust any tension that looks off.
Safety eyes, stuffing and detail work
Aim for eyes that stay put, plush stuffing, and fine detail work that brings the piece to life. Choose safe eyes and a stuffing method that won’t push through the fabric. Seed the body evenly to avoid lumps while keeping firmness at the limbs’ attachment points. For details, select contrasting stitches or threads that are visible without being overpowering. The result should be a cuddly toy that’s polished and safe for little hands.
Tune your technique as you go. Test eye placement on scrap fabric, then mirror it on the other side. If you use safety eyes, secure the washer and post from the back. Add stuffing in small amounts and mold gently around eyes and limbs to avoid overfilled seams. Use a fine needle for facial features, pulling stitches taut but not stretched. Proper tension keeps your amigurumi neat and sturdy.
As you near finishing, review each seam and edge. Rebalance stuffing if you see flat spots, and tighten loose ends before closing. A smooth silhouette with a friendly face matters more than a stiff shape. Practice on scrap fabric if unsure.
Safety tips wiring amigurumi near eyes
If wiring near the head for poseability, keep the wire flexible, thin, and coated to prevent fabric snagging. Create a shallow path with a needle, pad the wire with extra stuffing or a soft sleeve, and consider a protective inner cap inside the head for skin-safe contact. Keep the wire away from eye sockets and avoid pressing post areas too tightly against the fabric. Check for exposed metal and re-route if needed for a safe, poseable figure.
Final stuffing and closing methods
Finish with balanced, snug filling. Add small amounts of stuffing to flat or hollow areas without distorting features. Close with secure stitches and tie a firm knot, weaving the end into surrounding stuffing. A clean, hidden finish gives a professional look and durability for display or play.
Cover sharp ends and check safety
Before finishing, cover sharp ends or rough edges with extra padding and secure stitches. Run your fingers along seams to feel for rough spots and add stuffing or stitches as needed. A final safety check now saves fixes later and helps your piece pass the gentle use test.

Clara Fern — Crochet Artist & Amigurumi Designer
Clara Fern is a crochet artist and amigurumi designer based in Austin, Texas. With 9 years of experience working with yarn and hook, she transformed a lifelong passion for handcraft into a creative mission: making amigurumi accessible, fun, and deeply rewarding for crafters of all levels.
Clara discovered amigurumi during a trip to Japan in 2017, where she fell in love with the art of bringing tiny characters to life through crochet. Back home in Texas, she spent years studying color theory, design principles, and advanced crochet techniques — developing her own signature style that blends kawaii aesthetics with original character design.
Through maclafersa.com, Clara shares everything she has learned — from choosing the right yarn and reading your first pattern, to designing fully original amigurumi characters from scratch. Her writing is known for being clear, detailed, and genuinely helpful, with no steps skipped and no secrets kept.
When she’s not crocheting, Clara enjoys watercolor painting, visiting local yarn shops, and drinking way too much coffee while sketching new character ideas.


