
Read the pattern yarn requirements
You’ll often find the yarn needs listed at the top of a pattern. When you check these requirements, you set yourself up to succeed. Look for the total yardage or meters, the number of skeins, and whether the yarn is a DK, worsted, or bulky weight. If you’re shopping in a store, grab a few extra skeins of the same batch to avoid color or dye lot differences. If you’re online, note the exact brand and colorway so you don’t end up with a shade that doesn’t match your project. A little extra now saves you worry later.
Note the exact yardage and skein count you’ll need. If the pattern says 400 yards (366 meters) and 2 skeins, write that down in your project notebook. If the pattern uses two different yarns for parts of the piece, ensure you use the same weight and fiber blend for both sections. If your yarn is discontinued or you can’t find the same run, have a plan B ready. Keeping track of these details keeps you moving and avoids last-minute trips to the store.
If you’re unsure about a brand’s feel, you can compare textures online, but always trust the numbers first. Yardage and skein counts aren’t suggestions—they’re the blueprint for your finished amigurumi. A quick check saves you from running out mid-row, so jot down what the pattern asks for and keep it handy during shopping and swatching.
Find listed yards, meters, and skein count you need
Patterns show exact numbers for each color or yarn type. You want the total, but also need to know how many skeins come in each color. If a color needs 150 yards and your skeins are 50 yards each, you’ll need 3 skeins for that color. Keep a simple checklist: color A yards, color B yards, and total skeins. If you’re changing colors mid-project, add up the lengths for every section to avoid running short.
Numbers like yards, meters, and skein counts should stand out. Double-check conversions if the pattern lists meters and your yarn is in yards, or vice versa. A quick calculation now means fewer trips later. If in doubt, buy one extra skein of each color you’re using—it’s a small cost to prevent big headaches.
Patterns sometimes show alternative yarn options. If you swap for a yarn with a different yardage per skein, recalculate total skeins. Do this math before you buy yarn to avoid finishing the body only to discover you’re short for the finishing touches. Keep a simple note of your final skein counts and move forward confidently.
Check recommended gauge and yarn weight on the pattern
Gauge is how many stitches or rows you get in a certain fabric size. Patterns usually show a gauge swatch and specify a yarn weight. If your gauge is off, your amigurumi might end up larger or smaller than planned. Aim to match the pattern’s gauge as closely as possible; you can adjust with a different hook size or tension if needed.
Pay attention to the exact weight and gauge noted. If the pattern calls for DK weight with a gauge of 22 stitches over 4 inches and your swatch shows 20 stitches, you’ll need to adjust—try a smaller hook or switch to the recommended yarn weight. Matching gauge saves you from size and texture surprises.
Different fibers can behave differently even with the same weight. A cotton DK can feel stiffer than wool DK, affecting final size. Compare your swatch to the pattern, and consider making a couple of swatches if you’re unsure. A little practice saves frustration.
Confirm finished size and stitch counts before buying
Before checkout, confirm the finished size listed in the pattern and compare it to your target size. If the numbers don’t match, you might need a different yarn weight or hook size. Check the total number of stitches and rounds as well. Knowing these counts helps you estimate how much yarn you’ll actually use and avoids overbuying or underbuying. If your fabric looks denser or looser, adjust your hook size and re-check the gauge. Catching this early saves headaches later.
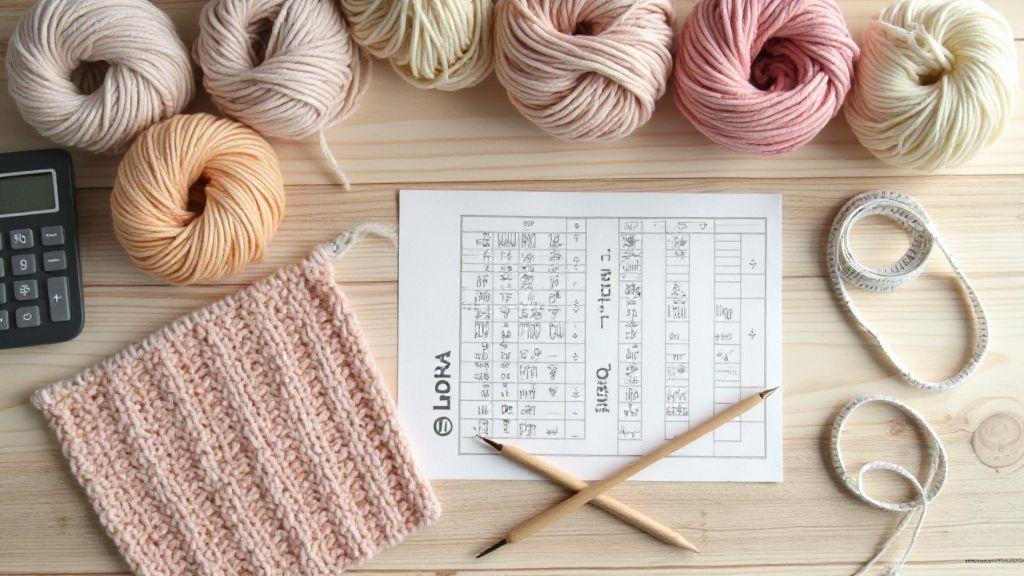
Make a gauge swatch for yarn calculation
An Amigurumi plan needs a trustworthy gauge. A gauge swatch helps you know exactly how much yarn the finished toy will need and which hook size to use. It’s a tiny test run that saves big headaches later. Measure by stitches, rows, and weight so your project fits the pattern.
A good swatch is your guide. If your swatch shows looser or tighter stitches than the pattern, adjust before committing to the full project. This saves you from buying too much yarn or ending up with a piece that won’t match the pattern’s proportions. Keep the swatch simple and use the same yarn and hook you’ll use for the final piece. Label the swatch with gauge stats for future reference.
Crochet the swatch with the same hook and stitch you will use
Crochet the swatch using the exact hook size and stitch pattern you plan for the full amigurumi. Consistency matters—the smallest variation can throw off final size. If your plan includes a round head or a particular body shape, test with a swatch that mimics those shapes. Keep track of tension as you crochet and adjust early if needed.
Measure stitches per inch and weigh the swatch for accuracy
Lay the swatch flat and measure stitches per inch and rows per inch. Weigh the swatch to see how much yarn it used. This weight helps estimate how much yarn the full piece will require. If your gauge doesn’t match, switch hooks or adjust tension. Honest assessment of your yarn behavior saves you from surprises later.
Use swatch numbers to scale to the full project
Translate the swatch’s stitches per inch and weight into estimates for the whole amigurumi. Use the swatch to estimate rounds, total stitches, and yarn length for each part. Round up a little when unsure; it’s easier to add stitches than redo sections. The swatch becomes your budgeting tool, guiding how much yarn to buy and how many skeins you’ll need.
Convert skeins to yards and meters
Know exactly how much yarn you have by converting skeins to a standard unit. Confirm each skein lists yardage; if not, weigh the skein and use wrap-per-inch (WPI) as a guide. Once you have yardage per skein, multiply to get total yards, then convert to meters if needed (1 yard = 0.9144 meters). Keep everything in one system to keep calculations reliable.
Keep an organized tally when counting lots of skeins. Write down how many skeins you have and their yardage per skein. If you switch between yards and meters, convert after totaling yardage to avoid mistakes. This habit saves you from missed stitches and length errors.
Read the yarn label for yards or meters per skein
The label is the truth source. Look for yards per skein or meters per skein. If both are listed, choose the unit you’re most comfortable converting. If yardage isn’t listed, check the skein weight and the approximate yardage per gram from the maker’s data. Use that to estimate, but note it’s less precise than a labeled yardage.
Multiply skeins by yardage and convert units if needed
Multiply skeins by yardage per skein to get total yards. If you need meters, convert with 1 yard = 0.9144 meters. For mixes of skeins with different yardages, calculate each line separately, then add them up. When a total yardage is given by the project guide, compare it to your final yardage. If you’re short, you’ll know you need more skeins; if you’re long, consider a lighter weight or a smaller hook.
Use a yarn yardage calculator for fast estimates
A yarn yardage calculator provides quick, informed estimates based on your pattern, gauge, and chosen stitches. It helps you plan purchases and avoid over- or under-buying. Save the yardage you expect for each part, then compare it to your stash to stay on track and minimize store trips. Keep a few notes from the calculator to stay organized from start to finish.
Input stitch gauge, finished dimensions, and stitch pattern
Enter your stitch gauge, the final dimensions you want, and the stitch pattern you’ll use. Different stitches consume yarn differently, so this input affects the total. Use this to ensure your plan aligns with the pattern’s demands.
Compare the calculator result to the pattern yarn requirements
Compare the calculator’s total with the pattern’s listed yardage. If they’re close, you’re in a good range. If there’s a big gap, adjust before buying. For multi-color amigurumi, verify each color’s yardage is covered.
Calculate stitch gauge to yardage by hand
You can calculate yardage by hand from your gauge. Make a swatch, weigh it, and count stitches per inch and rows per inch. Use these figures to estimate how many stitches the design requires and how much yarn they will consume.
Count stitches in a swatch and find yards per stitch
Find yards per stitch by dividing total yards by total stitches in your swatch. This lets you translate pattern stitches into yarn length. If your swatch is off, recalculate with a new swatch using the same yarn and needles.
Multiply yards per stitch by total pattern stitches
Multiply yards per stitch by the pattern’s total stitches to get a rough yardage. Include a small buffer (e.g., 10%) for seams, finishing, and ends. If you’re comparing yarn options, use the same yards-per-stitch metric to compare.
Round up to match available skein yardage sizes
Round up to the next whole skein size to ensure you have enough. Leftover yarn can be useful for future projects, so consider keeping a small buffer.
Adjust estimates for amigurumi stitch density
Different hooks, yarns, and techniques change fabric density. Tighter tension uses more yarn per inch; looser tension uses less but may require more stitches to keep shape. Test a small motif to see how density affects yardage, then scale up. Density also affects stuffing—overstuffing can make stitches look tight and consume more yarn, while under-stuffing can create flat areas. Fine-tune tension to balance yarn, stitch count, and form.
Know that tight single crochet uses more yarn than loose stitches
Tighter stitches consume more yarn per inch than looser stitches. If you aim for a snug amigurumi, plan for higher yarn use. A quick swatch in your chosen tension can give you a reliable baseline.
Test small motifs in the same stitch and stuffing level
Before the full piece, test small motifs with the same stitch and stuffing you’ll use. Note row count, yardage, and stuffing amount. Use this data to refine your overall estimate.
Increase estimates for dense shaping and small parts
Dense shaping and small parts (noses, ears, etc.) use more yarn per area. Add 10–30% more for compact features, depending on complexity. Run a quick trial of a dense part to calibrate your overall estimate.
Convert yarn weight to yardage when labels differ
If a skein’s label weight differs from the pattern’s recommendation, work in yards and convert as needed. Compare yardage per weight and adjust yardage estimates accordingly. Test a swatch with the converted yardage to confirm gauge, then refine your total yardage estimate.
Use label yards per gram or per ounce to convert weight to yards
Read yards per gram or ounce on each label, then multiply by the weight you have to obtain total yards. This helps you compare skeins of different weights and plan the exact yardage you’ll use. Verify gauge with a swatch after conversion.
Weigh partial skeins to calculate leftover yardage you have
Weigh remaining skeins after using a portion to know exactly how much is left. Compare remaining yardage to pattern requirements and adjust by slowing down, swapping in higher-yardage skeins, or resizing. A precise leftover count helps you decide when to start a new skein.
Track grams used as you work for precise totals
Record grams used for each section to compute exact totals. Translating grams to yards using the label’s yardage-per-gram keeps your final tally aligned with the pattern’s yardage target.
Plan for color changes and small parts
Plan where you’ll swap colors and where you’ll add small pieces. Visualize each change to prevent gaps or loose stitches. Map out stripes, facial details, and attachments in advance to avoid hunting for the right shade mid-round. Test color placement on a scrap piece if you’re unsure.
Estimate extra yarn for stripes, faces, and limbs you will sew on
Reserve extra yarn for sewn-on parts. For stripes, add a bit extra to account for joins. For faces, keep options in case you want to tweak features. For limbs or ears attached later, set aside a small stash that blends with the main colors.
Buy separate small skeins or scraps for contrast colors
Keep a few small skeins or scraps for contrast colors (eyes, mouths, buttons, patches). This prevents color clashes and makes testing easier. Start with a few key contrast colors commonly used in amigurumi.
Add 10–20% extra for color runs and practice pieces
Budget 10–20% more yarn for color runs and practice pieces. This cushion helps you experiment and correct mistakes without delaying the finish.
How to Estimate Yarn Quantity From a Pattern
You’ll use a straightforward approach: compare the pattern’s yardage to your yarn’s weight and tension. Check your gauge and adjust up or down. If the pattern uses color A heavily but you swap colors often, add a buffer. Keep a notebook or digital note with your color plan to track usage and remaining yardage.
When planning color changes and small parts, write down the exact sections where color changes occur and the anticipated length for decorative pieces. This makes it easier to estimate yarn for stripes, faces, and limbs and helps you decide whether to buy extra skeins. By staying organized, you’ll avoid overbuying or underbuying and finish with the look you want.
Final buying strategy: how much yarn do I need
Think of yarn planning like a recipe: enough of each color, but not so much you waste it. Use a practical mix of skeins and consider shade differences across dye lots. Plan by color blocks—body, head, arms, legs, and accents—and estimate grams or meters for each. Round up to cover small shortfalls and keep a stash for future projects.
Buy one extra skein or 10–25% more than your estimate
Always add a cushion. One extra skein or 10–25% more than your estimate reduces risk if you miscount or if a color has longer yardage than expected. It also helps if you need to rework a part without another store trip. A little cushion saves time, stress, and ensures a cohesive final piece.
Match dye lot and brand to avoid shade differences
Shade consistency matters as much as stitch count. Always match dye lot and brand when stocking up. If you mix brands, swatch first to ensure similar behavior. A quick gauge swatch can reveal differences that affect your final piece.
Keep receipts and label stash to return or reuse leftovers
Save receipts and label leftovers. Store leftovers in labeled containers so you can reuse or return items if needed. When you reorder, your labels and notes will save you guessing and keep your craft organized and affordable.

Clara Fern — Crochet Artist & Amigurumi Designer
Clara Fern is a crochet artist and amigurumi designer based in Austin, Texas. With 9 years of experience working with yarn and hook, she transformed a lifelong passion for handcraft into a creative mission: making amigurumi accessible, fun, and deeply rewarding for crafters of all levels.
Clara discovered amigurumi during a trip to Japan in 2017, where she fell in love with the art of bringing tiny characters to life through crochet. Back home in Texas, she spent years studying color theory, design principles, and advanced crochet techniques — developing her own signature style that blends kawaii aesthetics with original character design.
Through maclafersa.com, Clara shares everything she has learned — from choosing the right yarn and reading your first pattern, to designing fully original amigurumi characters from scratch. Her writing is known for being clear, detailed, and genuinely helpful, with no steps skipped and no secrets kept.
When she’s not crocheting, Clara enjoys watercolor painting, visiting local yarn shops, and drinking way too much coffee while sketching new character ideas.


