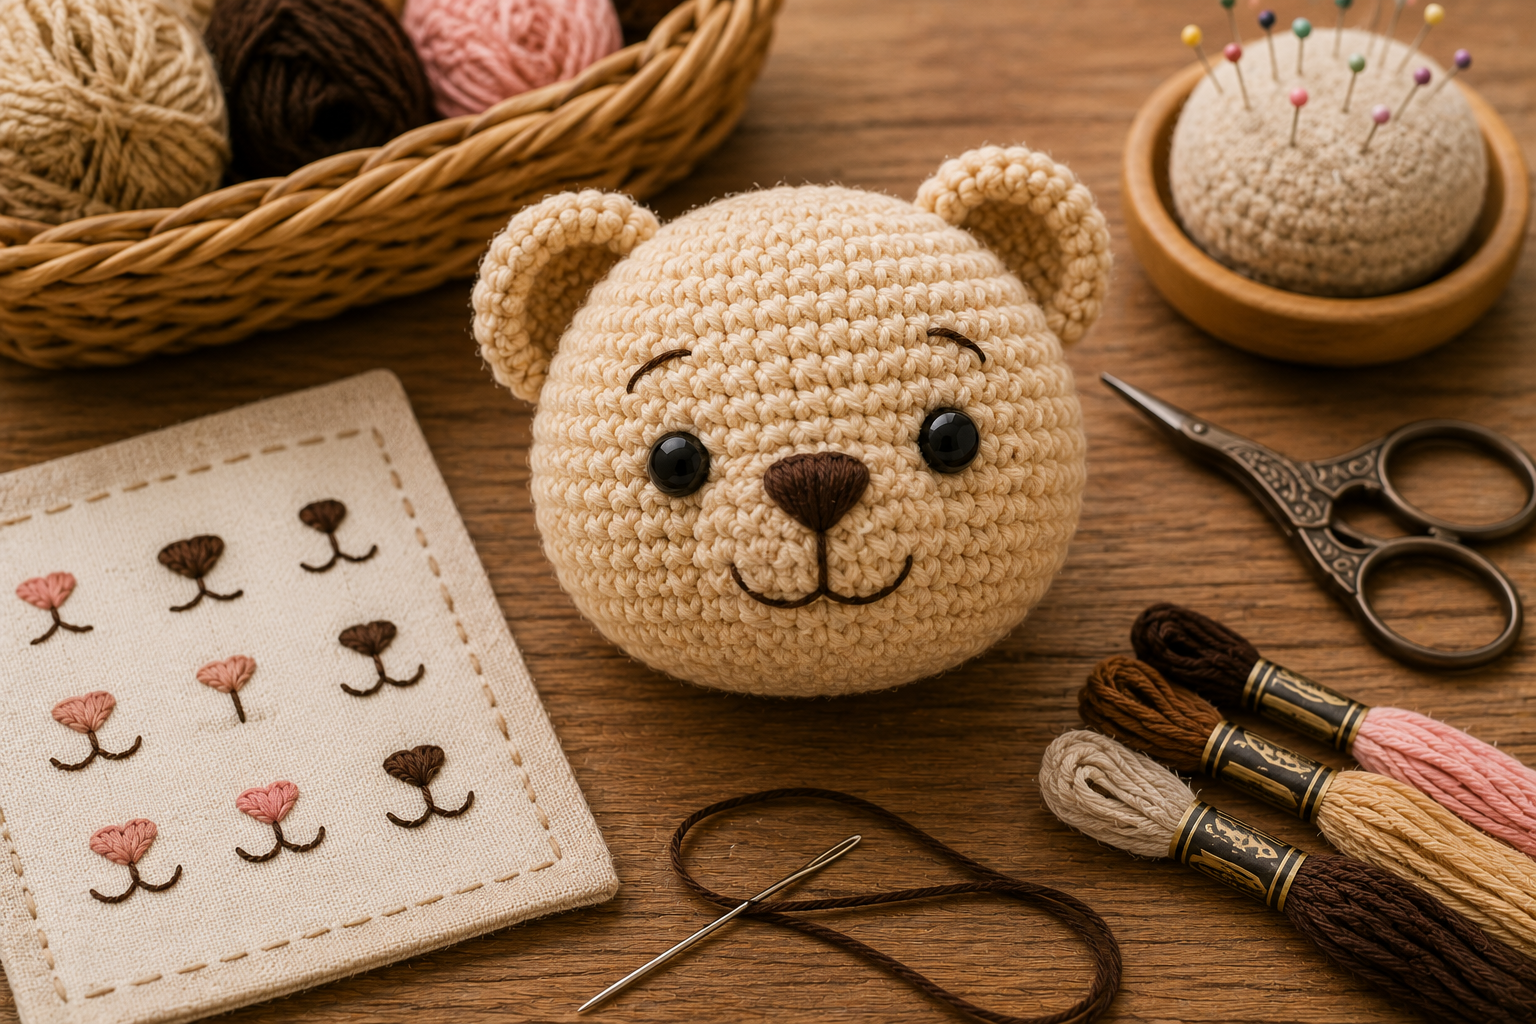
How to Embroider a Cute Amigurumi Mouth and Nose
The smallest details often make the biggest difference in amigurumi.
You can crochet a perfectly shaped head, carefully position the eyes, and create beautiful proportions, but the personality of the character often doesn’t fully appear until you add the nose and mouth.
A tiny change in the angle of a smile can make a bear look cheerful instead of neutral. A triangular nose can create a classic teddy-bear expression, while a tiny round nose may make the same character look younger and softer. Even moving the mouth only one stitch lower can noticeably change the entire face.
That’s why facial embroidery deserves just as much attention as crocheting the character itself.
The good news is that you don’t need advanced embroidery skills to create adorable amigurumi faces. With a tapestry needle, a small amount of yarn or embroidery floss, careful placement, and a few simple techniques, you can create clean noses and mouths that give your characters much more personality.
In this guide, you’ll learn how to embroider a cute amigurumi mouth and nose step by step, including placement, shaping, thread selection, symmetry, and techniques for creating different expressions.
Why Embroider the Nose and Mouth?
There are several ways to create facial features on amigurumi.
You can use plastic noses, felt pieces, crocheted appliqués, buttons, or embroidery.
Embroidery is particularly versatile because it allows you to control almost every detail.
You can change:
- size
- shape
- thickness
- position
- color
- expression
It also adds very little bulk to the face.
This makes embroidery especially useful for small amigurumi where plastic components may look disproportionately large.
Another advantage is customization.
Two characters made from exactly the same crochet pattern can look completely different simply because their noses and mouths are embroidered differently.
Materials You’ll Need
You don’t need many supplies.
For most projects, you’ll need:
- finished or nearly finished amigurumi head
- embroidery floss or yarn
- tapestry or embroidery needle
- scissors
- pins
- stitch markers
- optional fabric-safe marking tool
The exact thread depends on the size of your amigurumi.
Embroidery floss works particularly well for small and medium characters because you can control its thickness.
For larger plush amigurumi, yarn may create a better proportion.
Choosing the Right Thread
Thread thickness is one of the first things to consider.
If your embroidery thread is too thick, the nose may dominate the entire face.
If it’s too thin, the feature may disappear against the crochet texture.
For miniature amigurumi, consider using only a few strands of embroidery floss.
For medium cotton amigurumi, full embroidery floss or thin yarn may work well.
For large plush characters, regular yarn can often create stronger facial features.
Before threading your needle, place the yarn across the character’s face.
This simple test gives you a good idea of whether the thickness feels proportional.
What Color Should You Use?
Black is the traditional choice for many amigurumi noses and mouths, but it isn’t your only option.
Dark brown can create a softer appearance, especially on bears, bunnies, dogs, and woodland animals.
Gray can work beautifully with pale or pastel-colored characters.
You can even experiment with:
- dark pink
- burgundy
- navy
- beige
- contrasting colors
The best color depends on the style you’re trying to achieve.
If the character has a very soft pastel palette, a dark brown nose may blend more naturally than pure black.
Embroider Before or After Stuffing?
In many cases, facial embroidery is easier when the head has been at least partially stuffed.
Stuffing gives the head its final three-dimensional shape.
Without stuffing, the crochet fabric lies differently, and facial features that look perfectly positioned on a flat head may shift once the head becomes round.
A useful approach is to stuff the head enough to establish its final shape while keeping the opening accessible.
Then embroider the face.
The open head gives you more control over hiding and securing yarn ends.
However, facial embroidery can also be added after the head is completely closed. You’ll simply need to hide the yarn tails inside the finished piece.
Start by Finding the Center of the Face
Before embroidering anything, determine the center of the face.
Don’t rely entirely on visual estimation.
Use the crochet stitches as a grid.
Place a pin at the approximate center between the eyes.
Then count stitches to each side.
Also count the rounds vertically.
This helps ensure that the nose is centered rather than leaning slightly left or right.
For characters with a muzzle, use the center of the muzzle as your primary reference.
Test Placement With Pins
Pins are one of the most useful tools for facial embroidery.
Before making a permanent stitch, use pins to mark:
- top of the nose
- bottom of the nose
- left edge
- right edge
- mouth center
- mouth corners
Then look at the face from a normal viewing distance.
Move the pins if necessary.
A difference of one stitch can completely change the expression, so it’s worth spending a few minutes experimenting.
Consider the Relationship Between Eyes and Nose
The nose shouldn’t be positioned independently from the eyes.
All facial features need to work together.
A nose placed relatively close to the eyes creates a compact face.
A lower nose creates more space in the center of the face and may make the muzzle appear longer.
Before embroidering, look at the triangle created by the two eyes and the nose.
Does it feel balanced?
If not, adjust the nose before stitching.
How to Embroider a Simple Triangular Nose
A triangular nose is one of the most popular choices for teddy bears, cats, dogs, foxes, and many other animals.
Start by marking three points:
- upper left
- upper right
- lower center
These points define the triangle.
Bring your needle out at one upper corner.
Insert it at the other upper corner to create the top edge.
Then begin filling the triangle with parallel stitches running from the upper edge toward the lower center area.
Place each stitch closely beside the previous one.
Continue until the crochet fabric beneath the nose is completely covered.
The result should be a smooth, filled triangle.
Build the Nose Gradually
Don’t try to create a thick nose with only one or two bulky stitches.
Several controlled stitches usually produce a cleaner result.
As you work, stop frequently and check the shape.
Make sure both sides remain balanced.
If one side begins extending farther outward, correct it before adding additional layers.
Building the nose slowly gives you much more control over the final shape.
How to Create a Round Nose
A round or oval nose can create a particularly sweet expression.
Mark the approximate width of the nose.
Then make several vertical or horizontal stitches across the area.
Gradually add shorter stitches near the outer edges to round the shape.
For example, the center stitches might be slightly longer while the outer stitches become progressively shorter.
This creates an oval silhouette.
You can add another layer if you want the nose to appear more raised.
How to Create a Tiny Minimalist Nose
Small amigurumi often don’t need a fully filled nose.
Sometimes one or two stitches are enough.
A tiny horizontal stitch can create a simple nose for a miniature bear or bunny.
You can then add a short vertical line beneath it and two small mouth curves.
This minimalist approach works particularly well for:
- keychains
- mini amigurumi
- simple kawaii characters
- small dolls
When working at a tiny scale, less is often more.
Add the Vertical Line Below the Nose
Many classic animal faces include a short line extending downward from the center of the nose.
This line connects the nose to the mouth.
Bring the needle out at the bottom center of the nose.
Insert it one or two rounds lower, depending on the size of the face.
Keep the line centered.
This small detail creates a clear anchor point for the mouth.
How to Embroider a Simple Smile
A classic amigurumi smile often resembles a small letter “Y” turned into a mouth shape.
After creating the vertical line below the nose, bring the needle out at its lower endpoint.
Create one diagonal stitch toward the left.
Return to the center.
Create another diagonal stitch toward the right.
The result is a simple smiling mouth.
You can change the expression by adjusting the angle and length of these two stitches.
Create a Curved Smile With Multiple Stitches
If you want a softer curved mouth, avoid using one long straight stitch.
Instead, create the curve using several shorter stitches.
For example:
- Start at the center beneath the nose.
- Make a short diagonal stitch.
- Continue with another small stitch.
- Gradually follow the desired curve.
Short stitches allow you to control the shape more precisely.
This technique is particularly helpful for larger amigurumi.
Use Couching for Smooth Curves
Another useful technique for creating curved mouths is couching.
First, place one longer strand of thread across the surface in the shape you want.
Then use tiny stitches with another thread to hold that strand in place at strategic points.
This lets you create smooth curves without forcing the embroidery thread to follow the crochet stitches naturally.
Couching can be especially useful for:
- broad smiles
- curved mouths
- cartoon expressions
- larger amigurumi
Keep the securing stitches subtle so they don’t distract from the mouth itself.
How Mouth Angle Changes Expression
One of the most fascinating things about facial embroidery is how much emotion can come from tiny adjustments.
Upward Curves
Create a cheerful or friendly expression.
Neutral Horizontal Mouth
Creates a calm or minimalist appearance.
Slight Downward Curves
Can make the character look sad, concerned, or thoughtful.
Asymmetrical Mouth
Can create a mischievous or playful expression.
Open Mouth
Can suggest excitement or surprise.
Before securing the embroidery, experiment with temporary thread placement.
Create a Happy Open Mouth
For a more expressive character, you can embroider a small open mouth.
Outline a tiny oval or curved shape beneath the nose.
Fill the center using dark thread.
You can optionally add a tiny pink section to suggest a tongue.
This works particularly well for cartoon-inspired amigurumi.
However, keep the scale appropriate.
On a small face, an elaborate open mouth can easily become overwhelming.
Add a Tiny Tongue
A small pink stitch can add a lot of personality.
After creating a dark open mouth, place one or two pink stitches near the bottom.
The effect should be subtle.
You don’t need to fill half the mouth with pink.
A tiny accent is usually enough to suggest a tongue.
This detail works well for:
- puppies
- bears
- playful monsters
- cheerful characters
Create a Cat-Style Mouth
Cats often look adorable with a small triangular nose and a delicate curved mouth.
After embroidering the nose, add a short vertical line beneath it.
From the bottom of that line, create two small curves moving outward.
Keep them relatively short.
You can also add embroidered whiskers afterward.
For a softer look, use dark brown or gray instead of black.
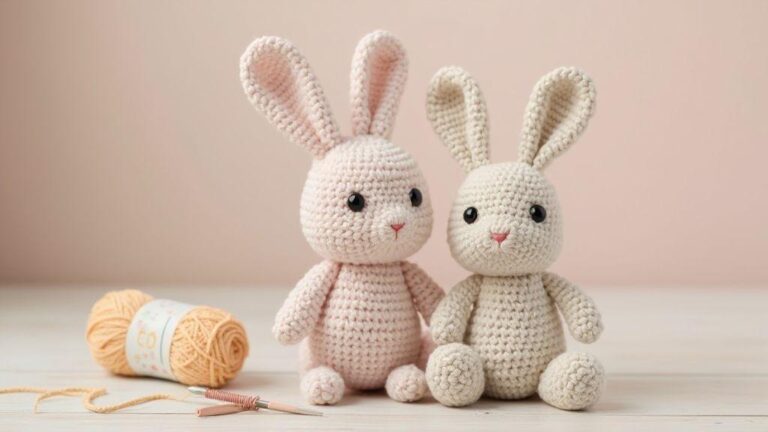
Create a Bunny Nose
Bunnies often look particularly cute with small pink noses.
A tiny inverted triangle works beautifully.
Use pink embroidery floss and keep the shape compact.
Add a short line beneath the nose and a subtle mouth.
Because bunny faces often have a gentle appearance, avoid making the mouth excessively large.
Create a Teddy Bear Nose
For a classic teddy-bear face, a broad triangular or oval nose works well.
Dark brown is an excellent alternative to black.
Fill the nose carefully with parallel stitches.
Then add a vertical line beneath it and two gentle mouth curves.
The combination creates the familiar traditional teddy expression.
Add Highlights to a Large Nose
For larger embroidered noses, a tiny highlight can create additional dimension.
After filling the nose with dark yarn, add one small stitch using a lighter color.
White, cream, or light brown may work depending on the design.
Place the highlight toward one upper side of the nose.
Keep it small.
The goal is to suggest reflected light rather than create a large contrasting mark.
Add Blush After the Mouth
Once the nose and mouth are finished, you may want to add blush beneath the eyes.
This can make the character feel warmer and more expressive.
Blush can be created with:
- pink embroidery
- felt
- yarn
- appropriate doll-making coloring materials
Position it symmetrically below and slightly outward from the eyes.
Check how it interacts with the mouth before making it permanent.
Keep Your Tension Consistent
Embroidery tension is extremely important.
If you pull the thread too tightly, it can sink into the crochet fabric.
This may distort the muzzle or create an unwanted indentation.
If the thread is too loose, the stitches may lift away from the surface.
Aim for enough tension to keep the embroidery neatly against the crochet without compressing the stuffing.
After every few stitches, gently run your finger over the embroidered area.
It should feel smooth and secure.
Don’t Split the Crochet Yarn Accidentally
When inserting the needle, try to pass between crochet stitches rather than splitting individual yarn fibers whenever possible.
Splitting the yarn can make the embroidery harder to reposition.
It may also create a less polished finish.
A blunt tapestry needle is useful because it naturally tends to move between yarn strands rather than piercing directly through them.
Hide the Starting Yarn Tail
If the head is still open, hiding the starting tail is easy.
Bring the needle from inside the head to the desired starting position.
Leave the yarn tail inside.
After the embroidery is finished, secure the thread appropriately and hide the remaining tail inside as well.
If the head is already closed, insert the needle through a less visible area and bring it out at the embroidery point.
Pull gently until the tail disappears into the stuffing.
How to Finish the Embroidery
Once you’re satisfied with the nose and mouth, secure the thread without creating a visible knot on the face.
One common method is to pass the needle through the head and bring it out somewhere away from the embroidery.
Gently tension the thread.
Cut it close to the surface.
The remaining end retracts into the stuffing.
The exact finishing method may depend on the yarn and construction, so make sure the embroidery remains secure.
Check Symmetry From the Front
After finishing, place the amigurumi directly in front of you.
Look at it straight on.
Check:
- Is the nose centered?
- Is one side wider?
- Is the vertical line straight?
- Are the mouth curves similar?
- Does the mouth align with the eyes?
Minor asymmetry is natural in handmade work, but obvious differences can usually be corrected before the thread is fully secured.
Check the Face From the Side
Don’t evaluate the embroidery only from the front.
Rotate the head.
A nose that appears centered from the front may protrude unevenly because of inconsistent stitch tension.
Also check whether the embroidery sits smoothly against the muzzle.
This is especially important for characters with large three-dimensional snouts.
Take a Photo Before Finalizing
Photographs are surprisingly useful for checking amigurumi faces.
Take a straight-on photo with your phone.
Look at the image instead of the physical character.
You may notice:
- crooked placement
- uneven mouth corners
- asymmetrical nose shape
- incorrect spacing
These details sometimes become easier to identify in a flat photograph.
What If the Nose Looks Wrong?
Remove it.
Embroidery is relatively forgiving.
If you haven’t secured the thread permanently, carefully pull out the stitches and try again.
Don’t keep adding more stitches to a badly shaped nose hoping it will eventually improve.
Sometimes restarting produces a much cleaner result.
Professional-looking amigurumi often involves redoing small details until they feel balanced.
Avoid Over-Embroidering
A common beginner mistake is continuing to add stitches after the nose already looks complete.
Too many layers can create a bulky lump.
The nose may begin to sit unnaturally far above the crochet surface.
Stop once the underlying fabric is covered and the shape looks smooth.
If you want a dimensional nose, add layers deliberately rather than automatically.
Use the Crochet Stitches as a Grid
One of the greatest advantages of embroidering on crochet is that the stitches provide built-in reference points.
Instead of thinking:
“I’ll put the nose somewhere around here,”
think:
“The nose begins between these stitches on Round 14 and spans four stitches.”
This makes your results much more reproducible.
It’s especially useful if you’re designing a pattern that other people will follow.
Record Placement When Designing Patterns
If you’re creating your own amigurumi design, document the facial placement carefully.
Record:
- nose round
- nose width
- nose height
- mouth position
- distance from eyes
- thread type
- number of embroidery strands
Take close-up photographs as well.
This information makes it much easier to reproduce the same expression later or explain it clearly in a written pattern.
Match the Mouth to the Character’s Personality
Before choosing a mouth shape, think about the character itself.
A sleepy bear might need only a tiny neutral mouth.
A cheerful bunny could have a gentle smile.
A mischievous fox might benefit from a slightly asymmetrical expression.
A cartoon puppy could have an open mouth and tiny tongue.
A minimalist doll may look better with one simple embroidered line.
The mouth should reinforce the personality rather than simply fill empty space beneath the nose.
Common Mistakes to Avoid
Several mistakes can make facial embroidery look less polished.
Embroidering Before Checking Placement
Always test with pins first.
Using Thread That’s Too Thick
The features may overwhelm the face.
Pulling Too Tightly
This can distort the crochet fabric.
Making the Nose Too Large
A large nose changes the proportions of the entire face.
Ignoring the Eyes
The eyes, nose, and mouth should work as one composition.
Using One Long Stitch for a Complex Curve
Several smaller stitches usually create better control.
Adding Too Many Details
Simple faces are often the cutest.
Refusing to Redo a Mistake
If the placement looks noticeably wrong, removing a few stitches is usually worth the effort.
Practice Different Faces on a Test Sphere
If facial embroidery makes you nervous, crochet a simple practice sphere.
Use pins to mark eyes and then experiment with several nose and mouth combinations.
Try:
- triangular nose + smile
- round nose + neutral mouth
- pink bunny nose
- teddy-bear nose
- open mouth
- asymmetrical smile
Take photos of each version.
This exercise can help you understand how small changes influence expression without risking a completed project.
Safety Considerations
Embroidered features are often chosen when makers want to avoid hard plastic facial components, but secure construction still matters.
Make sure embroidery is firmly anchored.
Avoid long loose loops that can catch on objects or fingers.
If the amigurumi is intended as a toy, consider the intended age group and follow the relevant toy-safety requirements for your region.
Every part of the finished piece should be appropriate for its intended use.
A Simple Facial Embroidery Checklist
Before considering the face complete, check that:
- the nose is centered
- the nose size matches the face
- the thread thickness is appropriate
- the embroidery tension is even
- the vertical line beneath the nose is straight
- the mouth is balanced
- both sides of the smile are intentional
- yarn ends are securely hidden
- the expression works with the eyes
- the face looks good from multiple angles
If everything feels balanced, resist the temptation to keep adding details.
Sometimes the simplest expression is the most effective.
Final Thoughts
Learning how to embroider a cute amigurumi mouth and nose is one of the easiest ways to give your crochet characters more personality.
The technique itself doesn’t need to be complicated. What matters most is thoughtful placement, appropriate thread thickness, controlled tension, and understanding how small changes affect expression.
Start by establishing the center of the face and testing placement with pins. Build the nose gradually rather than trying to create the entire shape with one bulky stitch. Then add the mouth using short, controlled stitches that complement the character’s personality.
Experiment with triangular teddy-bear noses, tiny bunny noses, minimalist lines, gentle smiles, open mouths, and even small tongues.
Most importantly, don’t rush the face.
You’ve probably already spent hours crocheting and assembling your amigurumi. Spending a few extra minutes adjusting the nose or redoing an uneven smile can dramatically improve the final result.
With practice, facial embroidery becomes much less intimidating. Eventually, those few tiny stitches will become one of your favorite parts of the process—because they’re the moment when a crocheted shape stops looking like a collection of yarn and stuffing and starts looking like a character with a personality of its own.
Clara Fern — Crochet Artist & Amigurumi Designer
Clara Fern is a crochet artist and amigurumi designer based in Austin, Texas. With 9 years of experience working with yarn and hook, she transformed a lifelong passion for handcraft into a creative mission: making amigurumi accessible, fun, and deeply rewarding for crafters of all levels.
Clara discovered amigurumi during a trip to Japan in 2017, where she fell in love with the art of bringing tiny characters to life through crochet. Back home in Texas, she spent years studying color theory, design principles, and advanced crochet techniques — developing her own signature style that blends kawaii aesthetics with original character design.
Through maclafersa.com, Clara shares everything she has learned — from choosing the right yarn and reading your first pattern, to designing fully original amigurumi characters from scratch. Her writing is known for being clear, detailed, and genuinely helpful, with no steps skipped and no secrets kept.
When she’s not crocheting, Clara enjoys watercolor painting, visiting local yarn shops, and drinking way too much coffee while sketching new character ideas.