How to Add Wire to Amigurumi Safely for Posing
One of the most exciting ways to make an amigurumi character more dynamic is to give it poseable limbs. Instead of arms and legs that remain permanently in one position, an internal wire structure can allow a finished character to sit, wave, bend its arms, turn its head, or hold different poses.
Wire armatures are especially popular in collectible amigurumi, dolls, fantasy creatures, animals, and characters designed primarily for display.
However, adding wire to amigurumi requires more planning than simply inserting a piece of metal inside a crocheted limb.
An improperly prepared wire can eventually poke through the stuffing or crochet fabric. Sharp ends can damage yarn, and wire that’s too thin may break after repeated bending. For toys intended for young children, internal wire can also introduce hazards that make a poseable construction inappropriate.
The goal is therefore not only to create movement, but to create an internal structure that’s as secure and durable as possible for the project’s intended use.
In this guide, we’ll explore how to add wire to amigurumi for posing, how to choose suitable wire, how to protect the ends, how to build a simple armature, and when it’s better to avoid wire altogether.
What Is an Amigurumi Wire Armature?
An armature is an internal framework that supports or shapes a three-dimensional object.
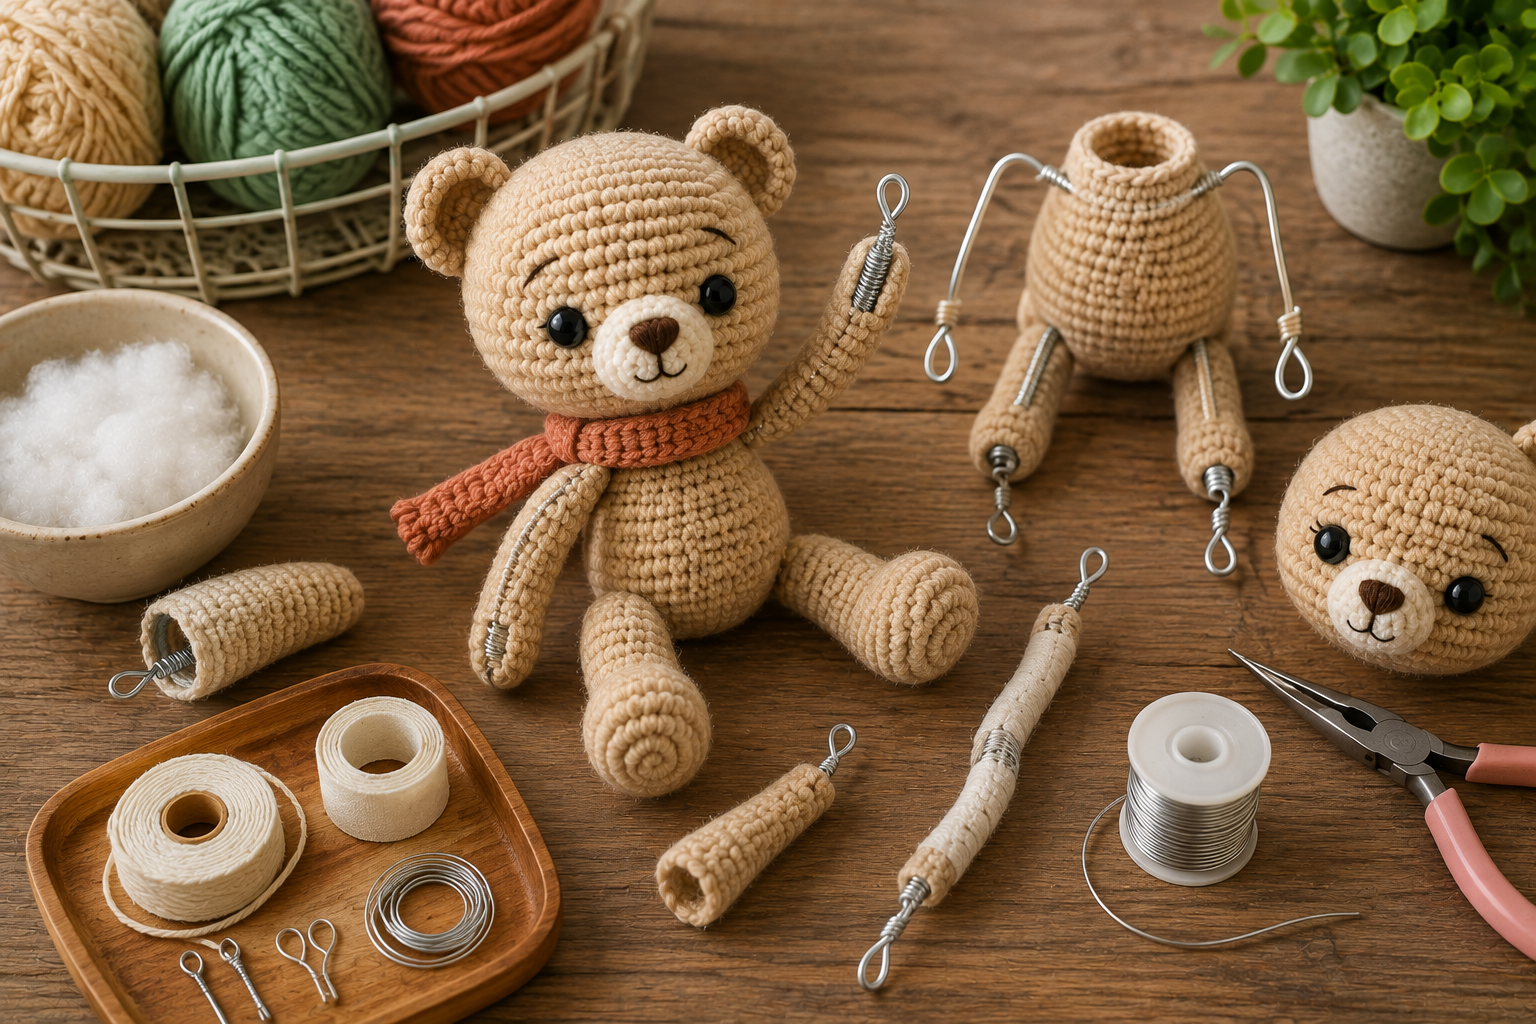
In amigurumi, the armature is usually made from flexible wire positioned inside the crocheted body.
Think of it as a simplified skeleton.
Depending on the design, wire may run through:
- arms
- legs
- torso
- neck
- tail
- wings
- ears
A simple doll might have one continuous piece of wire running from one hand through the shoulders and into the opposite hand.
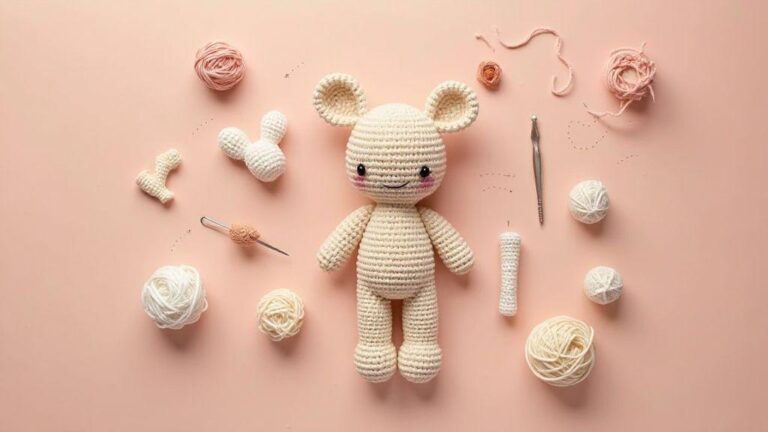
A more elaborate character might have a complete internal structure connecting the arms, legs, torso, and neck.
The complexity should match what the character actually needs to do.
Why Add Wire to Amigurumi?
The main reason is poseability.
A standard stuffed arm naturally hangs according to gravity and its attachment point.
A wired arm can potentially be bent into different positions.
This allows a character to:
- wave
- hold its hands together
- raise an arm
- bend its knees
- sit more naturally
- position its tail
- support long ears
- maintain a particular posture
Wire can also provide structural support.
For example, a long crocheted neck may bend under the weight of a large head. An appropriately designed internal support can help maintain the intended position.
Wire Is Best for Display Amigurumi
Before adding any internal armature, consider how the finished piece will be used.
Wire is generally most appropriate for:
- collectible amigurumi
- display dolls
- photography props
- decorative characters
- adult-owned crochet figures
For toys intended for babies or young children, a soft construction without internal wire is generally the safer design choice.
Even well-protected wire can potentially become exposed if a toy is heavily bent, chewed, pulled, damaged, or repeatedly washed.
When designing children’s toys, follow the applicable toy-safety requirements in the country where the finished product will be used or sold.
Choosing Wire for Amigurumi
The ideal wire needs to balance two qualities:
flexibility and strength.
It needs to bend when you intentionally reposition the character while remaining firm enough to hold that position.
If the wire is extremely thin, it may not support the limb.
If it’s excessively thick, bending the character may become difficult and could place unnecessary pressure on the crochet fabric.
The appropriate thickness depends largely on the size and weight of the project.
A miniature doll requires much less structural support than a large crocheted dragon.
Common Wire Options
Several types of craft wire may be used for decorative poseable figures.
Aluminum Craft Wire
Aluminum armature or craft wire is popular because it’s relatively lightweight and easy to shape.
It can work well for many display amigurumi projects.
Coated Craft Wire
Wire with a protective coating provides an additional barrier between the metal and surrounding materials.
However, the coating doesn’t eliminate the need to protect cut ends.
Floral Wire
Some makers use floral wire for small or lightweight structures.
Its suitability depends on its thickness, stiffness, coating, and the size of the project.
Very thin floral wire may not provide enough support for larger amigurumi.
Whatever material you choose, avoid rusty, damaged, brittle, or unidentified scrap wire.
Avoid Extremely Thin Wire
It’s tempting to choose very thin wire because it’s easy to insert into narrow limbs.
But thin wire has disadvantages.
It may:
- fail to hold a pose
- bend too easily
- create concentrated pressure against the fabric
- fatigue after repeated bending
If the limb is large enough, using an appropriately thicker wire is generally preferable to relying on a fragile strand.
For certain designs, makers also create reinforced structures rather than depending on one very thin wire.
Never Leave Cut Wire Ends Exposed
This is one of the most important rules when making a wired amigurumi.
Cut wire ends can be sharp.
They should never be left pointing directly toward the crochet fabric.
Even if the wire initially sits in the center of the stuffing, movement and compression can gradually shift its position.
A sharp end could eventually work toward the outer surface.
Every endpoint therefore needs careful protection.
Create Loops at the Ends
One useful method is bending the end of the wire back onto itself.
Using suitable pliers, curve the final section into a small closed loop.
Instead of ending in a sharp point, the wire now ends in a rounded shape.
Make the loop as smooth and compact as possible.
Check it carefully with your fingers.
There shouldn’t be a sharp tip projecting outward.
This is especially important at the ends of arms and legs, where the armature may extend relatively close to the crocheted surface.
Wrap the Wire
After shaping the wire, many amigurumi makers wrap the armature before inserting it.
Possible wrapping materials include suitable fabric strips, yarn, or other soft protective materials appropriate for the project.
The purpose is to create a barrier between the metal structure and the crochet fabric.
Wrapping can also:
- soften the armature
- reduce shifting
- help stuffing grip the structure
- add thickness to narrow wire
Pay particular attention to joints and endpoints.
The wrapping should remain secure rather than sliding along the wire.
Why Tape Alone Isn’t a Perfect Solution
Tape is sometimes used when building craft armatures, but it shouldn’t create a false sense of security.
Some adhesives may deteriorate over time.
Tape can also shift or become less effective after repeated movement.
If you’re using a wrapping or covering material, the underlying wire should still be shaped safely, particularly at its ends.
A rounded wire endpoint plus protective covering provides a more thoughtful construction than simply placing tape over a sharp cut edge.
Plan the Armature Before Stuffing
Don’t wait until the amigurumi is almost finished to decide where the wire should go.
Before inserting anything, sketch the internal structure.
Mark where the wire needs to travel.
For a doll, a basic plan might look like:
Left hand → left arm → shoulders → right arm → right hand
Another piece might support:
Torso → neck → head
A more complete structure might connect the legs to the torso.
Planning prevents unnecessary overlaps and helps you determine where different wire sections should connect.
A Simple Arm Armature
For a basic poseable doll, the arms are a good place to begin.
Measure approximately how far the wire needs to travel from one hand through the shoulders to the other hand.
Leave additional length for creating safe loops at both ends.
Cut the wire using an appropriate wire cutter.
Don’t use your crochet scissors.
Crochet scissors aren’t designed for metal and may become damaged.
Create a small rounded loop at each end using pliers.
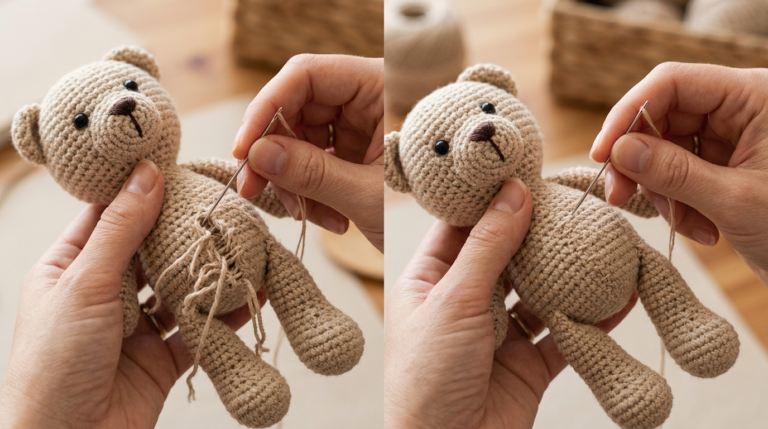
Then wrap or otherwise appropriately protect the wire before installation.
Insert the Wire Before Final Stuffing
Wire is generally easier to position while the body remains open.
If you’re working from the bottom upward, determine when the armature needs to be inserted according to the construction of the pattern.
Place the protected wire inside the crocheted structure.
Then gradually add stuffing around it.
The stuffing should surround the wire rather than sitting only on one side.
This helps keep the armature centered.
Surround the Wire With Stuffing
The wire shouldn’t sit directly against the crochet fabric whenever it can reasonably be avoided.
Create a cushioning layer around the armature.
Add small portions of stuffing gradually.
Push some stuffing between the wire and the exterior fabric.
Then rotate the piece and check all sides.
The goal is for the wire to remain buried within the center of the limb.
This also prevents the finished arm or leg from feeling noticeably hard along one side.
Don’t Overstuff Around the Wire
There’s an important balance.
Too little stuffing may allow the wire to move around inside the limb.
Too much stuffing can make the limb difficult to bend.
Overstuffing can also stretch the stitches and increase pressure against the outer crochet fabric.
For poseable limbs, you may want slightly more flexibility than you would in a completely rigid stuffed component.
Test the movement as you stuff.
Building a Poseable Neck
Large-headed amigurumi can sometimes benefit from internal neck support.
However, this area requires careful design because the weight of the head places considerable stress on the connection.
A neck support shouldn’t terminate as an unprotected wire point beneath the head.
The support needs to be appropriately shaped, padded, and positioned so that pressure isn’t concentrated in one small area.
For decorative dolls, some makers extend a protected armature farther into the head so the load is distributed more effectively.
The exact construction depends on the size and proportions of the character.
Adding Wire to Legs
Poseable legs can allow a character to sit or change stance.
A basic leg structure may extend from one foot upward toward the hips.
In more advanced armatures, the two leg wires connect through the pelvis or torso.
As with the arms, protect the lower endpoint carefully.
The wire shouldn’t end as a sharp point inside the foot.
Create a loop and add protective wrapping.
Then surround the structure evenly with stuffing.
Adding Wire to a Tail
Tails are excellent candidates for wire support.
A wired tail can create expressive poses and may even help balance some display characters.
Measure the tail before cutting the wire.
Make the armature slightly shorter than the full crocheted tail so the protected endpoint doesn’t press directly against the final tip.
Create a rounded end.
Wrap the wire.
Insert it carefully and add stuffing around it.
For long tails, check the position as you continue stuffing.
Wired Ears
Very long ears may benefit from internal support, particularly in decorative characters.
However, thin ears provide less room for padding around wire.
This makes protection especially important.
An alternative is to use construction methods that create firmness without metal, depending on the design.
For example, double-layer crochet or other structural techniques may provide enough support for some ears.
Don’t add wire simply because it’s possible. Use it when it provides a meaningful benefit.
Connect Armature Sections Carefully
Complex characters may require multiple pieces of wire.
Avoid leaving unprotected intersections where cut ends could shift.
Connections should be stable and appropriately covered.
For highly complex poseable sculptures, specialized doll-making armature systems may be more appropriate than improvising an elaborate internal skeleton from random craft wire.
Remember that every additional connection creates another potential point of movement or failure.
Simpler is often better.
Test the Armature Before Inserting It
Once you’ve created the wire structure, test it outside the amigurumi.
Bend the arms.
Move the legs.
Check the neck.
Ask:
Does the wire hold its position?
Is it too difficult to bend?
Does any section feel weak?
Are all endpoints smooth?
Are there any sharp projections?
It’s much easier to correct the armature before it’s surrounded by stuffing and enclosed inside the character.
Test the Range of Motion
A poseable amigurumi doesn’t need the flexibility of a human body.
Trying to create extreme movement may place unnecessary stress on the wire and crochet fabric.
Instead, determine the useful range of motion.
For example, an arm may only need enough movement to:
- rest at the side
- bend slightly forward
- raise for a wave
A leg might need only enough flexibility for sitting and standing-style poses.
Moderate movement is usually more practical than extreme bending.
Don’t Bend the Same Point Repeatedly
Metal can weaken through repeated bending.
If the same tiny section is bent backward and forward over and over, the wire may eventually fatigue and break.
When posing the character, create gradual curves instead of extremely sharp bends whenever possible.
This distributes stress over a larger section.
It’s another reason poseable amigurumi is generally better suited to display than constant play.
Wire Thickness Should Match the Character
There is no universal wire diameter that’s perfect for every amigurumi.
The appropriate choice depends on:
- character size
- yarn weight
- limb diameter
- stuffing density
- weight of the head
- desired movement
- wire material
Rather than selecting wire based on one fixed recommendation, test a small sample.
Place the protected wire inside a test crochet tube similar in diameter to the intended limb.
Stuff it.
Then see whether the limb bends comfortably and holds its position.
Consider Double Wire Carefully
For larger decorative characters, one wire may sometimes feel too flexible.
A reinforced structure may provide additional support.
However, adding more wire also adds stiffness and bulk.
Before doubling anything, test whether using a more appropriate wire thickness would create a cleaner structure.
The armature still needs enough surrounding space for protective material and stuffing.
Keep Wire Away From Safety-Eye Hardware
If your amigurumi uses safety eyes, remember that their posts and washers occupy space inside the head.
Plan the neck or head armature so it doesn’t press directly against this hardware.
This is another reason to examine the internal layout before final assembly.
When several rigid components are concentrated in one small area, positioning becomes much more important.
Wire and No-Sew Amigurumi
No-sew construction can make armature installation more challenging because the body and limbs may be integrated during crocheting.
You need to think several steps ahead.
If arms are crocheted directly into the body, the wire may need to be positioned before the torso becomes too narrow to access.
Read the complete pattern first and identify the last practical opportunity to insert the armature.
Never force a large wire structure through a tiny finished opening.
Wire and Chenille Amigurumi
Thick chenille yarn creates large plush characters that may seem ideal for armatures because there’s plenty of internal space.
However, these characters can also be heavier.
A thin wire that easily supports a small cotton doll may not be strong enough for a large chenille limb or head.
If you’re converting a small amigurumi pattern into a large plush version, reevaluate the internal structure rather than automatically using the same wire.
Alternatives to Wire
Wire isn’t the only way to create structure.
Depending on the project, you may be able to use:
- firmer stuffing
- strategic shaping
- tighter crochet
- double-layer construction
- structural seams
- jointing methods designed for dolls
- reinforced crochet components
For a tail that only needs to curve slightly, strategic stuffing may be enough.
For an ear that needs to stand upright, tighter stitches or double-layer construction may solve the problem.
Use the simplest method that achieves the desired result.
When You Should Avoid Wire
There are situations where an internal wire armature isn’t the best choice.
Consider avoiding it when the amigurumi:
- is intended for a baby or young child
- will be frequently washed
- will receive rough play
- is designed to be squeezed constantly
- doesn’t actually need poseability
- has limbs too narrow to safely accommodate the structure
A completely soft amigurumi is often more appropriate for toys intended for active handling.
Inspect the Crochet Fabric
Before closing the piece, carefully inspect the outside.
Look for:
- stretched stitches
- visible wire
- unusual hard spots
- distorted shaping
- stuffing gaps
- areas where the armature sits too close to the surface
Bend the character gently into several intended poses.
Check the fabric again.
If you can feel the wire pressing strongly against one location, reposition the stuffing or armature before closing the piece.
Closing the Amigurumi
Once you’re satisfied with the armature and stuffing, finish the crochet according to the pattern.
Before permanently closing the final opening, perform one last check.
Make sure all wire endpoints remain protected.
Confirm that the armature is centered.
Test the intended poses.
Then close the piece securely and hide the yarn tail.
Once the opening is closed, correcting internal problems becomes much more difficult.
Tell Customers When an Amigurumi Contains Wire
If you sell finished amigurumi, it’s helpful to clearly disclose when a character contains an internal wire armature.
A poseable collectible and a soft children’s toy are different products.
Customers should understand the intended use.
For example, a wired character may be described as a decorative poseable collectible intended for display rather than a children’s toy, when that accurately reflects the product.
Also follow the labeling and product-safety requirements that apply where you sell your work.
Common Mistakes When Adding Wire to Amigurumi
Leaving Sharp Ends
Never leave a cut wire tip pointing toward the crochet fabric.
Choosing Wire That’s Too Thin
It may fail to hold poses or fatigue quickly.
Choosing Wire That’s Too Thick
The character may become difficult to pose and the structure may create excessive pressure.
Forgetting Protective Wrapping
Bare wire has less cushioning between it and the crochet fabric.
Adding the Armature Too Late
Once openings become small, safe installation becomes much harder.
Understuffing Around the Wire
The armature may shift and become visible.
Overstuffing the Limbs
The character may become difficult to pose.
Creating Extremely Sharp Bends
Repeated bending at one small point can weaken wire.
Using Wire in a Project That Doesn’t Need It
Sometimes ordinary crochet shaping provides all the structure required.
A Simple Armature Checklist
Before closing a wired amigurumi, check the following:
- The wire is appropriate for the project’s size.
- The armature holds the intended poses.
- No wire is rusty or damaged.
- Every cut end has been rounded or looped.
- Endpoints are securely protected.
- The armature has appropriate cushioning.
- Stuffing surrounds the wire evenly.
- No sharp areas can be felt through the fabric.
- The crochet stitches aren’t being stretched by the structure.
- The character has been tested in its intended poses.
- The finished piece is appropriate for its intended user.
Taking a few extra minutes to inspect these points can prevent problems that would otherwise appear after the amigurumi is completely finished.
Should Beginners Use Wire in Amigurumi?
Beginners can experiment with simple armatures, but it’s best to start small.
Instead of attempting a full-body articulated doll immediately, try adding support to the tail of a decorative animal or creating simple poseable arms.
This allows you to practice:
- cutting wire
- creating smooth loops
- wrapping the armature
- positioning it inside crochet
- stuffing around it
- testing movement
Once you’re comfortable with these basics, you can move on to more complex internal structures.
Final Thoughts
Adding wire to amigurumi opens up an entirely new range of creative possibilities.
A character that would normally remain in one fixed position can become much more expressive, with bendable arms, adjustable legs, curved tails, supported necks, and dynamic poses.
But successful armature construction requires more than inserting wire into stuffing.
Choose wire that matches the size and weight of the character. Smooth and protect every endpoint, provide cushioning between the armature and crochet fabric, surround the structure evenly with stuffing, and test movement before permanently closing the piece.
Most importantly, consider the intended use of the finished amigurumi.
Wire armatures are particularly useful for decorative and collectible characters that will be posed carefully. For toys intended for babies, young children, or rough play, a completely soft construction is generally a more appropriate choice.
When used thoughtfully, an internal armature shouldn’t distract from the crochet at all. It should quietly support the design from inside, giving your amigurumi something traditional stuffing alone can’t provide: the ability to pose, move, and express even more personality.

Clara Fern — Crochet Artist & Amigurumi Designer
Clara Fern is a crochet artist and amigurumi designer based in Austin, Texas. With 9 years of experience working with yarn and hook, she transformed a lifelong passion for handcraft into a creative mission: making amigurumi accessible, fun, and deeply rewarding for crafters of all levels.
Clara discovered amigurumi during a trip to Japan in 2017, where she fell in love with the art of bringing tiny characters to life through crochet. Back home in Texas, she spent years studying color theory, design principles, and advanced crochet techniques — developing her own signature style that blends kawaii aesthetics with original character design.
Through maclafersa.com, Clara shares everything she has learned — from choosing the right yarn and reading your first pattern, to designing fully original amigurumi characters from scratch. Her writing is known for being clear, detailed, and genuinely helpful, with no steps skipped and no secrets kept.
When she’s not crocheting, Clara enjoys watercolor painting, visiting local yarn shops, and drinking way too much coffee while sketching new character ideas.