
Common Beginner Mistakes in Crochet and How to Fix Them
Common Beginner Mistakes in Crochet and How to Fix Them guide you through the core missteps—from tension and gauge to dropped stitches—so you can craft even, polished Amigurumi. This article highlights practical fixes you can apply tonight to improve your results.
How to Fix Your Crochet Tension
Tension determines how your Amigurumi turns out: stitches too tight are hard to insert and can look stiff; too loose create gaps and wobble. The goal is a steady, even fabric that sits comfortably in your hands. You can fix tension by slowing down, watching yarn flow, and adjusting how you hold your hook. Practice with a swatch, then apply what you learn to your project. Your amigurumi will hold its shape better.
To fix tension, start by checking how you grip the hook. A relaxed grip helps your yarn flow smoothly. If you notice your stitches are too tight, loosen your grip and guide the yarn with your wrist. If stitches are loose, wrap the yarn a touch firmer and hover the hook closer to the yarn tail. Small changes yield big results. And remember: consistency beats perfection; aim for even stitches, not speed.
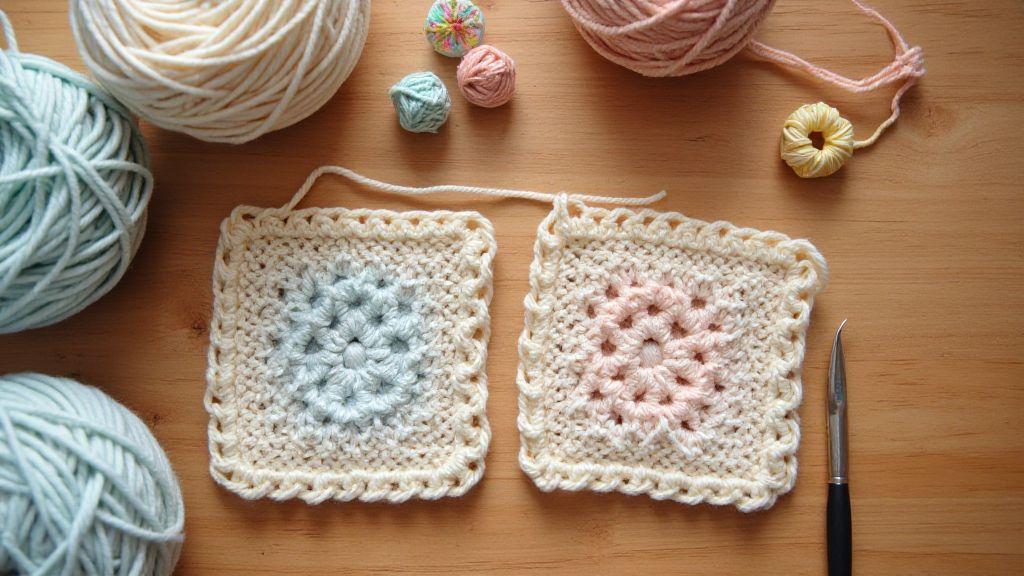
Practice with a simple square or an amigurumi ear to compare rows for consistency. If you see tight spots, slow your pace and let the yarn surface into each stitch. If you spot loose spots, pause and recheck your tension as you wrap the yarn around your fingers, then resume. Small adjustments add up to uniform results.
Signs of tight or loose tension
Tight tension shows as stitches hard to insert and a stiff fabric. The fabric may curl or pucker, and finishing can be frustrating. Loose tension shows as visible gaps, uneven rows, and a drapey texture. Inconsistency in stitch height can cause wobble when placing the toy. The best clue is consistency—if some stitches feel off in every row, you’re likely not maintaining even tension.
Texture matters too. Tight tension yields a dense fabric; loose tension yields an airy, holey texture. If rounds don’t lie flat and you notice stairs where rounds meet, that’s a tension cue. Your goal is even stitch height and a neat top-stitch. When you notice any of these, pause and adjust your grip, keep yarn flowing, and slow down. Your amigurumi will look neater and hold its shape better.
Simple tension practice for beginners
Grab a scrap of yarn and a crochet hook you’re comfy with. Make a long chain, then single crochet back along the chain. Focus on keeping the yarn loose enough to move but snug enough to keep stitches from slipping. Count your stitches to ensure consistency, and compare a few swatches side by side. If you see gaps, tension is too loose; if you see stiff rows, it’s too tight. Adjust by easing off or tightening your grip a touch and repeating.
Next, try a tiny circle: chain a few, join, and work single crochets around to form a small disc. This helps you feel how tension affects round shapes before you jump into ears or limbs. When you measure your work, aim for roughly the same height for every stitch. If you notice drift, slow your motion and guide the yarn more evenly. With each round, you’ll gain awareness of your tension without stressing over the project.
Tension troubleshooting checklist
- Confirm your grip is relaxed yet controlled. If you notice tight fingers, loosen up and let your yarn glide. If you’re too slack, firm the hold just enough to guide the yarn.
- Keep a steady yarn flow. Don’t yank or pull the yarn; let it move smoothly through your fingers.
- Compare swatches. If one area tightens, adjust your grip or yarn tension there and repeat.
- Watch stitch height. If stitches sit too high or too low, adjust how you wrap the yarn around your fingers.
- Practice with quick, small projects. Short sessions build muscle memory faster than long, frustrated marathons.
Repairing Dropped Crochet Stitches
When you’re Amigurumi crafting, a dropped stitch can feel like a roadblock. You’re close to finishing a cute little buddy, and a tiny slip happens. Don’t panic. You can repair it and keep your project neat. In this section, you’ll learn to spot and fix dropped stitches without unraveling your entire piece. Your aim is to keep stitches even so your toy stays sturdy and cute.
You’ll gain confidence as you practice. The more you repair stitches, the faster you’ll spot trouble and fix it. Think of a dropped stitch like a misthreaded bead in a bracelet—you can correct it with patience and the right move. Let me guide you through it step by step, using simple terms and useful tips you can apply tonight.
Keep your goal clear: a clean repair that blends in with the rest of your Amigurumi. You want your finish to look seamless, not like you had a hiccup in your pattern. With the right approach, you’ll save your yarn, your time, and your piece’s adorable look.
How to spot a dropped stitch
A dropped stitch isn’t always obvious. A loose loop along the side or a vertical line of unraveling yarn that shouldn’t be there can be a clue. Sometimes the fabric looks stretched or wonky in one spot. If you see a loop hanging down or a horizontal row that doesn’t align with your current row, you’ve found trouble. Uneven tension near the area is another cue.
You can catch it early by checking your work every few rounds. Gently run your fingers along the surface, feeling for any loose strands that don’t sit with the rest of the stitch pattern. If you spot a dropped stitch, fix it promptly—the sooner you fix it, the easier the repair. Your goal is to keep the fabric uniform so your Amigurumi stays sturdy.
If you’re working with color changes, be extra careful. A dropped stitch can snag on a new color, making the repair harder later. Pause and secure nearby stitches before continuing. Keeping tension even helps you spot problems earlier and makes the fix smoother.
Steps to pick it up safely
First, locate the exact dropped stitch and identify how many strands are loosened. If it’s just one loop, you can fix it with a simple pick-up. If several stitches are loose, you’ll need to unravel a bit to regain control. Take a slow breath and plan your move before you tug.
Next, insert your hook under the strand that should be the top of the dropped stitch. Gently pull up to form a new loop, matching the height of your surrounding stitches. Then slide another hook under the loop from the row below and pull it through the loop you just made, creating a secure stitch. Keep your tension light; you don’t want to pull too tight and warp the fabric.
Repeat carefully if the stitch requires more than one loop to reach the correct height. Work stitch by stitch, checking after each one that your fabric still lays flat and even. If you’re repairing near a seam or a color change, take extra care not to pull on adjacent stitches. A little patience goes a long way here.
If the dropped stitch was already pulled tight or twisted, you might need to adjust your approach. Loosen the surrounding stitches slightly with your fingers or a small tool, then reinsert your hook and pull the loop through. The key is to restore the original stitch height without creating new gaps.
Tools to fix dropped stitches
Keep a small crochet hook handy—preferably the same size as your project. A compact pair of scissors and a tapestry needle help in tricky spots. Some crafters carry a stitch marker to mark the location once you find the drop, so you don’t lose track while you fix it. Local, simple tools are enough to get the job done without fuss.
With the right tools, you’ll fix dropped stitches quickly and confidently. The trick is to stay calm and steady, treating the repair as part of the process—not a failure. Your Amigurumi will thank you with a clean finish and lasting charm.
Fixing Uneven Crochet Edges
Crochet edges can look sloppy if you don’t control tension and stitch count from the start. You’ll learn simple checks and fixes so your Amigurumi edges sit flat and clean. Think of your edge as the frame around a sculpture: neat frame, neat figure. When you want a polished look, start with even stitches, even tension, and a quick block if needed. You’ll notice a big difference by focusing on consistency rather than scrambling to hide mistakes later.
Your first step is to inspect your edges as you go. If you see a wave or a pull, pause and compare the number of stitches in your turning chains to the pattern’s guidance. It’s easy to miscount, especially when tired or switching between yarns. The fix is often as simple as adding or skipping a stitch in the turning chain to keep the row’s width even. By keeping a steady pace and counting aloud, you prevent most wavy edges before they form, so your Amigurumi stays neat from the top to the bottom.
If your piece has waviness, you can even out the edge with a light blocking or a quick fix row. Blocking relaxes the fibers and evens tension across the edges. You don’t need fancy gear—just a damp cloth and a flat surface. Lay the piece flat, lightly dampen, and pin the edges until they dry. The edge will settle into a uniform line, making the finish look more professional. A little patience here saves redoing hours of work.
Why your edges go wavy
Wavy edges come from uneven tension and inconsistent stitch counts. Pulling some stitches tight while keeping others looser shifts the row’s width, causing ripples. Changing yarn weights or using multiple hooks can disrupt rhythm and spacing. When changing color or fiber, keep tension gentle and steady so the edge remains even.
Skipping or adding turning-chain stitches is a subtle but common mistake. The turning chain often acts as the first stitch of the new row, and if its height doesn’t match the rest of the row, you’ll see a tilt or wave along the edge. Unfinished edges or loose finishing can also cause edge stretching. Awareness of these patterns helps you stop waviness before it starts.
Stitches and Blocking to Even Edges
To fix waviness, focus on correct stitches and a quick block if needed. First, check you’re using the right stitch count for each row. If you’re supposed to have a certain number of stitches along the edge, count at least every few rows until you’re confident you’re on track. If you find extra or missing stitches, correct them right away—catching this early keeps the edge clean.
Blocking is your best friend when edges refuse to cooperate. After finishing, dampen slightly and pin the edges to a flat surface, shaping them to a straight line. Let it dry completely; the fibers will relax and the edge becomes uniform. If you prefer not to dampen too much, you can use a light steam (over a cloth) to set the edge without soaking the entire piece. This method respects your yarn’s fibers while delivering a crisp edge that looks intentional.
Quick Edge Repair Tip
If you spot a wavy edge late, you can do a fast repair by working a slanted slip stitch along the edge. Insert your hook at the first edge stitch, yarn over, and pull through both loops to anchor. Move along the edge, placing one slip stitch per edge stitch to tighten and level the border. This quick technique smooths the line without redoing the whole row, especially handy for small Amigurumi where precision matters.
Crochet Beginner Mistakes: Common Stitch Errors
You’ll run into stitch mistakes when you’re learning Amigurumi, but you can fix them fast if you know what to look for. In this section, you’ll learn the two biggest culprits and how to spot them in your work. When you pause to check your stitches, you’re cutting down frayed yarn, loose ends, and misshapen pieces later. Think of it like aligning tiny bricks; one off brick and the whole wall wobbles. You want your rounds to stay even, your stitches to sit neat, and your toy to come out smooth and cuddly.
First, you’ll want to understand how skipped, extra, and twisted stitches creep into your work. Skipped stitches create a flat spot that makes your amigurumi’s shape look odd. Extra stitches widen a round and push your piece out of its intended form. Twisted stitches pull your yarn in directions that throw off height and tension. If you’re rushing through a row, or you stare at the hook instead of the work, these mistakes sneak in. When you crochet with intention, you’ll feel the difference between a round that sits properly and one that puffs or dips. Your goal is consistent height and even spacing from stitch to stitch.
As you practice, you’ll see these errors more clearly. The key is to pause, count, and compare your work to your pattern. When you notice a weaker edge or a bulge where there shouldn’t be one, you’re likely seeing a skipped or extra stitch. If your rounds don’t stack neatly into a cylinder, you’re probably dealing with a twisted stitch or uneven height. The more you check early, the less time you spend ripping back. You’ll gain confidence by treating each row as a small checkpoint toward a flawless finished amigurumi.
Skipped, extra, and twisted stitches
Skipped, extra, and twisted stitches are the three big saboteurs of neat amigurumi. They sneak in when you rush or miscount. Skipped stitches create gaps that throw off your round’s circumference. Extra stitches add width where there shouldn’t be any, making your pieces widen unevenly. Twisted stitches pull the yarn under the hook in odd ways, so your stitches don’t sit flat. You’ll notice the problem right away when your work looks uneven or the texture shifts unexpectedly. The fix is simple: slow down, count, and compare to the pattern row by row. When you spot a mismatch early, you can unwork just a few stitches instead of unraveling an entire round.
To prevent these errors, build a tiny checklist. Count your stitches at the end of each round, then count again after you join or move to a new color. If a round has too many or too few stitches, stop and correct before you continue. When you crochet with a steady pace and real-time checks, you’ll see the pattern’s rhythm and keep each round even. Also, keep your working tension consistent. If you pull too tight, you’ll squeeze in or miss stitches; too loose, and you’ll get gaps. Find your comfortable middle ground and stick with it.
How you can correct stitch height
Correcting stitch height starts with recognizing what it should look like at each stage. If your stitches sit higher than usual, you’re likely pulling too tight or making taller stitches. If they sit lower or flatten out, your tension is too loose. Your first step is to compare your current row to the pattern’s gauge. Next, adjust your grip and yarn tension by a small amount. A tiny tweak—just easing pressure a notch—can bring your stitches back to the right height. You’ll often need to repeat this check every few stitches until you’re consistent.
If you notice height issues mid-row, you can fix them without undoing the whole row. Work back to the last good stitch, correct the height there, and continue. If a whole round is off, you might need to rip back a few stitches to restore proper height. Remember, you’re aiming for uniform loops that sit evenly on top of the previous row. With practice, you’ll instinctively keep the right height and your amigurumi will keep its chubby, cuddly look.
Stitch error quick fixes
- If you notice a missing stitch: crochet into the next stitch as planned, then pull the fabric tight to hide the gap. If the gap remains visible, you may need to unravel back to the missing stitch and rework it.
- If your round bulges: check for an extra stitch in the round, or an accidental chain-spacer at the start of the round. Unravel to the point just before the issue and rework correctly.
- If your stitches look twisted or layered oddly: stop and recheck your turning chain height. Ensure your turning chain matches the stitch you’re making and that you’re not twisting the fabric as you work.
Counting Stitches in Crochet Tips
Counting stitches is your secret weapon for precise Amigurumi. You’ll feel more confident when you know exactly where you are in your pattern. Start by keeping your counts steady so your shapes stay even and your seams line up. If you slip up, pause, recount, and keep going—consistency wins in the end. When you count out loud or with a marker, you’ll notice tiny miscounts before they snowball into big issues. Remember, you control the pace, not the pattern.
You’ll love how clear your work looks when you set a rhythm for counting. The habit reduces guesswork and yarn waste. If your stitches look loose, counting helps you tighten up without overdoing it. If you’re crocheting with tight yarn, counting becomes your compass—a way to ensure stitches aren’t choking your fabric. Keep a calm pace, and your amigurumi will come out neat, round, and polished.
As you count, celebrate each correct stitch you’ve completed. Your confidence grows as your counts line up with the pattern. This practice also helps you spot where you might need to slip a few stitches or add a stitch to maintain shape. The more you count, the less you’ll rely on guesswork and the more your project feels like a craft you own.
Use markers to keep count
Markers are tiny helpers that keep your place without rechecking every stitch. Clip a safety pin or stitch marker into the first stitch of each round. When you see it again, you know you’ve finished a round and can move on. If you’re working in rows, place a marker at the end of each row to avoid miscounting. You’ll stay in control even if you pause to set down your project or take a quick break. Markers are your quick checkpoint, not a chore.
As you crochet, you’ll appreciate how markers reduce stress. They act like a breadcrumb trail, showing you where you started and where you’re ending. If you notice your marker has shifted, you know something’s off and you can fix it before you go too far. Keep a few extra markers handy for different projects, and you’ll never be slowed by a missing counting aid.
Counting in rounds vs rows
Rounds and rows require slightly different mindsets. In rounds, you may start with a magic ring or a chain loop, then tighten it as you go. Count each round as a complete circle, and use a marker to show where the round ends. In rows, you’ll count each row from start to finish, with the marker marking the end of the row. Keeping these distinctions in mind helps you stay consistent across patterns.
When you count in rounds, you’ll develop a rhythm that feels almost musical. In rows, your attention shifts to linear progress. Knowing the difference means fewer mistakes when you switch patterns or projects. It also helps you plan increases, decreases, and shaping for cute Amigurumi ears, noses, or limbs.
Easy stitch counting trick
Here’s a simple trick you can start using today: count by groups of five stitches. As you crochet, keep a mental tally or lightly mark every fifth stitch with a tiny dot of yarn or a marker. This breaks the counting into easy chunks, so you’re not staring at one long number. It makes it faster to spot when you’ve drifted off track and you can correct early rather than later.
You’ll find this trick handy when you’re working on small rounds or tight projects. It also helps you feel confident when you’re rushing to finish a picture for a gift or a cosplay prop. Practice this method a few times, and you’ll notice counting becomes quick and almost automatic.
Understanding Crochet Gauge for Beginners
You’ve picked up a hook and yarn, and you’re ready to feel confident with Amigurumi. Gauge is your secret tool. It decides if your stuffed friend ends up the right size or a tiny dwarf you’ll never finish. When you understand gauge, you can pick yarn and hooks that fit your pattern and your hands. You’ll see why your first project might look off and how to fix it fast. Gauge can seem tricky, but you’ll learn to read your swatches, compare them to a pattern, and adjust like a pro. This ties into Common Beginner Mistakes in Crochet and How to Fix Them by helping you hit the intended size and shape.
Gauge isn’t just about inches on a ruler. It’s about your tension, your yarn, and your hook choice all working together. If you pull too tight, your amigurumi will be stiff; if you’re too loose, pieces may be floppy. Your goal is steady, even stitches that create a fabric the pattern expects. With practice, you’ll know what to look for and how to compare your work to the designer’s gauge. You’ll finish projects with the right size, quicker, and with less guesswork. This is a core part of addressing Common Beginner Mistakes in Crochet and How to Fix Them.
Why gauge matters to your size
Your amigurumi’s size comes from the fabric you crochet. If your gauge is off, the final creature will be too large or too small. Matching the gauge ensures the pattern’s measurements stay true to the design. This is especially important for parts that must fit together, like a head on a neck or limbs joining a body. When you hit the right gauge, your project looks intentional, not rushed. This is a fundamental element addressed in Common Beginner Mistakes in Crochet and How to Fix Them.
How to make and measure a swatch
Start with a small square to test your gauge. Crochet a few rounds with your chosen yarn and hook until you have at least 4×4 inches of fabric. Block or lay it flat to get an accurate measurement—amigurumi stitches can shift when you press the fabric. Measure the width and height in multiple spots to confirm consistency. Compare your measurements to the pattern’s gauge. If you’re close, you’re fine. If not, tweak by changing your hook size and retry until you land in the target range.
When you measure, look at the stitches and rows per inch. Count how many stitches fit in an inch and how many rows fit in an inch. Your swatch should align with the pattern’s gauge. If you’re under, you may need a larger hook; if you’re over, try a smaller hook. Keep notes of your hook size, yarn, and the counts so you can recreate the feel next time. A good swatch saves you from surprise sizes mid-project. This practice also supports addressing Common Beginner Mistakes in Crochet and How to Fix Them.
Gauge adjustment guide
If your swatch isn’t matching the pattern, start with small hook changes. Move up or down by one size and crochet another swatch. Re-check your gauge until you land in range. If you can’t reach the target, consider adjusting your yarn color or fiber blend, but only after testing with a new swatch. Document what works, so you don’t waste time guessing on future projects. This aligns with avoiding Common Beginner Mistakes in Crochet and How to Fix Them.
Avoid guessing with your gauge in the middle of a project. Make a tiny swatch and pin it to your pattern page. It’s your quick reference when you’re choosing a hook or yarn. If your amigurumi is to be a gift or a toy, consistent gauge keeps the toy durable and the stitches neat. You’ll feel the difference in the final look and how it holds shape over time. This is a practical step in preventing Common Beginner Mistakes in Crochet and How to Fix Them.
Choosing Crochet Hook Size Guide
Choosing the right crochet hook size is a big step in making Amigurumi that looks neat and holds its shape. You’ll feel the difference in your work right away when the hook fits your yarn and pattern. The key is to know how hook size changes your stitches and finished feel. With the right hook, your stitches stay even, your stuffing flows in smoothly, and your toy looks professional. You want your projects to be fun, not frustrating, and the hook you choose is a big part of that. This is a common focus in Common Beginner Mistakes in Crochet and How to Fix Them.
The guide below helps you pick a hook that matches your yarn weight and the pattern you’re following. You’ll see how tension changes with different hooks, and you’ll get a quick rule you can use every time you start a new amigurumi. Remember, consistency matters—your goal is steady stitches and a clean surface that shows off your details like little noses and eyes.
Choosing the right hook size isn’t just about the label on the yarn. It’s about how your hands feel, how your stitches look, and how your finished piece holds shape. You’ll gain confidence by testing a few hooks with small swatches. It’s worth it to avoid loose stuffing gaps or tight spirals that make a project look tired. Your Amigurumi deserves a hook that fits your style and your yarn.
Match hook to yarn weight and pattern
When you start, look at your yarn weight and the pattern instructions. For common Amigurumi, you’ll usually use a smaller hook than the yarn label suggests. This makes tight stitches that keep stuffing from showing and helps the toy hold its round shape. If your pattern says to use a 3.0 mm hook with DK yarn, you might try a 2.75 mm or 3.0 mm first to see how it feels. You want stitches that are firm but not rough on the yarn. This choice is part of avoiding Common Beginner Mistakes in Crochet and How to Fix Them.
Your hand should feel comfortable without twisting or pinching. If your stitches look loose and open, try a smaller hook. If they’re puckered or hard to pull through, go up a size. You’ll know you hit the sweet spot when the fabric sits snug and you can see clear little circles inside each stitch. A good match keeps your magic eyes and tiny noses looking right, and your Amigurumi stays sturdy when you stuff it.
Pattern details matter too. Some patterns call for very tight tension to keep pieces from showing gaps. In those cases, you may need a slightly smaller hook than the yarn suggests. Others want a softer, plush finish and benefit from a larger hook. Always balance the pattern’s density with your yarn and hook choice so your finished piece holds its shape. This approach helps minimize Common Beginner Mistakes in Crochet and How to Fix Them.
How hook size affects your tension
Hook size directly controls how tight or loose your stitches are. A smaller hook pulls the yarn closer, creating tighter stitches. A larger hook makes looser stitches and a softer fabric. For Amigurumi, tight stitches help the toy stay firm and prevent stuffing from peeking out. If your tension is too loose, your stuffing might show through, and your shapes can wobble.
Your personal touch matters, too. Some days your hands are looser, other days tighter—normal. The trick is to test: crochet a small circle, count your stitches, and compare to the pattern gauge. If your count is off or your circles look sloppy, you know you’re not in the right tension yet. Adjust by trying a different hook size until your stitches look even and compact.
If you find your rows aren’t settling well, switch hooks and re-test. Consistent tension means your rounds stay neat and your seam lines disappear into the fabric. Your Amigurumi will thank you with clean edges and smooth curves, not knots and stretches. This practical check also helps prevent Common Beginner Mistakes in Crochet and How to Fix Them.
Quick hook selection rule
Start with the yarn weight and pattern guidance, then pick a hook one size smaller than the label suggests. If your stitches look loose, go down another size until your fabric sits snug. If they’re too tight or hard to pull through, go up a size. This quick rule helps you dial in the right tension fast. Keep a small swatch near your work area; it’s your visual gauge and saves frustration later. When unsure, test with two hooks near the chosen size and compare how the fabric feels. Your goal is clean stitches, steady tension, and a plush, well-shaped final piece. This practice supports avoiding Common Beginner Mistakes in Crochet and How to Fix Them.
Reading Crochet Patterns for Beginners
When you’re just starting out with Amigurumi, reading patterns can feel like learning a new language. Stay organized and take it one step at a time. Skim the pattern to see what you’ll make and the main pieces involved. Gather the required yarn, hook size, and any special notions. Mark off each section so you can see your progress clearly. In time, the pattern will feel familiar, and you’ll recognize the rhythm of the instructions.
Next, keep your work organized as you go. Use a notebook or digital notes to jot down stitch counts and any tweaks you make. This habit saves you from redoing sections if you lose your place. If a pattern uses multiple pieces, decide the order you’ll assemble them. You’ll thank yourself later when you don’t have to hunt for the ending instructions in a long pattern. Remember, patience pays off—your first amigurumi will be a proud keepsake and a stepping stone to faster, more confident projects. This aligns with avoiding Common Beginner Mistakes in Crochet and How to Fix Them.
Finally, don’t get discouraged by the first read-through. Patterns often use shorthand, but you’ll decode it with practice. Practice makes pattern-reading feel natural, and soon you’ll spot repeats and charts without thinking twice. You can also compare similar patterns to see how different designers handle the same stitches. Stay curious, and your confidence will grow with every round you complete. This helps you avoid Common Beginner Mistakes in Crochet and How to Fix Them.
Common abbreviations you must know
You’ll see a lot of abbreviations in crochet patterns, but you only need a handful to get started. The most common ones are chain (ch), single crochet (sc), increase (inc), and decrease (dec). Ch tells you how many starting stitches to make, and sc is your base stitch for Amigurumi. Inc adds stitches where the pattern calls for more fabric, while dec reduces stitches to shape your piece. When you see a number in parentheses after a comma, it means you’ll do that many repeats in that round or section. This pattern language is simple once you practice a few rounds. This review also supports avoiding Common Beginner Mistakes in Crochet and How to Fix Them.
Some patterns show stitches with symbols or shorthand like FO for finish off, meaning you close your work and weave in the ends. If you see slst, that’s a slip stitch, used to join rounds or move around without adding height. Rounds are often wrapped in parentheses or brackets to show what to repeat. When you’re unsure, re-read the line with the abbreviation aloud in your own words. You’ll notice you can translate most abbreviations into actions you’ve done before. This helps prevent Common Beginner Mistakes in Crochet and How to Fix Them.
Following repeats and charts
Repeats are the backbone of most Amigurumi patterns. You’ll see something like [sc, inc] 6x meaning you should repeat that sequence 6 times within the round. This is how the body grows evenly. A quick trick: count stitches at the end of each round to ensure you’re on track. If you miscount, you’ll feel the shape off, and you’ll know you need to check where the error happened. Charts simplify this by showing you where each stitch goes in a visual grid. Treat charts like a tiny map; a quick glance tells you where to put your hook next. Reading charts helps you avoid common beginner errors in crochet and how to fix them.
Charts can seem intimidating at first, but you can learn to read them by starting with a simple pattern and tracing the path with your finger or a yarn needle. If you’re uncertain about a symbol, keep a legend handy until you memorize it. Once you’ve read a few charts, you’ll recognize patterns and know where the repeats begin and end. Practice makes chart-reading nearly automatic, saving time while keeping stitches neat and even.
Pattern reading checklist
- Gather all supplies and confirm the hook size before you begin.
- Read the entire pattern once to know the end goal and the main pieces.
- Mark repeating sections and note the total stitch count per round.
- Learn the abbreviations you’ll see most often and keep a legend handy.
- Double-check your counts after each round to catch mistakes early.
- Use a stitch marker to keep track of the start and end of rounds.
- Save notes about any adjustments you make for future projects.
Crochet Finishing and Blocking Techniques
Finishing your Amigurumi is where your hard work truly shines. You’ll see clean lines, snug seams, and a polished look that makes your darling creations stand out. The goal is to make every piece look intentional, not rushed. In this section, you’ll learn how to weave in ends, block your pieces so they hold their shape, and what tools you’ll actually use to get professional results. The inclusion of proper finishing is a key element in avoiding Common Beginner Mistakes in Crochet and How to Fix Them.
Blocking is your secret weapon for smooth shapes. After you stitch, a quick blocking session can even out stitches, relax yarn tension, and make your piece look uniform. Whether you’re shaping an ear or a tiny hat, the right blocking steps can turn good to great. And remember, blocking is not optional—it’s a small step that pays big dividends in the final look of your Amigurumi.
You’ll also gain confidence in finishing a project quickly and neatly. With the right technique, you’ll avoid obvious gaps, loose ends, or a piece that looks home-made. The payoff is simple: smoother curves, crisper edges, and a finish that invites you to start your next project with even more gusto.
Weaving in your ends neatly
Woven-in ends are the backbone of a clean finish. Cut yarn tails to a reasonable length, then thread a blunt tapestry needle. Run the tail through the inside of a few stitches, parallel to the fabric, to hide it from view. Switch direction to avoid creating a lump, and anchor with a tiny stitch so the tail stays put.
When securing ends on Amigurumi, you want to be thorough but not overdo it. A few careful passes through the inside will stop unraveling without leaving a visible line. If you used multiple colors, weave each tail separately to prevent color bleed from showing through on the right side. Finally, snip close to the fabric, but leave a tiny nub to prevent slippage.
A quick tip: plan your color changes where you’ll easily hide ends, like under a seam or inside a stuffed area. This makes finishing look neat instead of bulky. Practice makes perfect, and you’ll notice pieces stay tidy with fewer touch-ups.
Basic wet and steam blocking steps
Blocking helps your stitches settle evenly and your shapes hold their form. For basic wet blocking, set up a shallow basin with lukewarm water and a touch of gentle soap if needed. Submerge the piece, gently squeeze out excess water—don’t wring—then lay it flat on a clean towel. Reshape carefully to your intended form and let it air dry.
Steam blocking offers a quicker route for small pieces. Hold a steam iron or steamer a short distance away from the fabric and hover, letting the steam relax the fibers. Do not touch the yarn with the iron itself. Once you see the stitches relax and shapes set, leave the piece to dry flat. It’s a good option when you’re aiming for precise curves with minimal fuss.
Know your yarn before you block. Some fibers bloom with water, and others can relax best with steam. If you’re unsure, test on a swatch first. Blocking is about control; the more deliberate you are, the more professional your final shape will look.
Finishing tool essentials
Your finishing kit doesn’t have to be fancy, but a few basics save you time and effort. You’ll want a blunt tapestry needle for weaving ends—easy on the fingers and less likely to poke through the stitches. A pair of small scissors helps you trim tails close to the fabric without snagging threads. A portable spray bottle makes wet blocking simple without soaking your entire project.
Having a grid mat or a clean, flat surface is also handy. It keeps your pieces from sliding while you work and makes blocking more predictable. If you’re blocking regularly, consider a few affordable clothespins to pin your piece in place without leaving marks. These small tools add up to cleaner, faster finishing.

Clara Fern — Crochet Artist & Amigurumi Designer
Clara Fern is a crochet artist and amigurumi designer based in Austin, Texas. With 9 years of experience working with yarn and hook, she transformed a lifelong passion for handcraft into a creative mission: making amigurumi accessible, fun, and deeply rewarding for crafters of all levels.
Clara discovered amigurumi during a trip to Japan in 2017, where she fell in love with the art of bringing tiny characters to life through crochet. Back home in Texas, she spent years studying color theory, design principles, and advanced crochet techniques — developing her own signature style that blends kawaii aesthetics with original character design.
Through maclafersa.com, Clara shares everything she has learned — from choosing the right yarn and reading your first pattern, to designing fully original amigurumi characters from scratch. Her writing is known for being clear, detailed, and genuinely helpful, with no steps skipped and no secrets kept.
When she’s not crocheting, Clara enjoys watercolor painting, visiting local yarn shops, and drinking way too much coffee while sketching new character ideas.


