
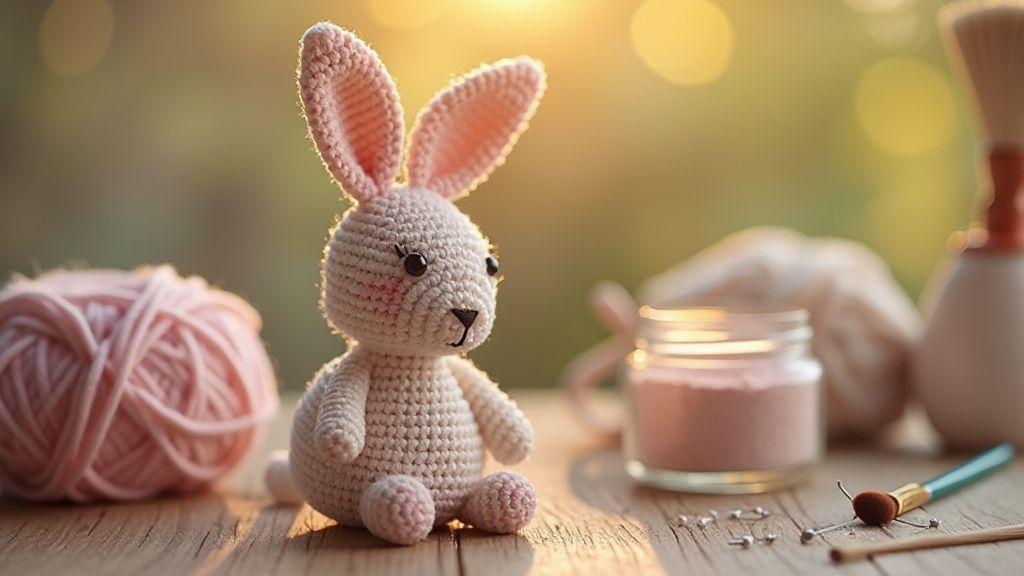
How to Add Glitter and Shimmer Effects to Amigurumi Safely: Quick Start
If you’re wondering how to add glitter and shimmer to your amigurumi without risk, this guide covers safe materials, careful prep, gentle application, sealing, care, and safety checks to keep your crochet toys bright and cuddly.
Pick safe glitter and shimmer materials for your amigurumi
Sparkle with confidence by choosing toy-safe, washable glitters and yarns. Look for non-toxic labels and craft-safe glitters designed for kids, avoiding pieces with sharp edges or coatings that flake. For shimmer yarns, choose brands that list safety standards and are intended for skin contact. Your aim is shimmer that stays put and doesn’t shed.
Consider how pieces touch skin and clothing. Non-toxic materials matter, especially for baby toys or decor in kids’ rooms. Check safety ratings and read reviews about washability and colorfastness. If in doubt, test a small swatch first to ensure a vibrant finish after washing and minimal transfer to hands or faces.
Match your project’s vibe. For a soft, cuddly look, opt for micro-glitter with gentle sparkle and smooth edges. For bold shine, choose larger, cosmetic-grade glitter while ensuring it’s labeled safe for crafts. Your choices should complement your amigurumi’s colors and texture and stay attached without irritating the skin.
Select non-toxic glitter for toys and baby items
Prioritize products clearly labeled non-toxic and suitable for children. Seek glitters marketed as craft-safe or cosmetic-safe; avoid anything with sharp edges or metallic foils that can flake. If unsure, choose glitters designed for slime or polymer clay, as they’re typically tested for skin contact and washing.
Check material composition. Opt for glitters with a safe base like polyester or PET and a clear binder. Avoid loose, chunky parts that could detach and irritate skin. Always follow washing guidelines so the glitter remains in place after baths or play.
Choose shimmer yarn and eco-friendly glitter for crafts
Balance sparkle with sustainability. Select shimmer yarn labeled eco-friendly or recycled content when possible, and pair it with glitter with low environmental impact. This keeps your craft bright while being kinder to the planet. Test how the shimmer reads on your fabric as you stitch or crochet to ensure the texture catches light well.
Verify colorfastness and washability. Pick yarns that won’t bleed and glitter that tolerates washing without shedding excessively. For kids’ items, ensure everything survives gentle washing cycles. The goal is shine without a glittery mess.
Check material labels and age ratings before use
Inspect safety notes and age recommendations on labels. If a product isn’t marked for children, skip it for amigurumi meant to be touched or chewed. Look for care instructions to know how to wash without losing sparkle or color. A caution about small parts or choking hazards is a deal-breaker for baby toys.
Prep your amigurumi and tools before you add sparkle
Set up to get the best shine. Inspect your amigurumi for loose threads and stitch gaps; gently press or steam to flatten raised areas so glitter sits evenly. Gather all tools to avoid mid-project searches, which helps you stay steady and protects the yarn from overworking.
Decide where sparkle will land. Mark placement with a fabric-safe chalk to keep decorations intentional. If you plan sequins, think about order: adhesive first, then a few stitches to anchor them. A calm prep routine makes the process smoother and safer.
Consider your workspace and lighting. Work over a clean, flat mat and use good lighting to see texture clearly, ensuring you don’t miss areas needing a touch of sparkle. When ready, proceed with confidence that your amigurumi is prepped for lasting shine.
Clean and flatten stitches so adhesive bonds better
A clean surface helps sparkle stay put. Trim stray ends and tuck loose fibers. If a stitch is snagged, reshape it gently without pulling too hard. A smooth surface helps the adhesive grab the yarn fibers evenly.
Lightly press to flatten raised stitches; this isn’t about crushing your work—just evening the top layer so glitter and glue spread evenly. If you notice tiny gaps, fill with a touch of yarn repair or a dab of glue that won’t bleed. Test a small invisible patch first: apply a tiny amount of glue and glitter to a hidden spot to confirm it bonds well and doesn’t bleed. If it passes, you’re ready to proceed.
Use fabric-safe glitter adhesive and sew-on sequins where needed
Choose a fabric-safe adhesive designed for delicate fibers. Apply a thin, even layer exactly where you want sparkle, then let it tack without pooling. If unsure, practice on a scrap first.
For extra texture, add sew-on sequins after the glue begins to tack. Place sequins with fine-point tweezers and secure with a couple of tiny stitches on the back or under raised stitches. Space them evenly for a balanced design.
Keep your glue capped and your workspace clean to avoid smudges on nearby stitches. If you need to reposition, do it before the glue fully dries.
Gather brushes, tweezers, and a glitter sealant for crocheted toys
Use a small, soft-bristled brush to sweep stray glitter before it dries. Tweezers help place tiny sequins or glitter specks precisely. Have a clear sealant in a separate container to prevent cross-contamination with your adhesive. Apply sealant in a light, even coat and let it dry fully before handling. If tackiness appears after drying, a second ultra-thin coat can help lock the shine without making the surface sticky. Keep tools clean and dry between steps.
Apply glitter and pearlescent paint with gentle techniques
Learn to add shine without stiffness. Start with a light touch and build gradually to keep fabric and yarn soft. Choose pearlescent paints labeled for fabric or flexible surfaces. Apply in small circles and let each layer dry before the next. Layer thin coats on raised areas to catch light without pooling in stitches. If you want subtle glow, mix a tiny amount of pearlescent paint with clear glaze. Use a nearly dry brush to prevent clumping and fiber staining.
Hold the brush at a shallow angle and feather paint from the edges to avoid harsh lines. Use a soft paper towel to lift excess before it dries. For handling, prefer flexible paints and sealants that stay soft after curing. Test on a hidden seam first to gauge feel. If stiffness appears, stop and wipe away the layer. Plan final looks before sealing.
Use a dedicated brush for each color to avoid muddy results. Work in a well-ventilated area and let each coat dry fully between steps. Pearlescent sheen may deepen with more layers, so plan ahead. Seal with a flexible topcoat designed for fabric or yarn.
Paint small areas using pearlescent fabric paint for amigurumi
Target tiny features like eyes, noses, or ear accents with a fine-tipped brush. Apply in ultra-thin layers, letting each dry before adding more. Use painter’s tape to create crisp edges if needed. Focus the pearlescent paint where light would naturally hit the shape.
Build color slowly. If you want more depth, add a second color in small controlled dabs after the first dries. Always test on a scrap amigurumi to confirm feel and finish. When satisfied, seal with a flexible topcoat.
Dab washable glitter for baby toys in thin layers to control shedding
Apply glitter in sheer, even layers with a light touch to avoid clumps. Use fine, washable glitter designed for crafts and fabrics; apply in layers, letting each dry before the next. If any loose glitter remains after drying, brush gently.
Keep glitter away from areas likely to be chewed or heavily handled. Use a clear, flexible sealant over the glitter to hold it in place. Test the method on a scrap first to ensure the glitter adheres well and remains washable.
Test each method on a scrap to confirm finish and durability
Always test techniques on a scrap piece before applying to your project. Check for stiffness, color consistency, and texture after drying. If the surface feels too rough, try a thinner coat or a different brush. Verify that the finish stays flexible after washing or handling. This step saves you from surprises on the final piece and helps plan the best sequence of steps.
Secure and seal shimmer so it won’t flake off your toy
Choose a clear, flexible sealant that bonds well to the surface you’ve worked on. Apply a thin layer over finished areas, reaching into crevices without pooling. Test sealant compatibility on a small patch to avoid dulling the shine. Smooth raised edges and wipe away excess before it dries. Layering sealants can improve durability, but use light coats to keep the surface soft.
Let the sealant cure fully before handling. Inspect for dull spots or missed areas and touch up as needed. If you see tiny flakes, apply a thin coat to those spots. A careful finish keeps sparkle intact while remaining safe to touch and play with.
Coat finished areas with a glitter sealant for crocheted toys
Apply sealant to the crocheted surface in smooth, even strokes, covering the glittered areas and nearby stitches for a balanced look. Work in sections to avoid pooling. If the sealant dries too quickly, pause and continue after it settles. A second coat adds durability; a third can even out shine. Ensure compatibility with yarns and plastics by checking the product label. Test on a scrap if uncertain. The goal is a durable, flexible finish that preserves color and sparkle.
Reinforce sparkle with stitching or sew-on sequins to limit loose bits
Add small stitches or a few sew-on sequins over glittered areas to catch stray bits. Use fine needles and thread that match your yarn color to blend in. Tiny backstitches along the glitter edge work well for stitching; for sequins, stitch through the center hole only to avoid pulling glitter loose. Space additions evenly for a balanced look.
After reinforcement, inspect for loose bits or snag points. If you find a loose sequin edge, add a small stitch to anchor it down. This saves you from glitter on hands later and keeps the toy looking fresh.
Let sealant cure fully and inspect for any loose particles
Give the piece ample time to cure per the sealant instructions. After it dries, run a finger over the surface to feel for tackiness or loose particles. Remove any loose glitter or recoat the area if needed. This ensures no glitter flakes end up on clothing or furniture.
Care for and wash your glittered amigurumis safely
You’ve spent time painting, embroidering, and sealing your amigurumi—protect that sparkle with careful care.gentle handling matters most; handle softly to avoid loosening glitter or stressing seams. Inspect for snags before washing to prevent tears. Air-dry flat on a clean towel, away from direct sunlight, and reshape while damp to maintain form.
Store glittered pieces in a cool, dry place, with tissue between items to prevent friction that could rub off glitter.
Hand wash gently and air dry to protect glitter and yarn
Gently hand wash in lukewarm water with mild, dye-free detergent. Swirl slowly; avoid twisting or wringing. Rinse by letting water flow over the surface. Press out water softly with your hands and lay flat to dry. Spot-clean small marks with a damp cloth and mild detergent; avoid soaking the whole piece unless necessary.
If you notice loose glitter after washing, fix it once the toy is fully dry.
Choose washable glitter for baby toys and include care labels for users
For babies or small children, select washable glitter blends and non-toxic sealants. Add clear care labels with simple instructions, such as Gently hand wash with mild soap. Lay flat to dry. Note any parts to avoid—like hot water or high heat—that could loosen sealants or glitter.
Maintain safety notes and age recommendations on packaging or product pages to help caregivers choose appropriately.
Recheck seams and reseal high-wear spots after cleaning
After cleaning and drying, inspect seams and high-wear areas. Restitch any loose threads and reinforce spots that bear more stress, like arms, legs, or the face. If you used glitter sealant, reapply a light, even coat to high-wear regions after complete drying. Thin layers keep the finish flexible and prevent cracking. Gently run your fingers over the surface to check for rough patches or lifted glitter and touch up as needed.
Test, document, and label your glittered toys for safety
Adopt a safety-first routine: test, document, and label. Anticipate how a child might interact with the toy and plan tests accordingly. Keep a simple, dated safety notebook with material details, test results, and fixes. This helps you track improvements and build trust with buyers through transparent safety checks.
Label each finished product with materials used, safety notes, and age recommendations. A clear sticker or card helps buyers and reviewers confirm compliance.
Perform rub and abrasion tests to check securing glitter on stuffed animals
Gently rub the surface with a soft cloth, then with a slightly rougher material, in multiple directions to simulate play. If glitter rubs off, adjust methods and re-test. Use a simple scorecard to record results and repeat tests after fixes to confirm durability. The aim is lasting sparkle that doesn’t shed.
Use only non-toxic glitter for toys and mark age-appropriate warnings
Non-toxic glitter is essential for toys. Ensure it’s labeled non-toxic and safe for skin contact, and verify any certifications. Even non-toxic glitter can have sharp edges; prefer rounded particles to reduce irritation. Attach clear, age-appropriate warnings on packaging or product pages to guide guardians.
Keep a record of materials and safety checks for buyers and reviewers
Maintain a safety log listing every material used (fabric, glue, sealant, glitter, additives) with batch numbers or supplier details, testing dates, results, and fixes. Include this record with products or on your listing. Update entries as procedures change to show continuous improvements and support audits and reviews.
How to Add Glitter and Shimmer Effects to Amigurumi Safely
This guide shows how to approach glitter and shimmer on amigurumi from material selection to finishing touches and safety checks. By following these steps, you can create sparkling, safe, and durable amigurumi that stay bright through play and washing.

Clara Fern — Crochet Artist & Amigurumi Designer
Clara Fern is a crochet artist and amigurumi designer based in Austin, Texas. With 9 years of experience working with yarn and hook, she transformed a lifelong passion for handcraft into a creative mission: making amigurumi accessible, fun, and deeply rewarding for crafters of all levels.
Clara discovered amigurumi during a trip to Japan in 2017, where she fell in love with the art of bringing tiny characters to life through crochet. Back home in Texas, she spent years studying color theory, design principles, and advanced crochet techniques — developing her own signature style that blends kawaii aesthetics with original character design.
Through maclafersa.com, Clara shares everything she has learned — from choosing the right yarn and reading your first pattern, to designing fully original amigurumi characters from scratch. Her writing is known for being clear, detailed, and genuinely helpful, with no steps skipped and no secrets kept.
When she’s not crocheting, Clara enjoys watercolor painting, visiting local yarn shops, and drinking way too much coffee while sketching new character ideas.


