How to Crochet Tiny Clothes for Amigurumi Characters
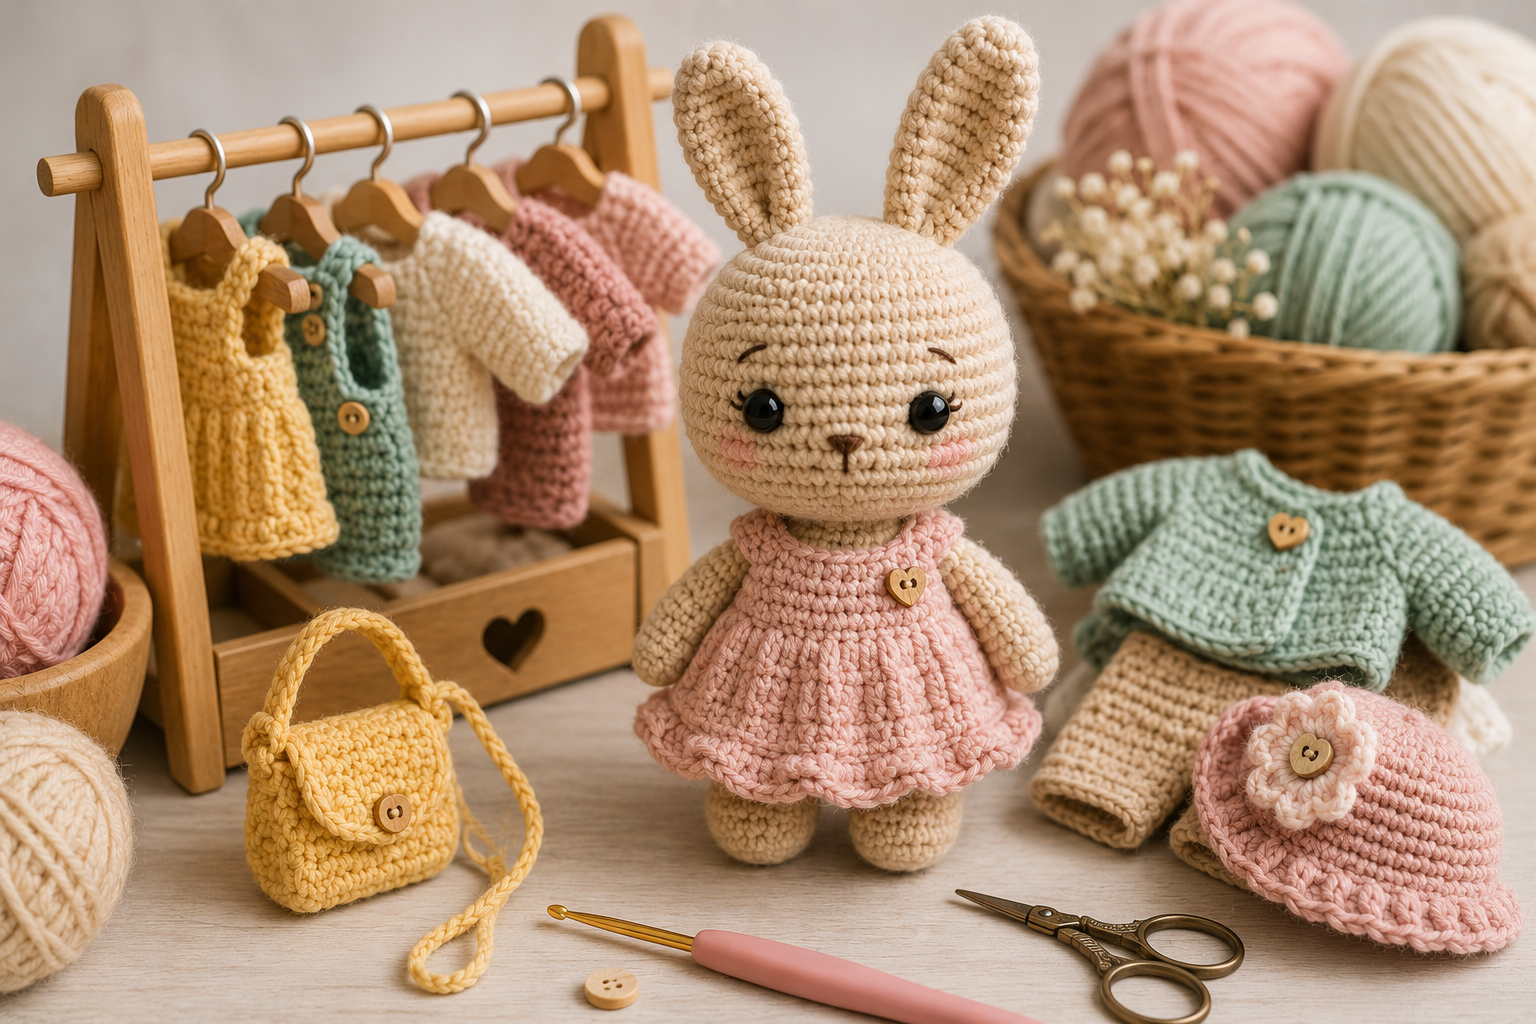
One of the most charming ways to give an amigurumi character personality is through clothing. A tiny sweater can turn a simple bear into a cozy winter character, while a miniature dress can completely transform the appearance of a doll. Hats, scarves, overalls, jackets, skirts, and even tiny shoes allow makers to create countless variations from the same basic amigurumi design.
However, crocheting clothes on such a small scale can be surprisingly challenging. Measurements need to be precise, bulky seams become much more noticeable, and even a difference of one or two stitches can dramatically affect the fit.
The good news is that tiny amigurumi clothing becomes much easier once you understand a few basic principles of sizing, construction, yarn selection, and shaping.
In this guide, you’ll learn how to crochet tiny clothes for amigurumi characters, how to measure your doll correctly, which construction methods work best, and how to achieve a clean, professional-looking result.
Why Crochet Removable Clothes for Amigurumi?
Clothing adds much more than decoration to an amigurumi project. It allows you to create a complete character rather than simply a crocheted toy.
The same basic doll pattern can become dozens of different characters simply by changing its outfit.
For example, one doll could wear a summer dress and sun hat, while another version of the same pattern could wear a sweater, scarf, and boots.
Removable clothing also makes amigurumi more interactive. Collectors can change outfits, children can dress their dolls, and makers can create seasonal clothing sets without having to crochet an entirely new character.
From a design perspective, clothes are also an excellent way to introduce additional colors, textures, and details without making the main body of the amigurumi overly complicated.
1. Measure Your Amigurumi Before Starting
Tiny clothing requires accurate measurements.
Unlike human clothing, there are no universal sizing standards for amigurumi. Two dolls that are both 20 centimeters tall might have completely different proportions.
One may have a large head and tiny body, while another may have a longer torso and wider hips.
Before designing clothing, measure the areas that will determine the fit.
Important measurements include:
- chest circumference
- waist circumference
- hip circumference
- torso length
- shoulder width
- arm circumference
- arm length
- leg circumference
- leg length
- head circumference for hats
Use a flexible measuring tape whenever possible.
If you don’t have one, wrap a piece of yarn around the character and then measure that yarn against a ruler.
Write these measurements down before beginning. Even when you’re following an existing pattern, checking the dimensions of your specific amigurumi can prevent fitting problems caused by differences in yarn, hook size, or crochet tension.
2. Choose Thin Yarn for Tiny Clothes
The yarn used for the character isn’t always the best choice for its clothing.
If your amigurumi is made with medium-weight yarn and you use exactly the same thickness for a tiny sweater, the clothing may look bulky and oversized.
Using slightly thinner yarn usually produces more realistic proportions.
Cotton yarn is particularly useful because it provides excellent stitch definition and tends to hold its shape well. Fine cotton can create beautifully detailed dresses, shirts, collars, and accessories.
Lightweight acrylic yarn is another option, particularly when you want softer garments such as sweaters or scarves.
Whatever fiber you choose, consider how thick the finished fabric will look compared with the character.
The goal is for the clothing to appear like a separate layer rather than becoming another bulky part of the body.
3. Use a Smaller Crochet Hook
Hook size is just as important as yarn thickness.
Tiny garments generally look best when the stitches are relatively compact. Loose stitches can create large visible gaps that make miniature clothing appear unfinished.
However, avoid making the stitches excessively tight.
Clothes need slightly more flexibility than the amigurumi body itself, particularly if the garment must stretch over the head, arms, or hips.
Experiment with a hook that produces neat stitches while still allowing the fabric to move.
Making a tiny swatch can help determine whether the yarn and hook combination creates the appearance you want before you spend time making an entire garment.
4. Understand the Simplest Clothing Construction Methods
You don’t need advanced garment-making knowledge to create amigurumi clothes.
Most miniature garments can be constructed using a few simple shapes.
A skirt, for example, can begin as a chain that fits around the waist. After joining the chain into a circle, increases can be added gradually to create the flare of the skirt.
A basic sweater can be constructed from a small rectangle wrapped around the torso, with openings left for the arms.
Another common method is top-down construction.
For a dress or sweater, you can begin around the neckline and gradually increase stitches around the shoulders before separating sections for the sleeves and body.
This method works particularly well for fitted garments because you can regularly test the clothing directly on the amigurumi as you crochet.
5. Try the Garment on Frequently
This may be the most important rule when crocheting miniature clothing.
Don’t wait until the garment is finished to check the fit.
Try it on your amigurumi regularly.
After completing a few rounds, place the garment against the character and check whether it fits correctly.
Ask yourself:
Is the neckline wide enough?
Can the arms fit through the openings?
Is the garment becoming too loose?
Will it fit over the hips?
Can it actually be removed once finished?
Because tiny garments contain relatively few stitches, even a single increase or decrease can noticeably change the dimensions.
Frequent fitting allows you to correct these issues before they become difficult to fix.
6. Add a Little Extra Room
A garment that perfectly matches the exact circumference of an amigurumi body may actually be too tight.
Remember that clothing needs enough room to slide over the character.
This is particularly important for dolls with large heads, hands, feet, or hips.
A tiny amount of additional width — sometimes just one or two stitches — can make the difference between a garment that fits comfortably and one that can’t be put on at all.
At the same time, too much extra room can make miniature clothing look baggy.
The ideal fit depends on the style you’re creating. A sweater can naturally be slightly loose, while a dress bodice usually looks better when fitted more closely.
7. Create Simple Armholes
Armholes often intimidate beginners, but they don’t need to be complicated.
One of the easiest methods is to use chains.
When you reach the position where an arm should pass through the garment, skip several stitches and make a chain across that space.
Continue crocheting into the next stitch.
On the following round, crochet into the chain stitches as normal.
This creates a simple opening for the arm without requiring separate pieces or complicated sewing.
Before continuing too far, test the opening on the character. Make sure the arm passes through comfortably without stretching the stitches excessively.
8. Use Increases and Decreases to Shape Clothes
Increases and decreases allow you to transform simple crochet tubes into fitted miniature garments.
For example, a dress may begin fitted around the chest and then gradually widen below the waist.
Adding increases creates this flare.
A jacket might need to become narrower near the waist, which can be achieved with strategically placed decreases.
The key is symmetry.
If you’re adding four increases to a skirt, distribute them evenly around the round rather than placing them randomly.
Balanced shaping creates a garment that hangs naturally on the character.
9. Make Tiny Dresses
Dresses are among the easiest and most versatile amigurumi garments.
A simple dress can begin at the neckline.
Crochet several rounds to create the upper section, leaving openings for the arms. Once you reach the waist, begin adding increases.
The more frequently you increase, the fuller the skirt becomes.
For a subtle A-line shape, increase gradually every few rounds.
For a dramatic, ruffled skirt, add several increases in a single round.
You can finish the bottom edge with decorative stitches such as shells, picots, or simple scallops.
Even a very basic dress can look elaborate when finished with a contrasting border or tiny decorative detail.
10. Crochet Tiny Sweaters and Jackets
Sweaters require slightly more planning because the arms need room to move through sleeves.
For beginners, a sleeveless vest is an excellent starting point.
Once you’re comfortable with the basic torso construction, sleeves can be added directly around the armholes.
Instead of crocheting separate sleeves and sewing them on, attach the yarn directly to the stitches surrounding the arm opening and work in rounds toward the wrist.
This reduces seams and produces a cleaner miniature finish.
For jackets or cardigans, work the torso back and forth rather than joining it into a complete circle. This leaves the front open and allows the garment to be easily placed on or removed from the character.
11. Add Small Details Carefully
Miniature details can make simple clothing look much more sophisticated.
Consider adding:
- tiny collars
- pockets
- bows
- belts
- decorative borders
- embroidered details
- contrasting cuffs
- small appliqués
However, scale is extremely important.
A decorative element that would look subtle on a full-size crochet garment can overwhelm an amigurumi outfit.
Usually, one or two carefully chosen details are enough.
If the garment already uses multiple colors or textured stitches, keeping additional decorations minimal often creates a more polished appearance.
12. Be Careful With Buttons and Small Accessories
Tiny buttons can look adorable on amigurumi clothing, but they require consideration if the finished character is intended for a child.
Small detachable pieces may present a choking hazard.
For decorative buttons, you can instead embroider small circles or crochet tiny bobbles directly into the garment.
These techniques can create a similar visual effect without requiring separate plastic or metal pieces.
For collectible amigurumi intended for adults, miniature buttons, beads, and other embellishments can provide beautiful finishing details.
13. Keep Seams as Small as Possible
Bulky seams are much more noticeable on miniature garments than on full-size crochet projects.
Whenever possible, use seamless construction.
Working in continuous rounds is ideal for skirts, pants, sleeves, hats, and many sweaters.
When seams are unavoidable, use a fine yarn needle and carefully match the edges without pulling the stitches too tightly.
Another option is slip-stitch joining, which can create a flatter seam than traditional sewing in some garments.
The cleaner the inside construction, the more naturally the clothing will sit against the amigurumi body.
14. Experiment With Different Outfits
Once you understand basic garment construction, you can create an entire wardrobe using only a few techniques.
A basic tube can become a skirt.
Add straps and it becomes overalls.
Extend the body and add armholes to create a dress.
Add sleeves and you have a sweater.
Leave the front open and it becomes a cardigan or jacket.
Accessories are even easier.
Scarves are essentially narrow rectangles. Hats can begin with the same increase pattern used for an amigurumi head. Bags can be made from two tiny panels or a miniature pouch.
Understanding these basic shapes makes designing original outfits much easier.
15. Write Down Your Stitch Counts
If you create an outfit that fits perfectly, record exactly what you did.
Write down the starting chain, number of rounds, placement of increases and decreases, armhole size, and hook and yarn used.
This transforms an experimental garment into a repeatable pattern.
It’s particularly valuable if you plan to create several characters of the same size or eventually publish your own amigurumi designs.
Small differences are difficult to remember later, and reconstructing a miniature garment from memory can be surprisingly frustrating.
Final Thoughts
Crocheting tiny clothes for amigurumi characters is a wonderful way to expand your creative possibilities and give each character a distinctive personality.
The most important principles are simple: measure the character carefully, choose appropriately thin yarn, maintain neat and flexible tension, test the garment frequently, and use basic increases and decreases to create shape.
Start with simple projects such as scarves, skirts, hats, or sleeveless dresses before moving on to fitted sweaters, jackets, pants, and more detailed outfits.
As your confidence grows, you’ll begin to see that miniature clothing is largely built from combinations of simple crochet shapes. Once you understand how those shapes interact with the proportions of your amigurumi, designing your own outfits becomes much more intuitive.
And that’s where tiny clothing becomes especially exciting: one basic amigurumi pattern can become an entire collection of unique characters simply by changing what they wear.
Clara Fern — Crochet Artist & Amigurumi Designer
Clara Fern is a crochet artist and amigurumi designer based in Austin, Texas. With 9 years of experience working with yarn and hook, she transformed a lifelong passion for handcraft into a creative mission: making amigurumi accessible, fun, and deeply rewarding for crafters of all levels.
Clara discovered amigurumi during a trip to Japan in 2017, where she fell in love with the art of bringing tiny characters to life through crochet. Back home in Texas, she spent years studying color theory, design principles, and advanced crochet techniques — developing her own signature style that blends kawaii aesthetics with original character design.
Through maclafersa.com, Clara shares everything she has learned — from choosing the right yarn and reading your first pattern, to designing fully original amigurumi characters from scratch. Her writing is known for being clear, detailed, and genuinely helpful, with no steps skipped and no secrets kept.
When she’s not crocheting, Clara enjoys watercolor painting, visiting local yarn shops, and drinking way too much coffee while sketching new character ideas.