
Introduction
Even the most carefully constructed amigurumi eventually experiences seam damage. A beloved toy dropped one too many times, a seam that separates under the stress of enthusiastic hugging, or stitches that gradually work loose over years of play—these are inevitable consequences of creating toys meant to be loved and handled. Rather than accepting a damaged seam as the end of an amigurumi’s life, skilled makers know how to repair seams invisibly, restoring the toy to its original condition. Understanding seam repair techniques allows makers to preserve their own work and extend the life of cherished handmade toys.
Assessing Seam Damage
Before attempting repairs, carefully examine the damage to determine the best repair approach. Partial Separation occurs when a seam has opened along part of its length but remains intact elsewhere. This is the easiest type of damage to repair. Complete Separation occurs when an entire seam has opened, requiring the piece to be reattached. Stitch Splitting occurs when individual stitches have broken or pulled apart, weakening the seam without completely separating it. Hole Damage occurs when the fabric itself has torn, requiring patching in addition to seam repair.
The location of the damage also affects repair difficulty. Seams on the exterior of the piece are visible and require invisible repair techniques. Seams on the interior (such as where limbs attach to the body) are less visible and allow for more visible repair methods.
Repairing Partial Seam Separation
Partial separation is the most common type of seam damage and the easiest to repair invisibly.
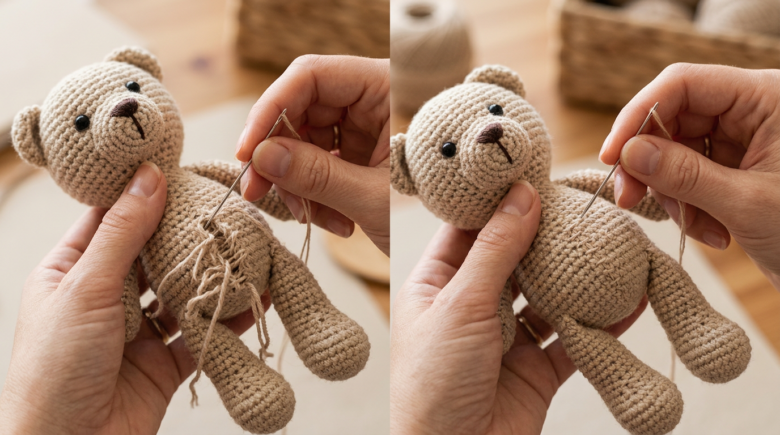
The Ladder Stitch Repair involves reopening the seam slightly, then re-sewing it with a ladder stitch. Use a seam ripper to carefully open the separated portion of the seam, being careful not to damage the surrounding stitches. Once the seam is open, use a ladder stitch to re-sew the pieces together, matching the original stitching pattern. Make stitches every quarter-inch around the entire separated area. Once the seam is re-sewn, the repair should be completely invisible.
The Whip Stitch Reinforcement involves reinforcing the separated area with additional whip stitches. After re-sewing with a ladder stitch, make a second pass with whip stitches offset slightly from the first pass. This creates a reinforced seam that is less likely to separate again.
The Embroidery Floss Wrap involves wrapping embroidery floss around the separated area before re-sewing. Wrap the floss in a spiral pattern around the seam area, then re-sew with a ladder stitch through the wrapped area. The floss provides internal reinforcement that prevents the seam from separating again.
Repairing Complete Seam Separation
Complete separation requires reattaching the piece, which is more involved than repairing partial separation.
The Reattachment Method involves carefully separating the piece completely, then reattaching it with reinforced stitches. Use a seam ripper to carefully remove all stitches holding the piece in place. If the piece is stuffed, you may need to remove some stuffing to access the seam. Once the piece is separated, re-sew it using a ladder stitch, making stitches every quarter-inch around the entire circumference. Make a second pass with whip stitches for reinforcement. If you removed stuffing, replace it before closing the seam.
The Patch Reinforcement involves reinforcing the seam with a patch before reattachment. Cut a strip of matching fabric (felt, fleece, or crocheted fabric) approximately 1 inch wide and long enough to cover the entire seam. Sew this patch to the interior of one piece using a ladder stitch. Then reattach the pieces using a ladder stitch, sewing through the patch for reinforcement. The patch distributes stress across a wider area, preventing the seam from separating again.
Repairing Stitch Splitting
Stitch splitting weakens a seam without completely separating it, requiring reinforcement rather than complete re-sewing.
The Reinforcement Stitch involves making additional stitches through the split area to reinforce it. Use a ladder stitch or whip stitch to make new stitches in the areas where the original stitches have split. Make stitches every quarter-inch, creating a reinforced band of stitching that distributes stress across multiple stitches.
The Embroidery Floss Reinforcement involves wrapping embroidery floss around the split area before reinforcing with stitches. Wrap the floss in a spiral pattern around the seam area, then make reinforcement stitches through the wrapped area. The floss provides internal support that prevents further splitting.
Repairing Hole Damage
Hole damage requires patching in addition to seam repair.
The Patch Method involves cutting a patch from matching fabric and sewing it over the hole. Cut a patch approximately 1 inch larger than the hole on all sides. Position the patch over the hole on the interior of the piece (so it’s not visible from the outside). Sew the patch in place using a ladder stitch around all edges. Once the patch is secure, repair any seam damage using the methods described above.
The Crochet Patch involves crocheting a small patch to cover the hole. Crochet a square or circle slightly larger than the hole using the same yarn and stitch pattern as the original piece. Sew the patch over the hole using a ladder stitch around all edges. This method creates a patch that matches the original piece perfectly.
The Appliqué Method involves sewing a decorative patch over the hole. If the hole is in a visible location, consider using an appliqué patch—a decorative piece of fabric or crocheted material that covers the hole while adding visual interest. This transforms a repair into a design feature.
Preventing Future Seam Damage
Once a seam has been repaired, take steps to prevent future damage.
Reinforce Weak Seams by making additional stitches through the repaired area. Make a second pass with whip stitches offset from the original stitches, creating a reinforced band.
Wrap with Embroidery Floss by wrapping the repaired seam with embroidery floss before the final stitching. The floss provides internal reinforcement that prevents future separation.
Use Stronger Thread by re-sewing the seam with heavy-duty thread or embroidery floss instead of regular yarn. Stronger thread is more resistant to breaking and pulling.
Avoid Stress by handling the repaired piece gently until the repair has fully set. Avoid pulling, stretching, or stressing the repaired seam for at least 24 hours after repair.
Conclusion
Seam damage doesn’t mean the end of an amigurumi’s life. With proper repair techniques, even severely damaged seams can be restored invisibly, extending the toy’s lifespan indefinitely. By understanding different repair methods and implementing preventive measures, makers can preserve their own work and help others extend the life of cherished handmade toys. A well-repaired seam is often stronger than the original, ensuring that the toy can continue to be loved and handled for years to come.

Clara Fern — Crochet Artist & Amigurumi Designer
Clara Fern is a crochet artist and amigurumi designer based in Austin, Texas. With 9 years of experience working with yarn and hook, she transformed a lifelong passion for handcraft into a creative mission: making amigurumi accessible, fun, and deeply rewarding for crafters of all levels.
Clara discovered amigurumi during a trip to Japan in 2017, where she fell in love with the art of bringing tiny characters to life through crochet. Back home in Texas, she spent years studying color theory, design principles, and advanced crochet techniques — developing her own signature style that blends kawaii aesthetics with original character design.
Through maclafersa.com, Clara shares everything she has learned — from choosing the right yarn and reading your first pattern, to designing fully original amigurumi characters from scratch. Her writing is known for being clear, detailed, and genuinely helpful, with no steps skipped and no secrets kept.
When she’s not crocheting, Clara enjoys watercolor painting, visiting local yarn shops, and drinking way too much coffee while sketching new character ideas.


