
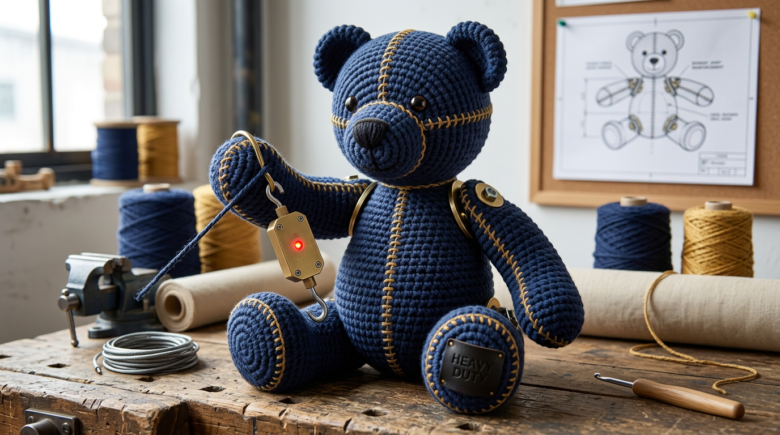
Introduction
Heavy amigurumi pieces—large stuffed animals, life-sized dolls, or densely packed sculptures—present unique challenges that standard crochet techniques cannot adequately address. The weight of substantial stuffing creates stress on stitches, seams, and attachment points that would easily support a small toy. Seams separate, stitches split, and limbs detach under the burden of their own mass. Professional makers have developed specialized reinforcement techniques that transform heavy amigurumi from fragile experiments into durable, long-lasting pieces. Understanding these advanced methods allows makers to confidently tackle ambitious projects that would otherwise seem impossible.
Assessing Weight and Stress Points
Before selecting reinforcement techniques, analyze where stress will concentrate in your specific project. A large standing bear experiences different stresses than a life-sized doll or a horizontal sculpture. The head of a standing figure bears its own weight plus the stress of being balanced on a thin neck. The limbs of a figure that will be posed experience stress at joints. The base of a standing piece experiences concentrated pressure at the feet.
Calculate approximate weight by estimating the volume of stuffing and multiplying by the density of your chosen fill material. Standard polyester fiberfill weighs approximately 0.5 ounces per cubic inch. A 24-inch bear with a 12-inch head and proportional body might contain 200+ cubic inches of stuffing, weighing 10+ pounds. This weight requires reinforcement far beyond what standard crochet can provide.
Reinforced Seam Techniques
Standard seams in amigurumi are created by sewing two crocheted pieces together with a ladder stitch or whip stitch. For heavy pieces, these seams become failure points where stitches separate under stress.
The Double-Seam Technique involves making two complete passes around each seam with a ladder stitch, creating a reinforced band of stitching. After completing the first pass, make a second pass offset slightly from the first, creating overlapping coverage. This distributes stress across twice as many stitches, dramatically improving durability.
The Backstitch Reinforcement involves reinforcing ladder stitches with backstitches made perpendicular to the seam. After completing a ladder stitch seam, make small backstitches every half-inch along the seam, creating a crosshatch pattern of reinforcement. This technique is time-consuming but creates seams that can support substantial weight.
The Embroidery Floss Wrap involves wrapping embroidery floss around the seam before sewing, creating internal reinforcement. Wrap the floss in a spiral pattern around the seam area, then sew through the wrapped area. The floss provides internal support that prevents the seam from separating even under stress.
Reinforced Attachment Points
Limbs, heads, and other components attached to the main body experience concentrated stress at attachment points. These areas require specialized reinforcement.
The Reinforced Joint Technique involves creating a reinforced band at the attachment point before sewing. Wrap embroidery floss around the attachment area multiple times, creating a reinforced band. Then sew through this reinforced area using a ladder stitch, distributing stress across the reinforced band rather than concentrating it on a few stitches.
The Disc Joint Method involves sewing through stacked discs (cardboard, plastic, or felt) at the attachment point. Create two discs approximately 1 inch in diameter, stack them, and sew through the center of both discs while attaching the limb. The discs distribute stress across a wider area, preventing the attachment point from separating.
The Washer Reinforcement involves sewing through large washers (metal or plastic) at attachment points. The washer distributes stress across its surface area, preventing stitches from pulling through the fabric. This technique is particularly effective for limbs that will experience significant stress.
Internal Reinforcement Materials
Beyond stitching techniques, internal materials can dramatically improve the durability of heavy amigurumi.
Interfacing Fabric sewn into seams before assembly provides internal reinforcement. Cut strips of heavy interfacing fabric and sew them into seams before attaching pieces together. The interfacing distributes stress across a wider area and prevents stitches from pulling through the crocheted fabric.
Fabric Tape wrapped around stress points before assembly provides reinforcement. Use heavy-duty fabric tape or athletic tape to wrap around attachment areas, creating reinforced bands. Then sew through the tape, anchoring the attachment securely.
Felt Reinforcement involves gluing or sewing felt patches to the interior of seams before assembly. The felt provides internal support that prevents stitches from separating. This technique is particularly effective for large seams that will experience significant stress.
Strategic Stuffing for Weight Distribution
How heavy amigurumi is stuffed affects stress distribution and durability.
Graduated Density Stuffing involves varying the density of stuffing based on structural needs. Stuff stress points—necks, joints, attachment areas—very firmly with densely packed fiberfill or wool roving. Stuff less critical areas with standard fiberfill at normal density. This distribution concentrates support where it’s needed most.
Layered Stuffing involves creating layers of different materials. The innermost layer might be wool roving or cotton batting for support. The middle layer might be standard fiberfill. The outer layer might be loosely stuffed for a softer exterior. This layering distributes weight and stress across multiple materials.
Weight Distribution involves placing heavier materials at the base of standing pieces. A standing bear should have its heaviest stuffing in the feet and lower body, creating a low center of gravity that resists tipping. Lighter stuffing in the head and upper body creates a more stable overall structure.
Reinforcement for Specific Project Types
Different types of heavy amigurumi require different reinforcement approaches.
Large Standing Figures need reinforcement concentrated at the base and neck. Reinforce the feet heavily to prevent tipping. Reinforce the neck to support the head’s weight. Use internal armatures (pipe cleaners, wire, or dowels) to maintain posture.
Life-Sized Dolls need reinforcement throughout, with particular attention to joints and attachment points. Use disc joints at elbows and knees to allow realistic movement while supporting weight. Reinforce the neck extensively to support the head. Use internal armatures to maintain posture.
Horizontal Sculptures need reinforcement at stress points where weight concentrates. A large octopus needs reinforcement where tentacles attach to the body. A large caterpillar needs reinforcement at segment connections.
Testing Reinforcement Effectiveness
Before declaring a heavy amigurumi complete, test the reinforcement thoroughly. Gently stress-test each seam and attachment point. Lift the piece by different areas to ensure all attachment points can support the weight. If any area shows signs of weakness, add reinforcement before finishing.
Conclusion
Reinforcing heavy amigurumi requires a multi-layered approach combining reinforced seams, reinforced attachment points, internal reinforcement materials, and strategic stuffing. By implementing these techniques, makers can create large, durable pieces that withstand years of handling and display. The investment in proper reinforcement transforms heavy amigurumi from fragile experiments into professional-quality sculptures that showcase the maker’s skill and vision.

Clara Fern — Crochet Artist & Amigurumi Designer
Clara Fern is a crochet artist and amigurumi designer based in Austin, Texas. With 9 years of experience working with yarn and hook, she transformed a lifelong passion for handcraft into a creative mission: making amigurumi accessible, fun, and deeply rewarding for crafters of all levels.
Clara discovered amigurumi during a trip to Japan in 2017, where she fell in love with the art of bringing tiny characters to life through crochet. Back home in Texas, she spent years studying color theory, design principles, and advanced crochet techniques — developing her own signature style that blends kawaii aesthetics with original character design.
Through maclafersa.com, Clara shares everything she has learned — from choosing the right yarn and reading your first pattern, to designing fully original amigurumi characters from scratch. Her writing is known for being clear, detailed, and genuinely helpful, with no steps skipped and no secrets kept.
When she’s not crocheting, Clara enjoys watercolor painting, visiting local yarn shops, and drinking way too much coffee while sketching new character ideas.


